
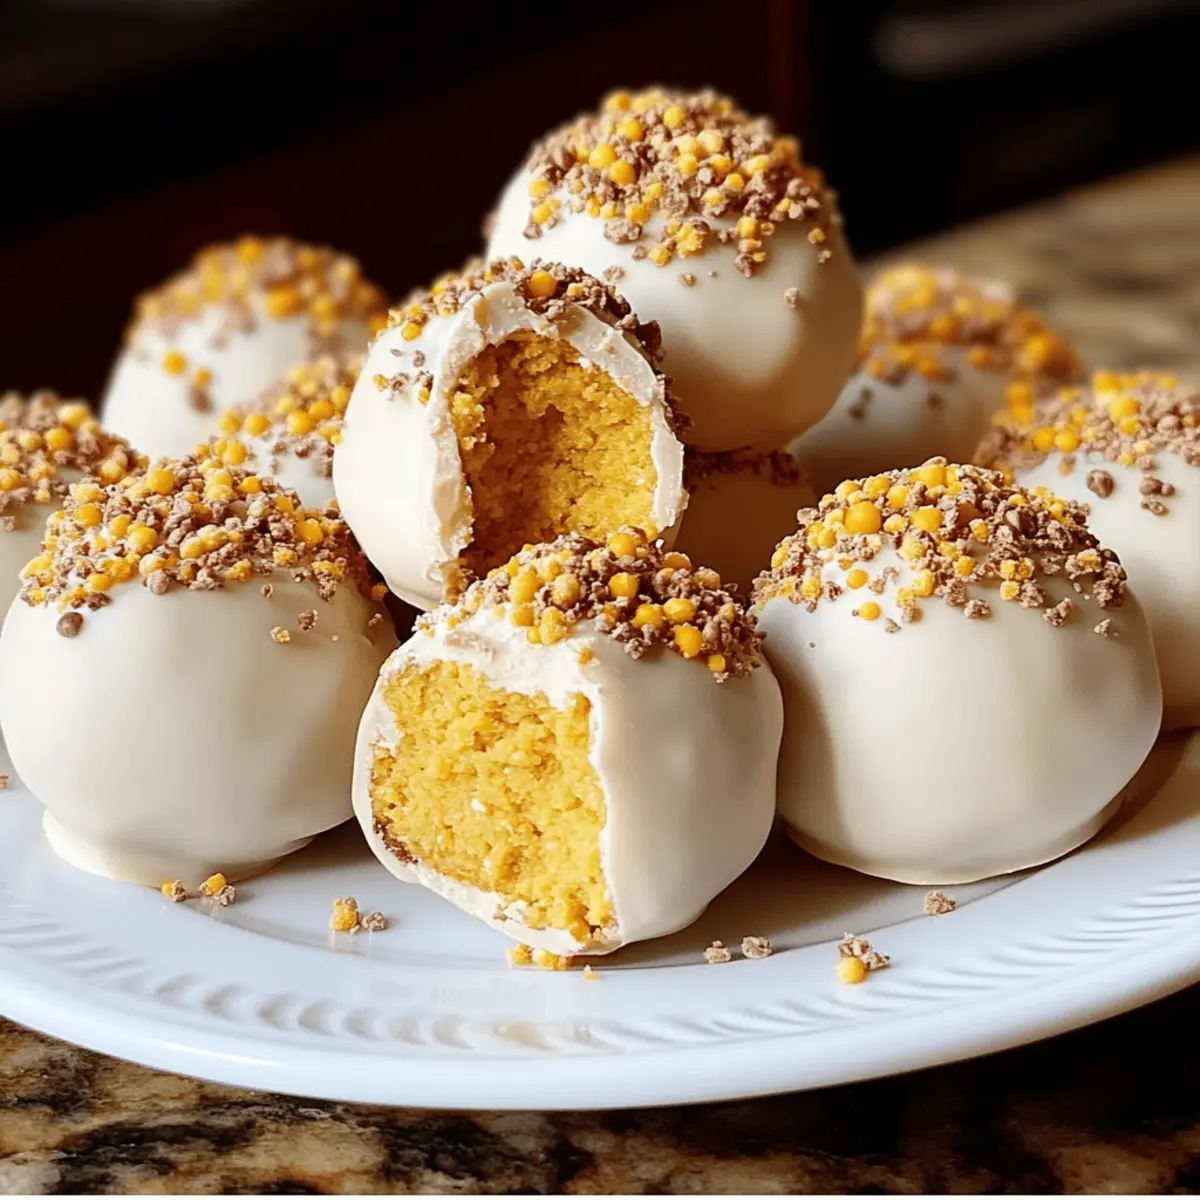
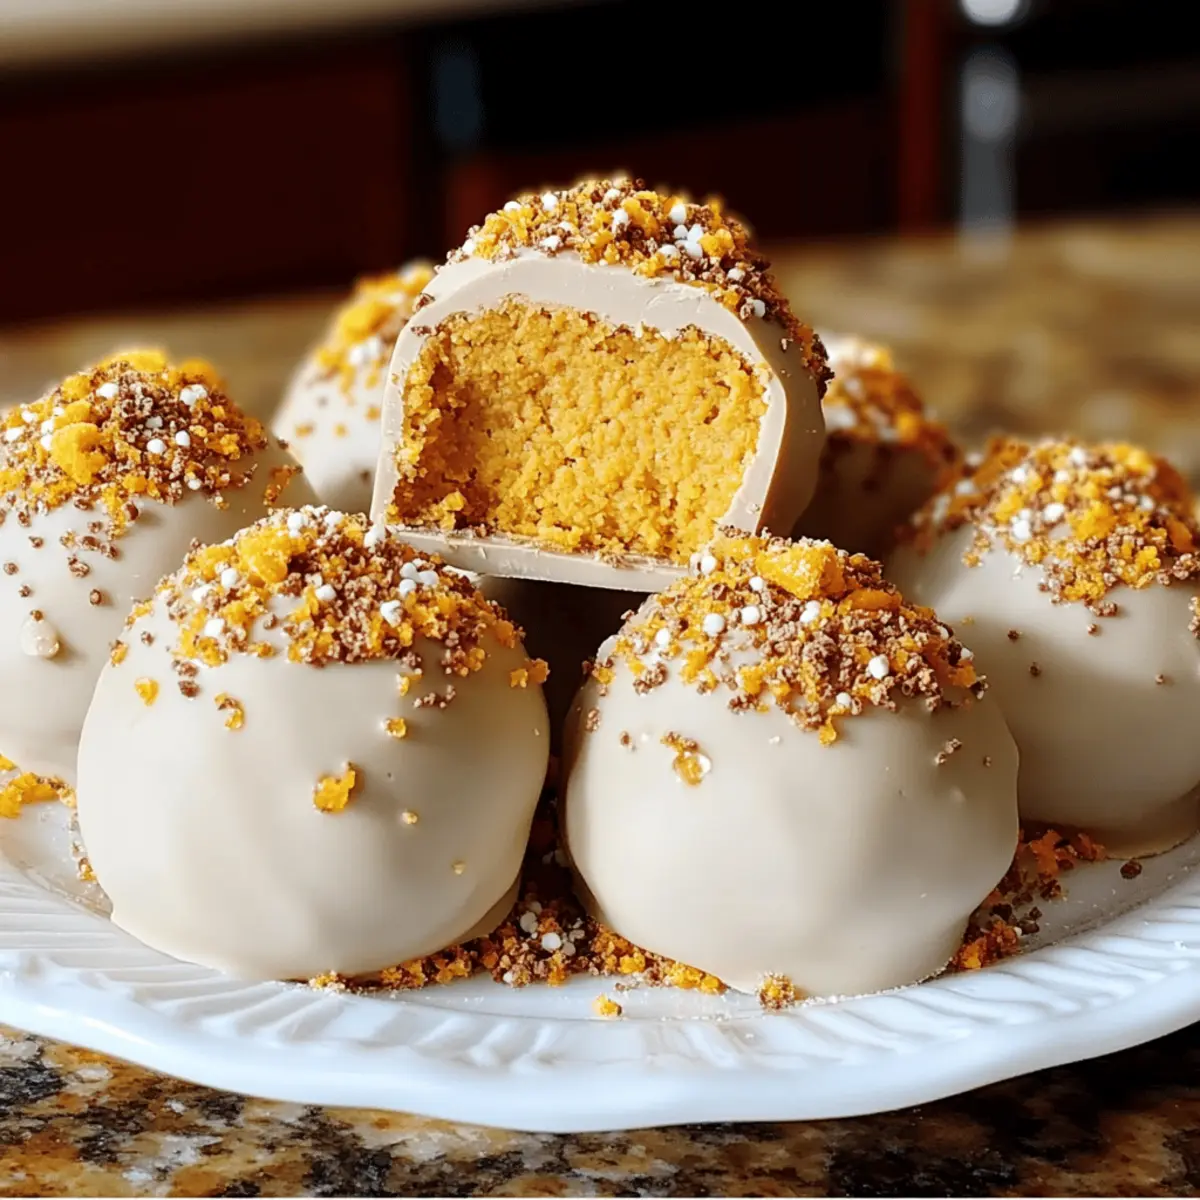
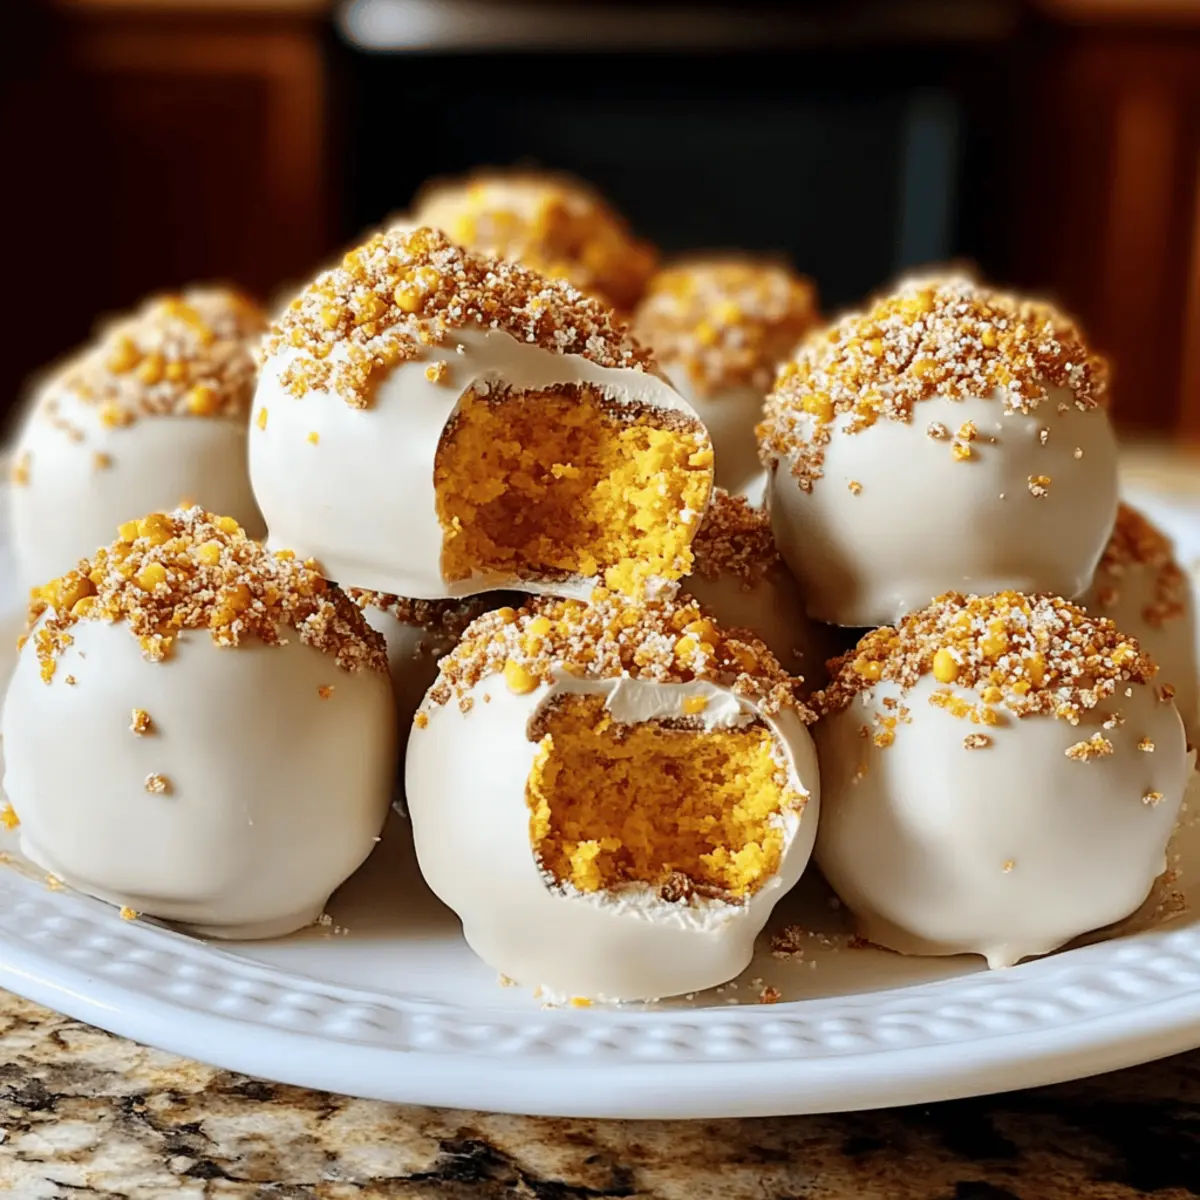
As I spun around my kitchen, the unmistakable scent of pumpkin spice danced through the air, whisking me into the cozy embrace of fall. When the desire for sweet treats strikes but oven space is limited, these Easy No-Bake Pumpkin Cheesecake Balls become my go-to solution. They deliver a delightful burst of seasonal flavor, all wrapped up in a silky chocolate shell that’s hard to resist. Plus, they’re incredibly easy to throw together, making them ideal for festive gatherings or a quick dessert fix. With gluten-free options available, everyone can join in on the fun! Ready to elevate your dessert game without the fuss? Let’s dive into this simple recipe that’s sure to impress family and friends alike!

Why Are These Pumpkin Cheesecake Balls a Must-Try?
Simplicity at Its Best: No oven, no hassle! This no-bake recipe ensures that you can whip up a delicious dessert in no time.
Decadent Flavor: The blend of pumpkin, warm spices, and rich chocolate creates an indulgent treat that embodies the essence of fall.
Versatile Coatings: Customize your pumpkin cheesecake balls with various coatings like white chocolate or dark chocolate, creating a unique look and taste every time.
Crowd-Pleasing Treat: Perfect for gatherings, these bites are sure to be a hit with friends and family, just like my Chocolate Cheesecake Amp.
Gluten-Free Options: With alternatives available, everyone can savor these delightful bites without worry. Enjoy the flavors of autumn with ease in your next dessert spread!
Easy No-Bake Pumpkin Cheesecake Balls Ingredients
For the Filling
- Cream Cheese – This brings a luscious richness; opt for block-style for the best texture, or Neufchâtel for a lighter option.
- Pumpkin Purée – The star of the show! Ensure it’s pure pumpkin, not pie filling, and pat it dry for a firmer center.
- Graham Cracker or Gingersnap Crumbs – These add delightful texture and classic flavor; use gingersnaps for extra spice, and look for gluten-free options if needed.
- Powdered Sugar – Sweetens and helps to bind the mixture smoothly without any grittiness; adjust based on the sweetness of your crumbs.
- Pumpkin Pie Spice & Cinnamon – This duo brings warmth and festive flair; make your own blend with cinnamon, ginger, nutmeg, and a dash of clove if you like.
- Vanilla & Salt – Enhances the flavor overall for a balanced taste profile.
For the Coating
- Chocolate or Candy Melts – Choose white chocolate for sweetness or dark chocolate for depth; coconut oil can be added for a smoother melt.
For Decorations
- Crushed Cookies, Sprinkles, or Chocolate Drizzle – These add a festive touch; feel free to get creative and customize your pumpkin cheesecake balls for any occasion!
These Easy No-Bake Pumpkin Cheesecake Balls will bring the taste of fall to any dessert table and are perfect for impressing guests with minimal effort!
Step‑by‑Step Instructions for Easy No-Bake Pumpkin Cheesecake Balls
Step 1: Prepare the Pumpkin
Blot the pumpkin purée using paper towels to remove excess moisture, ensuring a firmer filling for your Easy No-Bake Pumpkin Cheesecake Balls. This step is crucial as too much moisture can make the mixture too soft. Aim for 3-5 minutes of pressing to get the right consistency.
Step 2: Mix the Creamy Filling
In a mixing bowl, beat the cream cheese with a hand mixer on medium speed until smooth and creamy. Gradually add the blotted pumpkin purée, powdered sugar, vanilla extract, pumpkin pie spice, cinnamon, and a pinch of salt. Mix until completely combined and velvety, about 2-3 minutes.
Step 3: Incorporate the Cookie Crumbs
Fold in the graham cracker or gingersnap crumbs gently into the creamy pumpkin mixture. The filling should be soft but not sticky, resembling a thick batter. After thoroughly combining, cover the bowl with plastic wrap and chill in the refrigerator for about 15-20 minutes to firm slightly.
Step 4: Shape the Cheesecake Balls
Once chilled, scoop out tablespoon-sized amounts of the mixture using a cookie scoop or spoon. Roll each portion between your palms to form smooth balls. Place the shaped balls on a parchment-lined tray and chill them again for another 15-20 minutes to help maintain their shape.
Step 5: Melt the Coating
While the balls chill, melt your choice of chocolate or candy melts in a microwave-safe bowl. Heat in 20-30 second increments, stirring in between until smooth. If you want a thinner consistency, add a small amount of coconut oil to help the chocolate coat evenly.
Step 6: Dip the Cheesecake Balls
Working one ball at a time, dip each pumpkin cheesecake ball into the melted chocolate, coating it completely. Allow the excess chocolate to drip off before placing the coated ball back onto the parchment paper. This method ensures a smooth, even coating without clumping.
Step 7: Add Fun Decorations
While the coating is still wet, you can sprinkle crushed cookies, festive sprinkles, or drizzle additional chocolate on top for decoration. This step is where the fun can really begin! Get creative with your toppings to make each Easy No-Bake Pumpkin Cheesecake Ball uniquely festive.
Step 8: Allow to Set
Let the coated cheesecake balls sit at room temperature until the chocolate hardens or place them in the refrigerator for about 10 minutes for quicker setting. Once set, they’re ready to serve, or you can store them in an airtight container in the fridge for later enjoyment.
Expert Tips for Easy No-Bake Pumpkin Cheesecake Balls
-
Room Temperature Cheese: Ensure your cream cheese is at room temperature for easy mixing and a smooth filling. Cold cream cheese can lead to lumps and an unappetizing texture.
-
Pumpkin Purée Prep: Don’t skip blotting the pumpkin purée! Removing excess moisture will help achieve a firmer, more stable filling for your Easy No-Bake Pumpkin Cheesecake Balls.
-
Cookie Crumb Consistency: Use finely crushed graham cracker or gingersnap crumbs for a smooth texture. Large chunks can make rolling the balls difficult and result in uneven coatings.
-
Melt Chocolate Responsively: When melting chocolate or candy melts, do so in short intervals, stirring regularly. This prevents burning and ensures a glossy, smooth coat for your dessert balls.
-
Decoration Timing: Add toppings while the coating is still wet for the best adhesion. Waiting too long can cause toppings to slide off or not stick at all, leaving your balls looking bare.
-
Chill for Shape: Don’t rush the chilling steps! Allowing the balls to firm up in the refrigerator will help maintain their shape when you dip them in chocolate, resulting in a beautiful presentation.
What to Serve with Easy No-Bake Pumpkin Cheesecake Balls
Elevate your dessert experience with complementary flavors and textures that enhance these delightful pumpkin truffles.
-
Creamy Vanilla Ice Cream: The cool, rich creaminess contrasts beautifully with the spiced pumpkin flavor, making each bite heavenly. Serve a scoop alongside for a delightful combination!
-
Spiced Hot Apple Cider: Warm, spiced apple cider adds a cozy touch, enriching the autumn experience and balancing the sweetness of the cheesecake balls. A perfect warming drink for chilly nights!
-
Crunchy Pecan Pie Bars: The nutty sweetness of pecan pie bars plays nicely against the creamy cheesecake balls, creating a delightful platter for gathering during the holidays.
-
Fresh Whipped Cream: Light and fluffy, whipped cream offers a luscious finish to this indulgent dessert. Top with a sprinkle of cinnamon or nutmeg for added flair!
-
Chocolate Dipped Fruit: Juicy strawberries or bananas dipped in chocolate complement the pumpkin flavor beautifully while adding a fresh, fruity essence to your dessert spread.
-
Decadent Chocolate Cake: For a richer dessert table, pair these cheesecake balls with a moist chocolate cake that balances sweetness and provides a contrasting texture.
-
Nutty Granola Bars: For a satisfying crunch, nutty granola bars add a lovely contrast with their chewy texture. They also make for a delightful mid-afternoon snack alongside your treats!
-
Pumpkin Spice Lattes: Match the flavors of your dessert with a warm pumpkin spice latte, offering an aromatic coffee experience that intensifies the seasonal essence of these cheesecake balls.
-
Caramel Sauce Drizzle: A warm drizzle of caramel adds a touch of elegance and sweetness that beautifully enhances the existing flavors while delivering a bit of indulgence.
Easy No-Bake Pumpkin Cheesecake Balls Variations
Feel free to get creative and tailor these delicious cheesecake balls to your taste and dietary needs!
-
Sweet Potato Swap: Substitute pumpkin purée with sweet potato purée for a unique twist on flavor. This will still maintain that delightful fall essence.
-
Gluten-Free Crunch: Use gluten-free graham crackers or almond flour for the crust. It allows everyone to indulge without worry while enjoying the rich flavors.
-
Spice It Up: Add a touch of cayenne pepper or finely chopped candied ginger to the filling for a spicy kick. It elevates the classic flavors to a new level of excitement!
-
Chocolate Variety: Experiment with different chocolate coatings, such as caramel or butterscotch, to add a sweet twist. Each option brings its own personality to your truffles!
-
Nutty Garnish: Roll the finished cheesecake balls in crushed nuts like pecans or walnuts for added texture and a delicious crunch. The warmth of the nuts complements the pumpkin beautifully.
-
Fruity Fusion: Incorporate a teaspoon of orange zest into the filling for a bright citrus note, perfect for lifting those cozy pumpkin flavors. This refreshing addition can make the bites even more delightful!
-
Cookie Crumble Coating: Instead of plain chocolate, coat the cheesecake balls in crushed cookies like Oreos or Snickerdoodles. This not only adds variety but a delightful crunch that everyone will love.
-
Drunken Delight: For an adult twist, drizzle each ball with a shot of rum or bourbon-infused chocolate for a richer flavor experience. Just like my Fried Strawberry Cheesecake, these are bound to impress!
Make Ahead Options
These Easy No-Bake Pumpkin Cheesecake Balls are perfect for busy home cooks looking to save time during the festive season! You can prepare the pumpkin filling and shape the cheesecake balls up to 24 hours in advance; simply store them in an airtight container in the refrigerator. To maintain their quality, ensure they’re well-covered to avoid drying out. Alternatively, you can freeze the shaped balls for up to 2 months; just remember to let them thaw in the fridge before dipping them in chocolate. When you’re ready to serve, melt your coating and dip the balls, adding decorations immediately for a delightful treat that’s just as delicious as when freshly made!
How to Store and Freeze Easy No-Bake Pumpkin Cheesecake Balls
Fridge: Store undipped cheesecake balls in an airtight container in the refrigerator for up to 3 days. They stay fresh and ready to enjoy anytime!
Container: If you’ve dipped the pumpkin cheesecake balls, keep them in an airtight container as well, and they’ll last for 4-5 days—perfect for satisfying sweet cravings.
Freezer: For longer storage, freeze the undipped balls on a baking sheet until firm, then transfer them to a freezer-safe container or bag. They can be frozen for up to 2 months.
Reheating: To enjoy the frozen cheesecake balls, simply allow them to thaw in the refrigerator overnight. Avoid refreezing after thawing to maintain flavor and texture quality.
Easy No-Bake Pumpkin Cheesecake Balls Recipe FAQs
How do I select the best pumpkin purée for this recipe?
Absolutely! Look for 100% pure pumpkin purée, not pumpkin pie filling, as the latter contains added sugars and spices that can affect flavor. I recommend brands that specifically label “pure pumpkin” on the can. Additionally, take a moment to blot the purée on paper towels before using it. This will help remove excess moisture, ensuring your cheesecake balls hold their shape.
What is the best way to store my Easy No-Bake Pumpkin Cheesecake Balls?
For optimal freshness, store undipped cheesecake balls in an airtight container in the refrigerator for about 2 to 3 days. If they’re already coated, they’ll last around 4 to 5 days. Make sure to layer parchment paper between them to prevent sticking!
Can I freeze these cheesecake balls? If so, how?
Very! To freeze, start by placing the undipped balls on a baking sheet lined with parchment paper, making sure they don’t touch. Freeze them for about 1 to 2 hours until firm. Once solid, transfer them to a freezer-safe bag or container. They can be stored for up to 2 months. For serving, just thaw them in the refrigerator overnight—easy as pie!
What should I do if my pumpkin cheesecake mixture is too runny?
If your mixture seems too runny, don’t worry! Start by adding a bit more cookie crumbs, one tablespoon at a time, until the consistency thickens and is easier to mold into balls. You could also try chilling the mixture for an additional 10-15 minutes to help firm it up before shaping.
Are these pumpkin cheesecake balls suitable for gluten-free diets?
Yes, indeed! You can easily make these cheesecake balls gluten-free by using gluten-free graham cracker or gingersnap crumbs. Just ensure you check the labels on your cookie brands to confirm they meet your dietary needs.
Can I switch up the coating for my cheesecake balls?
Absolutely! The fantastic thing about these Easy No-Bake Pumpkin Cheesecake Balls is their versatility. Feel free to dip them in white chocolate, dark chocolate, or even colorful candy melts. You can also sprinkle on various toppings like crushed nuts or festive sprinkles to match the season!
Easy No Bake Pumpkin Cheesecake Balls for Effortless Indulgence
Ingredients
Equipment
Method
- Blot the pumpkin purée using paper towels to remove excess moisture.
- Beat the cream cheese with a hand mixer until smooth. Gradually add pumpkin purée, powdered sugar, vanilla, pumpkin pie spice, cinnamon, and salt, mixing until combined.
- Fold in graham cracker or gingersnap crumbs gently. Cover and chill in the refrigerator for 15-20 minutes.
- Scoop tablespoon-sized portions and roll into balls. Chill again for another 15-20 minutes.
- Melt chocolate or candy melts in short intervals, stirring until smooth.
- Dip each ball into melted chocolate, allowing excess to drip off.
- While the coating is wet, sprinkle with crushed cookies or drizzle chocolate on top.
- Let them sit until the chocolate hardens or refrigerate for about 10 minutes to set.
Leave a Reply