
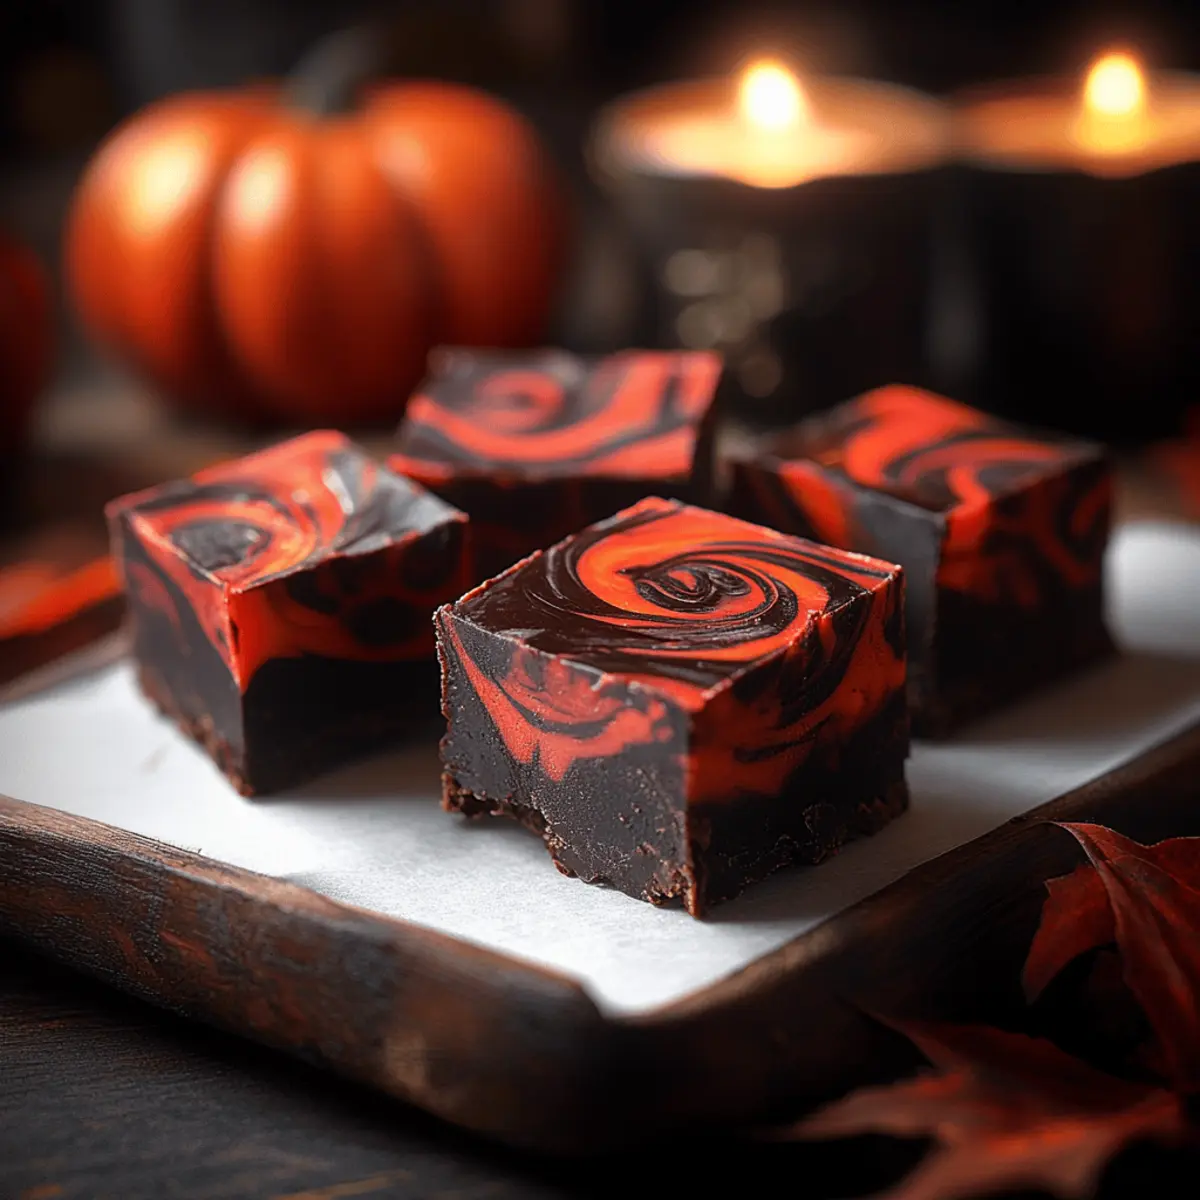
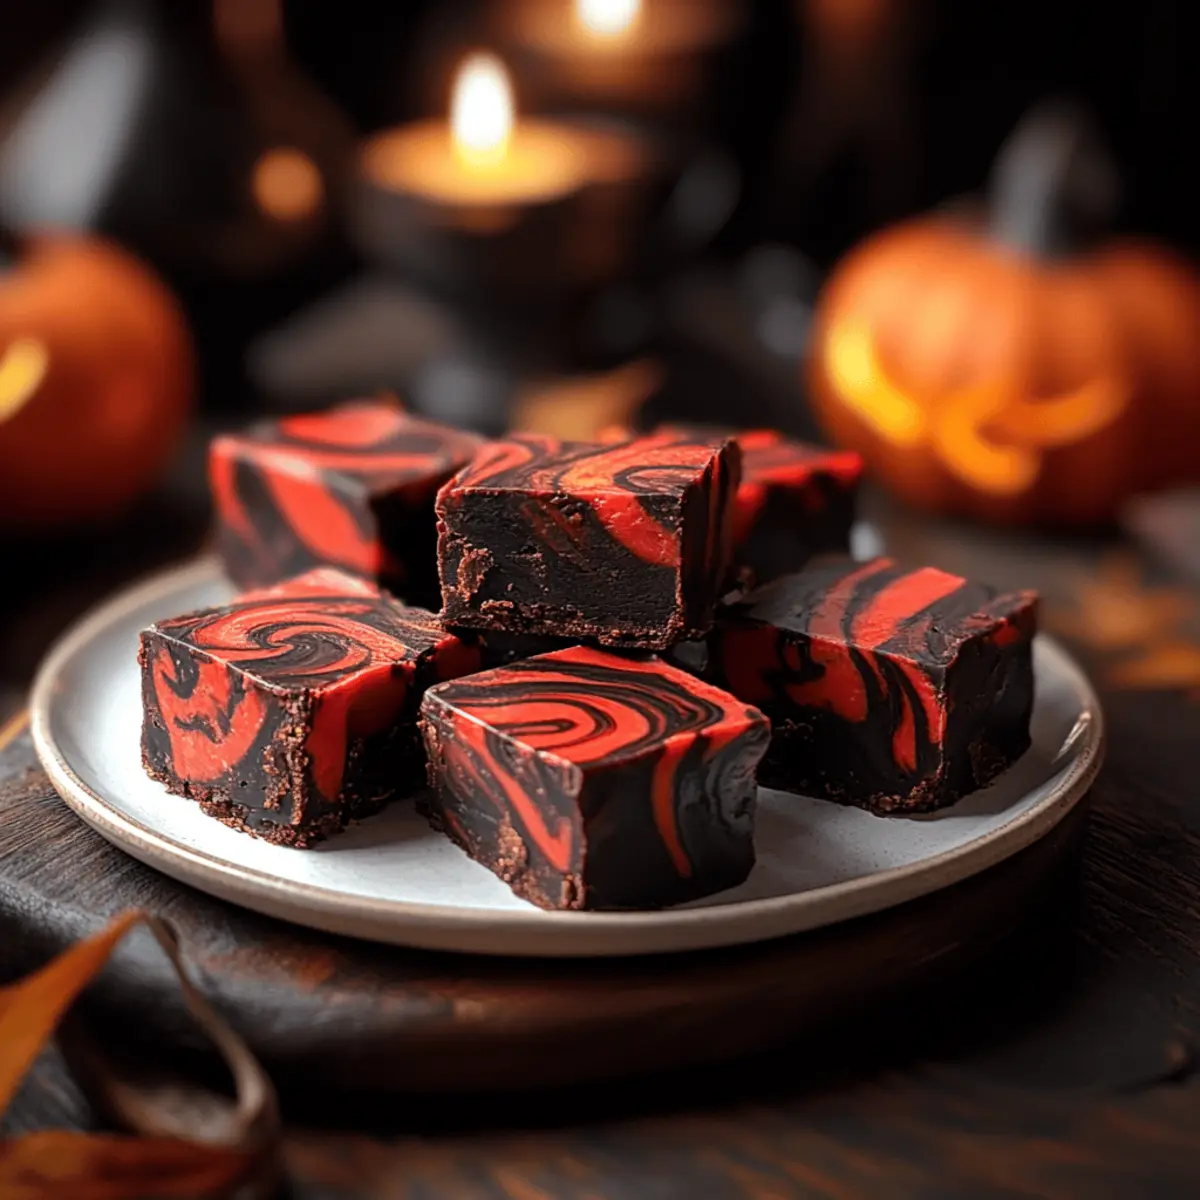
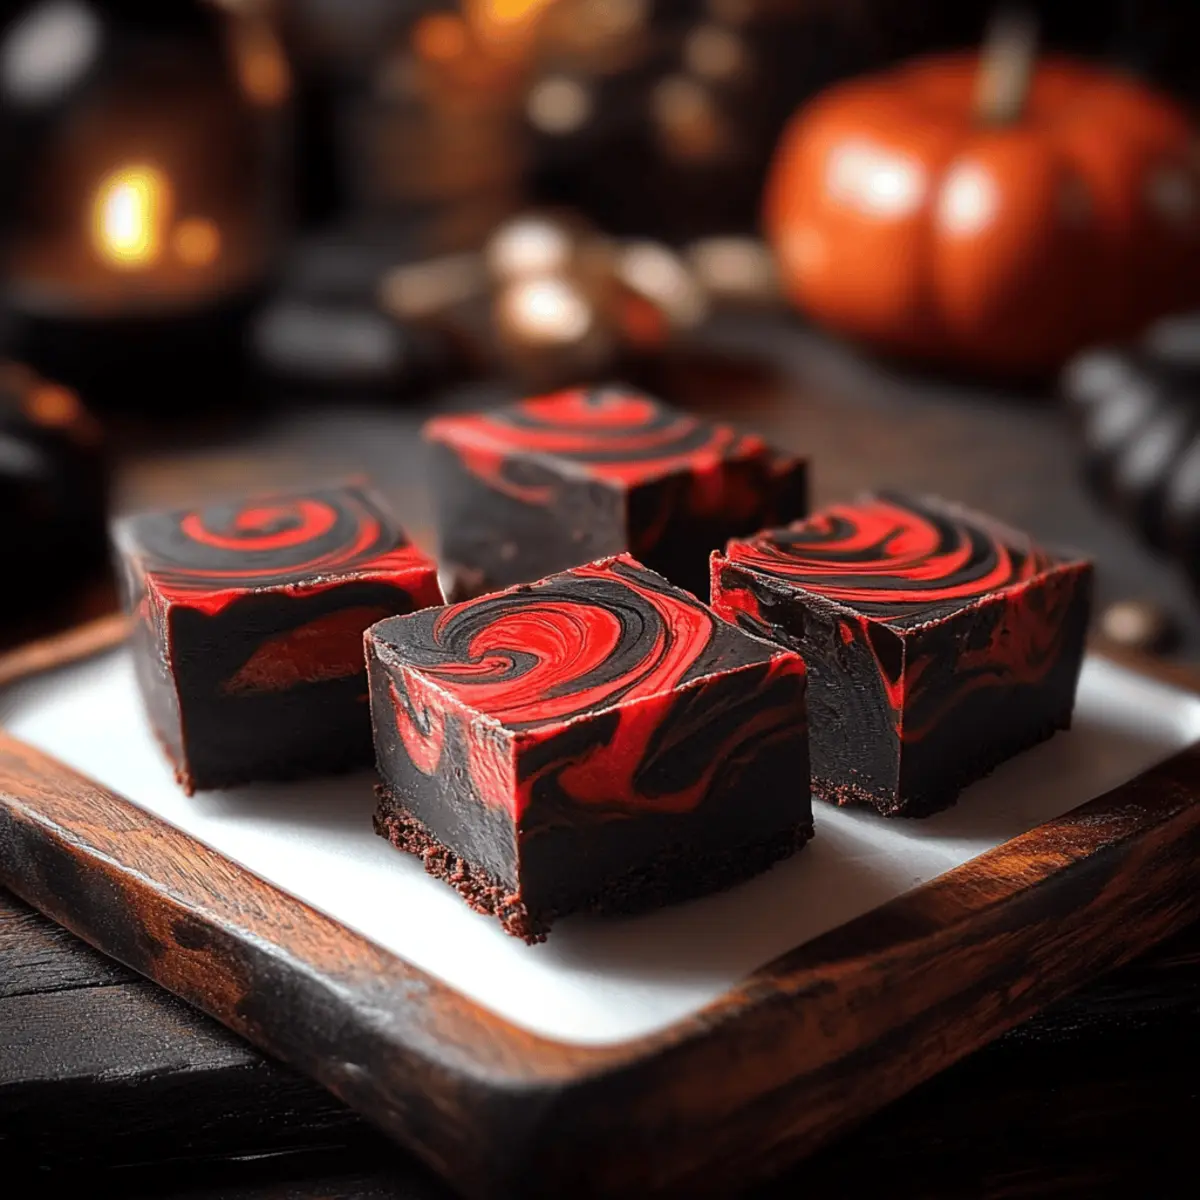
As I unwrapped the colorful candy melts, a wave of inspiration washed over me—it’s almost Halloween! Nothing screams festive fun like my creamy Vampire Fudge Recipe. This delightful treat features striking black and red swirls, perfect for gatherings where you want to wow your friends and family. The best part? It’s incredibly easy to whip up, taking just a few ingredients and minimal time, so you won’t be stuck in the kitchen for hours. Plus, it’s gluten-free and vegetarian, making it a crowd-pleaser for everyone at your spooky celebrations! Are you ready to bring a touch of ghoulish delight to your dessert table? Let’s get started!
Why is Vampire Fudge a Must-Try?
Irresistible Visual Appeal: The striking black and red swirls make this fudge a showstopper, instantly elevating your dessert table.
Effortless Preparation: With just a few simple ingredients, you can whip up this delight in no time—perfect for busy hosts!
Customizable Fun: Get creative! Use different candy colors or toppings to match any party theme, just like with Hot Honey Chicken that spices things up.
Crowd-Pleasing Treat: Gluten-free and vegetarian, it caters to various diets without compromising on flavor.
Memorable Halloween Experience: This Vampire Fudge captures the spirit of Halloween, making it a unique treat for parties!
Vampire Fudge Recipe Ingredients
• Here’s everything you need for this hauntingly delicious treat:
For the Fudge
- Black Candy Melts – these provide the essential dark color that makes the fudge mysterious and festive.
- Red Candy Melts – they add a vibrant swirl for that spooky effect; always opt for fresh ones to ensure smooth melting.
- Cream Cheese Frosting – adds a velvety richness to the fudge; you can substitute with thick vanilla or buttercream frosting if you prefer.
For Extra Flavors and Toppings
- Flavor Enhancers (Optional) – consider adding pumpkin spice or a sprinkle of cinnamon for a seasonal twist.
- Toppings (Optional) – get creative with crushed nuts, cookie crumbles, or colorful sprinkles; these can add texture and flair to your Vampire Fudge Recipe!
Now that you have the ingredients, let’s dive into creating this ghoulishly good treat that everyone will love!
Step‑by‑Step Instructions for Vampire Fudge Recipe
Step 1: Prepare the Pan
Lightly grease an 8” x 8” cake pan and line it with parchment paper in a cross shape, allowing for easy lifting of the fudge later on. This preparation ensures your creamy Vampire Fudge can be easily removed without sticking, setting you up for an effortless unveiling when it’s time to serve.
Step 2: Melt Candy Melts
In two separate heat-safe bowls, add black and red candy melts. Microwave each bowl in 30-second intervals, stirring well after each round until completely smooth—this should take about 2 minutes total. Look for no lumps or dark spots; this guarantees a beautifully blended fudge that embodies the vibrant hues of your Vampire Fudge.
Step 3: Warm Frosting
Take your cream cheese frosting and transfer it to a microwave-safe bowl. Heat it in the microwave for about 45 seconds, until warm but not bubbling. This step makes the frosting easier to mix with the melted candy, ensuring a deliciously smooth texture throughout your Vampire Fudge.
Step 4: Combine Mixtures
Divide the warmed cream cheese frosting between the bowls of melted black and red candy melts. Stir each mixture thoroughly until well combined and evenly colored, creating a rich and creamy base for your Vampire Fudge. The mixture should be glossy and consistent, indicating it’s ready for the next step.
Step 5: Layer Fudge
Begin layering the fudge in the prepared pan by alternating between pouring the black and red mixtures. Use a spatula to gently create swirls for a striking visual effect. This beautiful marbling will make your Vampire Fudge stand out at any Halloween gathering, so take your time to make it enchanting.
Step 6: Set Fudge
Once layered, gently tap the pan on the counter to even out the mixture and eliminate any air bubbles. Place the pan in the refrigerator and allow the fudge to chill for about 4 hours, or until fully set and firm to the touch. This chilling time ensures that your Vampire Fudge has the perfect texture when cut.
Step 7: Cut and Serve
After the fudge has fully set, carefully lift it from the pan using the parchment paper. Place it on a cutting board and slice it into squares with a sharp knife. The final touches reveal your glorious Vampire Fudge, ready to mesmerize your guests with its rich flavors and spooky appearance!
Make Ahead Options
These Vampire Fudge treats are perfect for meal prep enthusiasts looking to save time during the busy Halloween season! You can prepare the melted candy and cream cheese frosting mixtures up to 24 hours in advance. Simply store each mixture in airtight containers in the refrigerator; this keeps them fresh and ready for assembly. On the day of serving, just combine the warmed frosting with the candy melts as instructed and layer them in the pan. Allow the fudge to set in the refrigerator for about 4 hours. By prepping ahead, you’ll enjoy the same delicious flavor while taking the stress out of last-minute baking!
Expert Tips for Vampire Fudge Recipe
- Proper Heating: Microwave candy melts in short intervals to prevent burning; this ensures a smooth texture for your Vampire Fudge.
- Chill Time Matters: Don’t rush the setting time; let it chill for a full 4 hours to achieve that perfect texture.
- Layering Technique: Pouring the mixtures slowly and using a spatula to swirl helps create beautiful marbling, enhancing the visual appeal of your fudge.
- Toppings Choices: Feel free to customize your fudge with fun toppings; just be cautious not to add too many heavy items that might make the fudge difficult to cut.
- Storage Wisely: Keep any leftovers in an airtight container in the fridge for up to a week, ensuring your Vampire Fudge stays fresh and delicious!
What to Serve with Vampire Fudge
Bring your spooky celebration to life with these delightful pairings that will enchant guests and complement your delicious Vampire Fudge.
-
Pumpkin Spice Cookies: These soft, aromatic cookies add a warm, seasonal flavor that harmonizes beautifully with the creamy fudge.
-
Caramel Apple Slices: Tangy, fresh apple slices drizzled with rich caramel provide a crisp contrast to the smooth fudge, perfect for fall festivities.
-
Haunted Hot Chocolate: A mug of rich, velvety hot chocolate topped with whipped cream and sprinkles will keep everyone cozy and sweeten the spooky vibe.
-
Candy Corn Trail Mix: This colorful mix of candy corn, nuts, and dried fruits offers a crunchy, sweet contrast, making it an inviting snack for guests.
-
Ginger Ale Spritzers: Crisp ginger ale with a splash of cranberry juice provides a refreshing, fizzy drink that’s perfect for adults and kids alike, balancing the richness of the fudge.
-
Spooky Cheese Platter: A selection of various cheeses with autumn fruits and crackers creates a savory element, offering a delightful contrast to the sweetness of the fudge.
-
Chocolate-Dipped Pretzels: The salty crunch of pretzels covered in chocolate introduces a delightful texture and flavor contrast that pairs beautifully with the fudge.
-
Cinnamon-Spiced Apple Cider: Warm, spiced cider embraces the fall flavors and brings a cozy warmth that perfectly complements the savory richness of the Vampire Fudge.
How to Store and Freeze Vampire Fudge
Fridge: Store the Vampire Fudge in an airtight container in the fridge for up to 1 week, keeping it fresh and delicious for your spooky cravings.
Freezer: For longer storage, wrap the fudge tightly in plastic wrap or aluminum foil, then place it in a freezer-safe container. It will stay good for up to 3 months.
Thawing: When you’re ready to enjoy, thaw the fudge overnight in the fridge for the best texture and flavor.
Serving Reminder: Once thawed, cut into squares and serve chilled or at room temperature to fully appreciate the rich, creamy indulgence of your Vampire Fudge Recipe.
Vampire Fudge Recipe Variations
Invite your creativity to run wild with these fun ideas to customize your Vampire Fudge!
-
Color Swap: Change black and red candy melts to purple and green for a witchy theme. It’s a captivating twist that’ll thrill little goblins!
-
Nutty Delight: Add crushed nuts like walnuts or pecans to enhance texture and give your fudge a delightful crunch. This combination will surprise the taste buds!
-
Sprinkles Galore: Top your fudge with colorful sprinkles for a cheerful pop. It’s a simple way to add a festive touch that’s perfect for Halloween fun!
-
Flavored Fudge: Infuse seasonal flavors like pumpkin spice or cinnamon for an autumnal twist that complements the spooky season. This addition makes each bite a cozy delight.
-
Chocolate Drizzle: Drizzle some melted chocolate on top for extra indulgence. It adds richness and a delightful contrast in flavor!
-
Heat It Up: Mix in a pinch of cayenne pepper or cinnamon for a surprisingly spicy kick. Pair it with your choice of beverages for a fun contrast!
-
Fun Toppings: Get creative by adding cookie crumbles or a layer of peanut butter for an unexpected twist. Each variation will introduce new flavors and textures to enjoy.
-
Spooky Theme: For an extra Halloween touch, decorate your fudge with candy eyes or gummy worms placed on top when it’s set. It’ll surely bring giggles from kids and adults alike!
These crafting suggestions will turn your Vampire Fudge into a memorable treat that everyone will adore, just like my popular recipes for Cotton Candy Fudge or Sticky Toffee Pudding!

Vampire Fudge Recipe FAQs
How do I select the right candy melts for this fudge?
It’s important to choose fresh candy melts without dark spots or clumps. Look for bright, uniform colors that indicate they have been stored properly. If you see any lumps, it’s best to discard them to ensure a smooth melting process and a beautiful finish for your Vampire Fudge.
How should I store leftover Vampire Fudge?
Store your Vampire Fudge in an airtight container in the fridge for up to 1 week. Make sure it’s well-sealed to maintain its creamy texture. For longer storage, you can freeze the fudge. It stays fresh for up to 3 months when wrapped tightly in plastic wrap or aluminum foil, then placed in a freezer-safe container.
Can I freeze Vampire Fudge, and how do I do it?
Absolutely! To freeze your Vampire Fudge, wrap it tightly in plastic wrap or aluminum foil to prevent freezer burn. Then, place it in a freezer-safe container. When you’re ready to enjoy it, remove the fudge from the freezer and let it thaw overnight in the fridge. This method helps retain its delicious flavor and texture.
What should I do if my fudge doesn’t set properly?
If your fudge hasn’t set after 4 hours, it may be due to not enough chilling time or incorrect ratios of frosting and candy melts. Ensure you followed the steps accurately, and then give it additional time in the refrigerator. If it’s still too soft, try placing it in the freezer for about 30 minutes. After that, it should be easier to cut and serve!
Is Vampire Fudge suitable for people with dietary restrictions?
Yes! This Vampire Fudge Recipe is gluten-free and vegetarian, making it a great treat for various dietary needs. However, always check the specific brands of candy melts and frosting you use, as some may contain allergens. If you’re concerned about sugar content, look for alternative candy melts that use natural sweeteners.
Can I customize the colors and flavors for different occasions?
Very! You can easily switch out the black and red candy melts for seasonal colors, like orange and purple for Halloween or red and green for Christmas. Additionally, consider adding flavors like pumpkin spice or drizzling some salted caramel on top for a seasonal twist. The more, the merrier when it comes to creative toppings!
Ghoulish Vampire Fudge Recipe: Easy Halloween Treats at Home
Ingredients
Equipment
Method
- Lightly grease an 8” x 8” cake pan and line it with parchment paper.
- In two separate heat-safe bowls, add black and red candy melts and microwave in 30-second intervals until smooth.
- Warm the cream cheese frosting in the microwave for about 45 seconds until not bubbling.
- Divide the warmed frosting between the bowls of melted candy melts and mix thoroughly.
- Layer the fudge in the prepared pan, alternating between black and red mixtures, and swirl them.
- Tap the pan to eliminate air bubbles and refrigerate for about 4 hours until set.
- Lift the set fudge from the pan using parchment paper and cut into squares.
Leave a Reply