
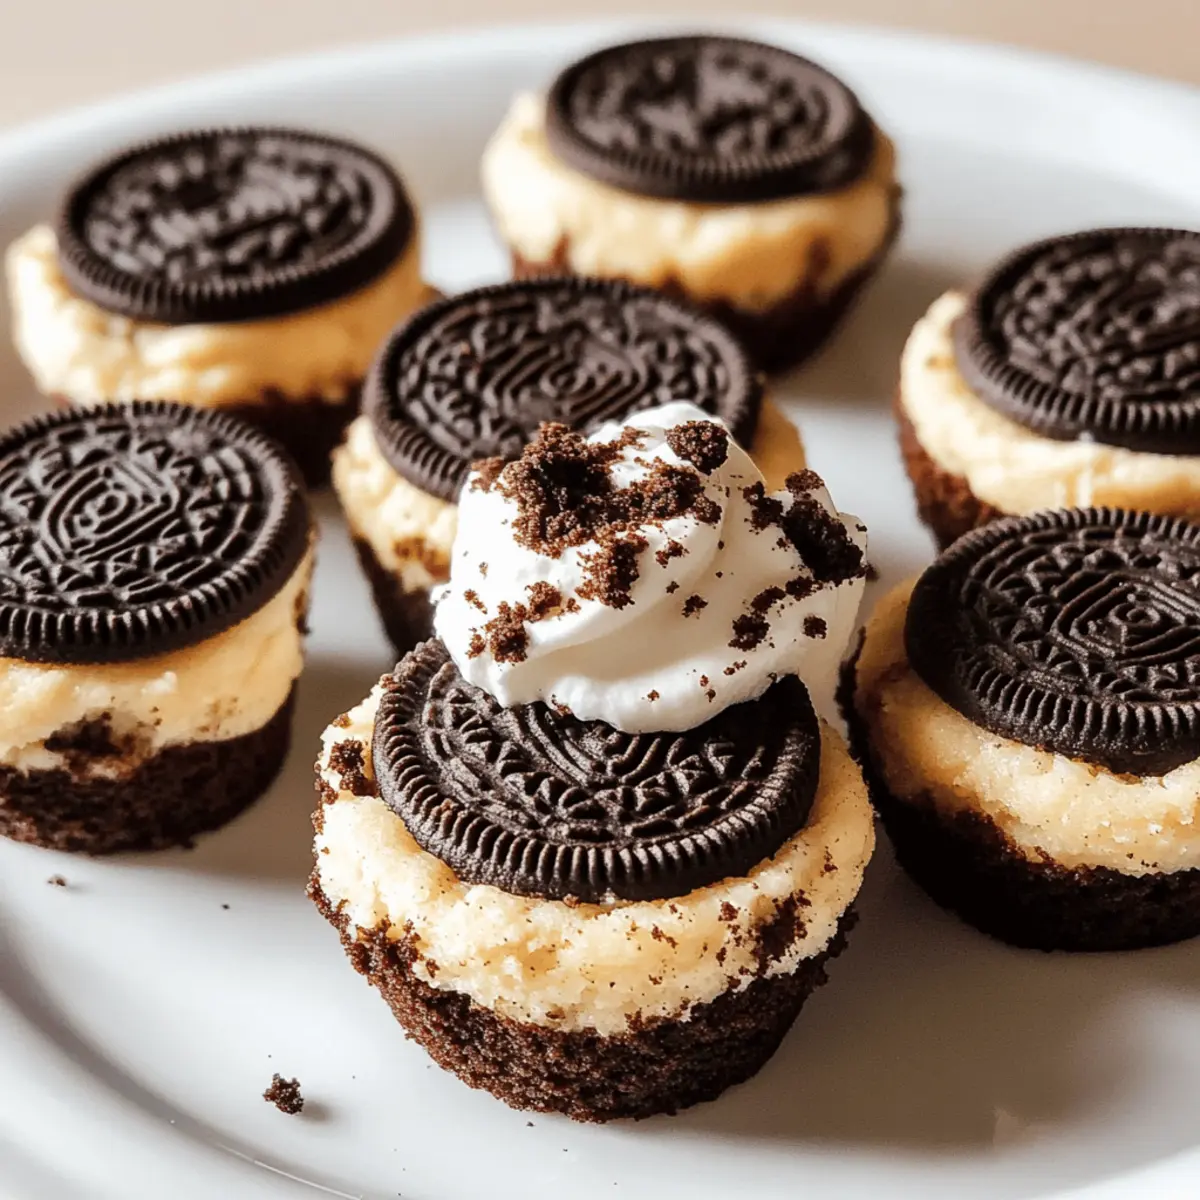
While flipping through my favorite dessert cookbook, I stumbled upon a treasure: a recipe for Oreo Cheesecake Cookie Cups. These delightful little treats combine a crispy Oreo crust with a luscious cheesecake filling, capturing the essence of indulgence in every bite. What’s more? They’re a breeze to prepare—perfect for those spontaneous gatherings or weeknight cravings when you want something special without a fuss. The beauty of these cookie cups lies in their versatility; whether you stick to the classic Oreo base or get adventurous with different cookie swaps and toppings, you’re sure to impress. Are you ready to bite into happiness and elevate your dessert game? Let’s get started!
Why Are Oreo Cheesecake Cookie Cups Irresistible?
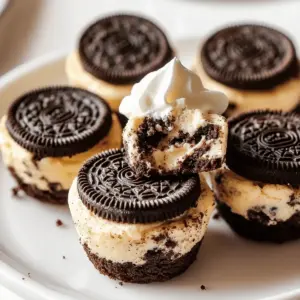
Delightful flavor combinations are at the heart of these treats; the iconic Oreo crust perfectly complements the creamy cheesecake filling. Customizable to suit every palate, you can easily switch up the cookie base or add toppings like fresh berries or chocolate sauce. Quick preparation means you can whip these up in under an hour, making them an excellent option for last-minute gatherings. Plus, they’re served in adorable individual portions, adding charm and flair to any dessert table. Try pairing them with a scoop of vanilla ice cream or alongside a slice of Chocolate Cheesecake Amp for a delectable dessert duo!
Oreo Cheesecake Cookie Cups Ingredients
For the Crust
• Oreo Cookies – Crushed for a flavorful base; classic Oreos deliver the perfect crunch.
• Unsalted Butter – Melted to bind the cookie crumbs together; this ensures a firm crust.
For the Filling
• Cream Cheese – The star of the show; use full-fat for a rich and creamy texture that truly enhances your Oreo Cheesecake Cookie Cups.
• Sugar – Sweetens the filling; feel free to adjust based on your personal taste preference.
• Sour Cream or Greek Yogurt – Adds creaminess and a slight tang; sour cream enhances flavor while Greek yogurt provides a lighter option.
• Mini Chocolate Chips – Optional for an extra chocolatey touch that complements the cheesecake filling.
For the Topping
• Whipped Cream – Lightly sweetened to balance flavors; piping it on top adds an elegant finish to your cookie cups.
• Crushed Oreos – A delightful sprinkle on top for that extra crunch and visual appeal, reminiscent of the crust.
Step‑by‑Step Instructions for Oreo Cheesecake Cookie Cups
Step 1: Preheat the Oven
Start by preheating your oven to 350°F (175°C), ensuring the temperature is just right for baking. This step is crucial as it guarantees even cooking for your Oreo Cheesecake Cookie Cups. While the oven heats up, gather your ingredients and prepare your workspace for the upcoming deliciousness.
Step 2: Prepare the Crust Mixture
Crush the Oreo cookies into fine crumbs using a food processor or by placing them in a zip-top bag and rolling with a rolling pin. In a mixing bowl, combine the crushed cookies with melted unsalted butter. Stir until the mixture resembles wet sand, sticky enough to hold its shape when pressed. This will create a deliciously crunchy base for your cookie cups.
Step 3: Form the Crust in Muffin Tin
Line a muffin tin with cupcake liners for easy removal of your Oreo Cheesecake Cookie Cups. Evenly distribute about a tablespoon of the Oreo mixture into the bottom of each liner, pressing it firmly down with your fingers or a small cup to form a solid crust. Make sure each crust is compact to hold the cheesecake filling securely.
Step 4: Make the Cheesecake Filling
In a large mixing bowl, beat the softened cream cheese with sugar using an electric mixer until the mixture is fluffy and well combined. Gradually add sour cream or Greek yogurt, mixing until the filling is smooth and creamy. This step ensures your cheesecake filling is rich and utterly delectable, ready to perfectly complement the crunchy crust.
Step 5: Add Optional Chocolate Chips
If you’d like to add a twist of extra flavor, gently fold in mini chocolate chips into the cheesecake mixture. This optional step introduces delightful little bursts of chocolate in every bite, enhancing your Oreo Cheesecake Cookie Cups.
Step 6: Fill the Cookie Cups
Spoon the creamy cheesecake filling over each Oreo crust in the muffin tin, leaving a little space at the top to allow for some rising during baking. The filling should be level with the top of the crust but not overflowing, providing an ample base for the deliciousness that will develop as they bake.
Step 7: Bake the Cookie Cups
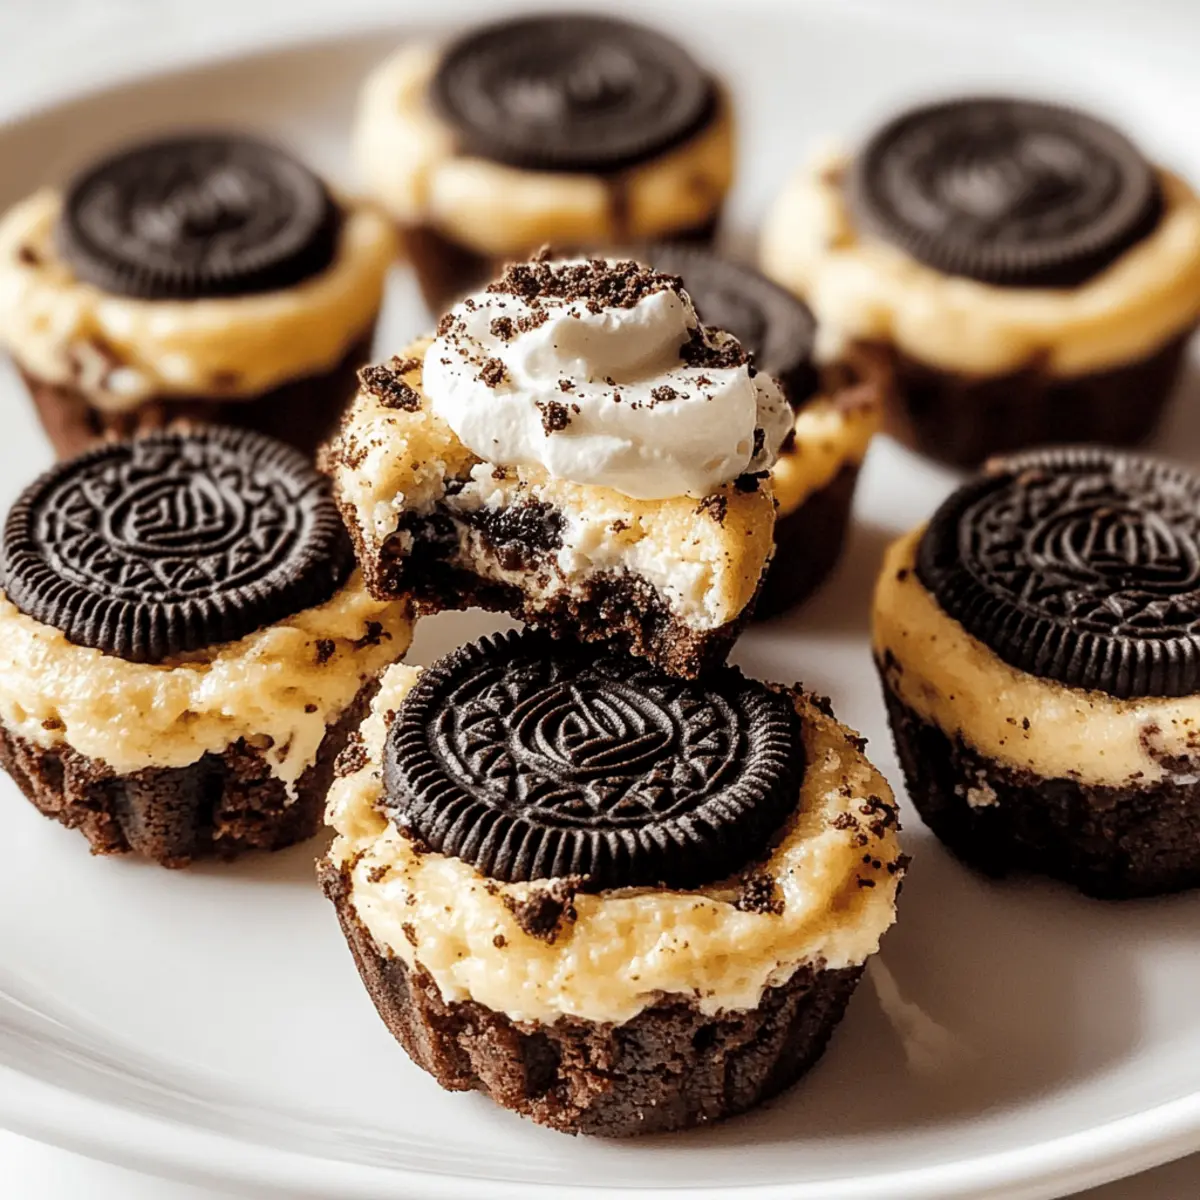
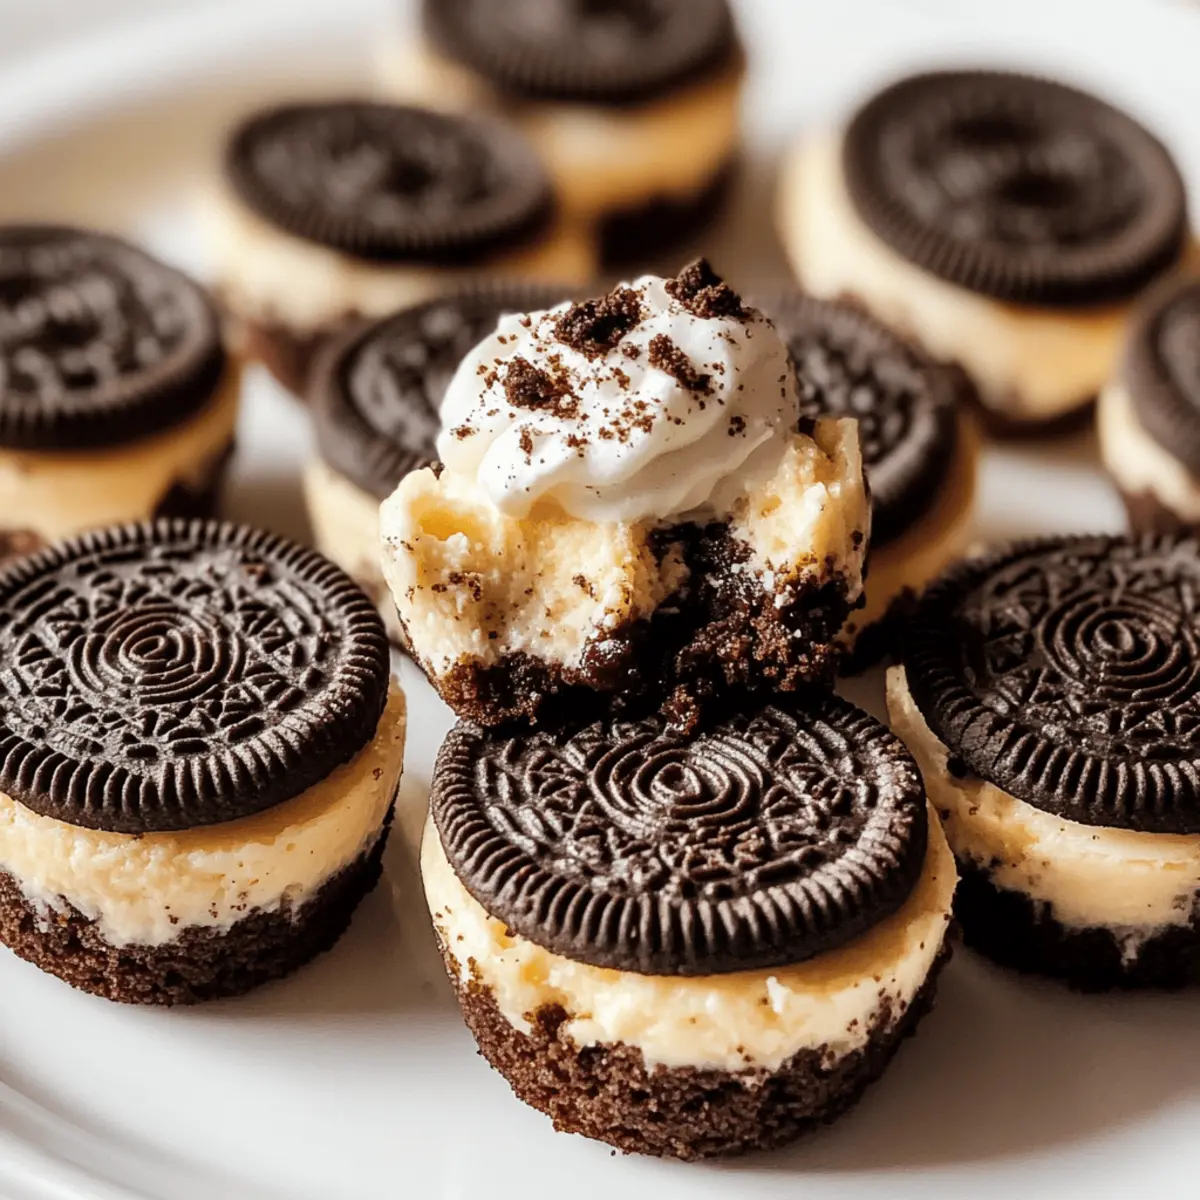
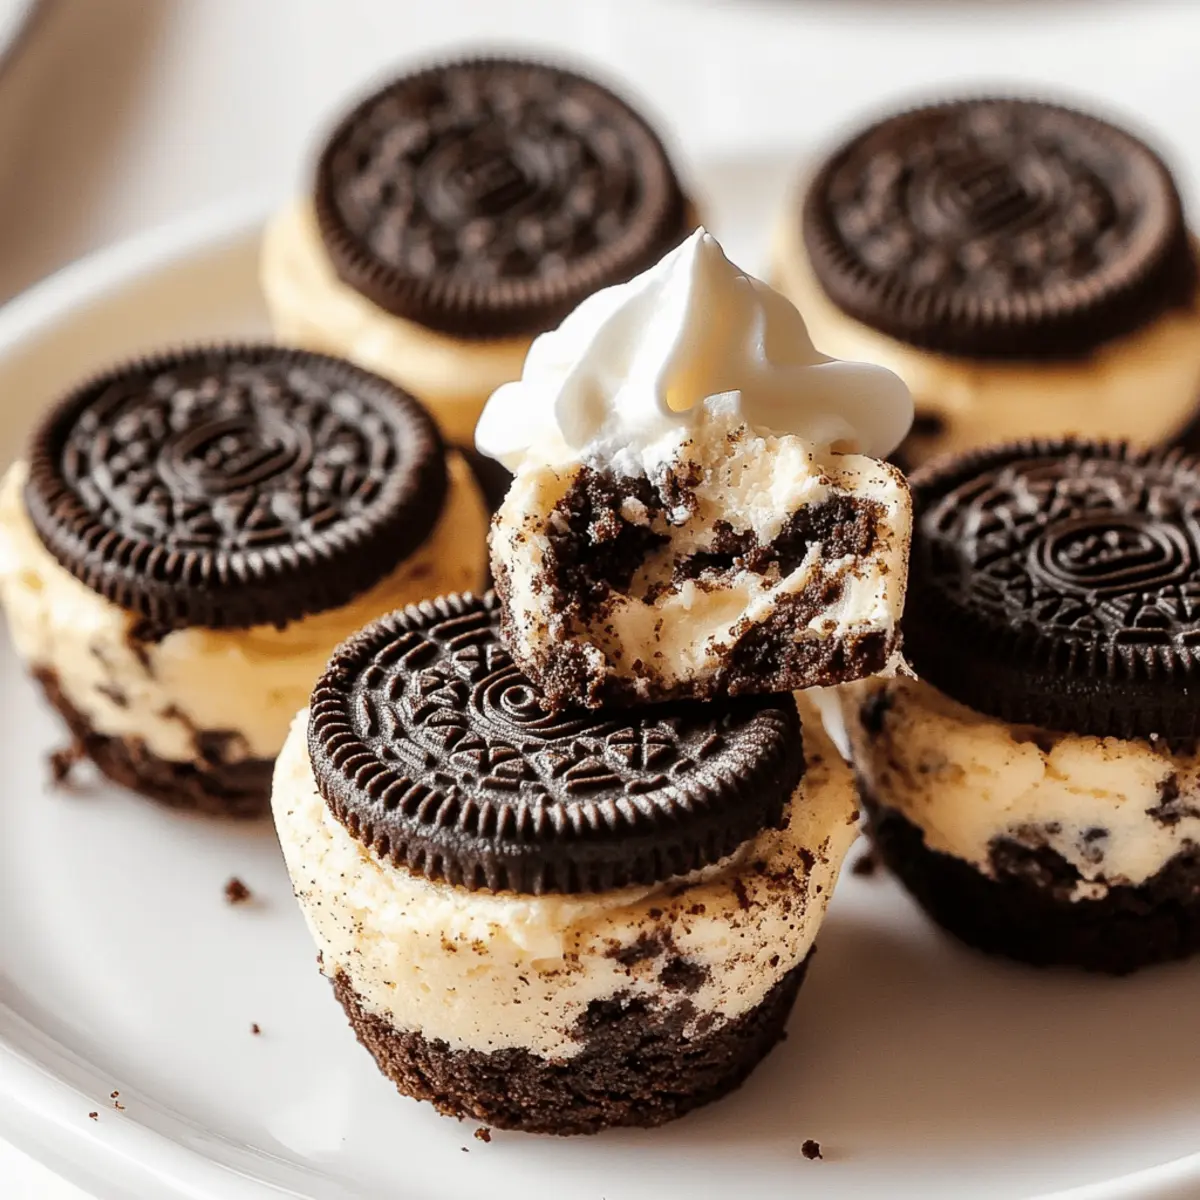
Place the muffin tin in the preheated oven and bake for 15-18 minutes. The centers should be slightly jiggly when you take them out; they will firm up as they cool. Be careful not to overbake, as this may lead to dry cheesecake cookie cups, which can ruin the creamy texture.
Step 8: Cool and Set
Remove the muffin tin from the oven and allow the Oreo Cheesecake Cookie Cups to cool completely at room temperature. Once cool, transfer the tin to the refrigerator and chill them for at least 1 hour. This setting time is vital for achieving that perfect creamy consistency, allowing flavors to meld beautifully.
Step 9: Top with Whipped Cream and Serve
After chilling, remove your Oreo Cheesecake Cookie Cups from the fridge. Pipe lightly sweetened whipped cream on top of each cup, creating a beautiful finish that’s as lovely as it is delicious. Finally, sprinkle with crushed Oreos for added texture and serve! Enjoy these delightful treats at your next gathering or simply as a sweet indulgence at home.
Expert Tips for Oreo Cheesecake Cookie Cups
Bake Time Alert: Don’t overbake: Keep an eye on the timer; remove them when the centers are slightly jiggly to preserve a creamy texture.
Cooling Essentials: Full cooling: Be sure to let the cookie cups cool completely before refrigerating to avoid cracks and achieve the perfect set.
Sour Cream Swap: Yogurt alternatives: Substitute sour cream with Greek yogurt for a lighter twist, but know it may alter the flavor slightly in your Oreo Cheesecake Cookie Cups.
Cream Cheese Choice: Full-fat preferred: Always opt for full-fat cream cheese for the creamiest, richest filling—a low-fat version may affect consistency.
Mix It Up: Customization options: Feel free to experiment with different cookie bases or toppings; get creative with flavors for a unique take on these Oreo Cheesecake Cookie Cups.
How to Store and Freeze Oreo Cheesecake Cookie Cups
Fridge: Store your Oreo Cheesecake Cookie Cups in an airtight container in the refrigerator for up to 5 days. This keeps them fresh and delicious for your sweet cravings.
Freezer: For longer storage, freeze the cookie cups for up to 2 months. Separate layers with parchment paper to prevent sticking and maintain their shape.
Thawing: When you’re ready to enjoy, simply transfer the cookie cups to the fridge to thaw overnight. This gentle method ensures they regain their creamy texture without compromising flavor.
Reheating: If you prefer to serve them warm, pop them in a microwave for about 10-15 seconds. Just be cautious not to overheat, which can affect the creamy filling of your Oreo Cheesecake Cookie Cups.
Make Ahead Options
These Oreo Cheesecake Cookie Cups are a fantastic option for make-ahead dessert lovers! You can prepare the Oreo crust up to 24 hours in advance by mixing the crushed cookies with melted butter and pressing them into the muffin tin. Simply cover it with plastic wrap and refrigerate until you’re ready to fill them. The cheesecake filling can also be made ahead and stored in the fridge for up to 3 days; just keep it airtight to prevent any absorption of odors. When you’re ready to serve, spoon the filling into the chilled crusts, bake according to the directions, and top them with whipped cream. This way, you’ll save time while still impressing your guests with deliciously creamy treats!
What to Serve with Oreo Cheesecake Cookie Cups
Elevate your dessert experience by pairing these delightful treats with perfect accompaniments that complement their rich flavors.
-
Fresh Berries: Their tartness cuts through the sweetness, adding a refreshing contrast that brightens each bite. Strawberries or raspberries are particularly delightful.
-
Vanilla Ice Cream: This classic pairing provides a creamy, cool contrast to the rich cheesecake, creating a lovely indulgent harmony in every mouthful.
-
Espresso or Coffee: A strong cup of coffee or espresso lends depth, balancing the sweetness of the cookie cups. It’s the perfect way to enhance flavors while enjoying a cozy dessert moment.
-
Chocolate Sauce: Drizzling hot chocolate sauce over your cookie cups adds an extra layer of decadence. The warmth of the sauce contrasts beautifully with the cool filling.
-
Whipped Cream: A generous dollop of freshly whipped cream enhances the creaminess, making every bite more luscious. The lightness of the cream complements the dense texture beautifully.
-
Caramel Drizzle: A rich caramel sauce not only elevates sweetness but also brings a lovely gooey element to the surface, enhancing visual appeal and flavor complexities at the same time.
-
Nutty Topping: Chopped nuts, like walnuts or pecans, introduce a crunchy texture that contrasts wonderfully with the creamy filling. They also provide a nutty flavor enhancement that rounds out the dessert.
-
Peppermint Extract: For a festive twist, mix a drop of peppermint extract into the whipped cream or cheesecake filling. It brings a refreshing note that pairs wonderfully with the chocolatey crust.
Oreo Cheesecake Cookie Cups Variations
Feel free to add a personal touch to your Oreo Cheesecake Cookie Cups! Let your creativity shine through with these delightful twists.
-
Graham Cracker Crust: Replace Oreos with crushed graham crackers for a classic cheesecake flavor.
-
Peanut Butter Cookies: Use peanut butter cookies instead of Oreos for a nutty, sweet sensation that pairs beautifully with cheesecake.
-
Fruit-Filled Delight: Top your cups with fresh strawberries or raspberries for a burst of fruity freshness that complements the creamy filling perfectly.
-
Nutty Crunch: Fold in chopped walnuts or pecans to the cheesecake filling for a satisfying crunch and delightful texture.
-
Chocolate Lover’s Dream: Substitute regular cream cheese with chocolate-flavored cream cheese to create an indulgent, chocolate-packed dessert.
-
Reduced Sugar: Substitute sugar with a low-calorie sweetener to create a lighter version without compromising on sweetness.
-
Saucy Drizzle: Drizzle your cups with chocolate or caramel sauce right before serving for an extra layer of flavor that elevates your dessert.
-
Mini Cheesecake Bites: Use a mini muffin tin instead to create a bite-sized version, perfect for serving at parties or get-togethers!
For even more ideas, explore combinations like serving them alongside a decadent slice of Funfetti Oreo Icebox Cake or a rich Fried Strawberry Cheesecake. The possibilities are endless!
Oreo Cheesecake Cookie Cups Recipe FAQs
How do I choose the best Oreos for the crust?
Absolutely! I recommend using classic Oreos for that iconic flavor that most people recognize and love. If you’re feeling adventurous, Double Stuf Oreos can add an extra layer of creaminess, enhancing the texture of your crust!
What’s the best way to store leftover Oreo Cheesecake Cookie Cups?
To keep your treats fresh, store the Oreo Cheesecake Cookie Cups in an airtight container in the refrigerator for up to 5 days. Make sure they’re completely cooled before sealing to maintain their delightful creaminess!
Can I freeze these cookie cups? If so, how?
Yes, you can freeze your Oreo Cheesecake Cookie Cups for up to 2 months! First, let them cool completely, then lay a piece of parchment paper between layers to prevent sticking. Place them in a freezer-safe container and seal tightly. When you’re ready to enjoy, simply thaw them in the refrigerator overnight.
What if my cheesecake filling is runny?
If your filling turns out runny, don’t worry! I suggest re-blending the mixture, adding an additional tablespoon of softened cream cheese and mixing until the consistency thickens. It’s essential to have a thick filling for the best texture in your cookie cups.
Are Oreo Cheesecake Cookie Cups suitable for people with dietary restrictions?
Great question! These treats contain gluten and dairy, so they’re not suitable for those with gluten intolerance or lactose allergies. However, you can swap out the Oreos for gluten-free cookies and use dairy-free cream cheese and whipped topping to cater to dietary needs while still enjoying the deliciousness of Oreo Cheesecake Cookie Cups.
Oreo Cheesecake Cookie Cups: Easy Indulgence You’ll Love
Ingredients
Equipment
Method
- Preheat your oven to 350°F (175°C). Prepare your workspace and gather all ingredients.
- Crush the Oreo cookies into fine crumbs and mix with melted unsalted butter until it resembles wet sand.
- Line a muffin tin with cupcake liners and press the Oreo mixture into the bottom to form a crust.
- Beat the cream cheese and sugar until fluffy, then mix in the sour cream or Greek yogurt until creamy.
- Fold in mini chocolate chips if desired.
- Spoon the cheesecake filling over each crust, leaving a little space at the top.
- Bake for 15-18 minutes until the centers are slightly jiggly. Remove from oven.
- Cool completely at room temperature, then refrigerate for at least 1 hour.
- Top with whipped cream and crushed Oreos before serving.
Leave a Reply