
As the air turns crisp and the leaves begin to dance to the ground, there’s nothing quite like a sweet-smelling kitchen filled with the essence of fall. Today, I’m excited to share my recipe for irresistibly cute Pumpkin Spice Cake Pops, which marry the warmth of pumpkin and the creaminess of frosting into delightful little bites. These cheerful treats aren’t just a feast for the eyes; they’re also beginner-friendly and perfect for busy schedules! Whether you’re hosting a gathering or enjoying a cozy night in, these cake pops bring the spirit of the season to your dessert table. Plus, I’ve included options for gluten-free and sugar-free alternatives so everyone can indulge. Are you ready to roll up your sleeves and create these autumn-inspired delights? Let’s dive in!
Why Are Pumpkin Cake Pops So Appealing?
Irresistible Charm: These cute Pumpkin Cake Pops are not only a visual delight but also a crowd-pleaser, making them perfect for any gathering.
Beginner-Friendly: With simple steps and basic ingredients, even novice bakers can create these fun treats.
Seasonal Flavor: Infused with warm spices and cozy pumpkin essence, they embody the spirit of autumn.
Versatile Options: Customize them with gluten-free or sugar-free variations, ensuring everyone can enjoy them. You can also check out the delicious Brown Butter Pumpkin for more fall inspiration!
Perfect for Sharing: These bite-sized pops are easy to grab and share, making them ideal for parties or casual get-togethers.
Make-Head Option: Prepare them in advance! Freeze in advance for up to a week, so you’re always ready for a sweet surprise.
Pumpkin Cake Pops Ingredients
For the Cake Pops
• Pumpkin Spice Cake Mix – This forms the base of your cake pops; opt for one with real spices for the best flavor.
• Eggs – Necessary for moisture and structure; use as directed on the package.
• Oil – Keeps your cake pop mixture moist; follow the package’s recommended amount.
• Water – Required to prepare the cake mix per instructions.
For the Creamy Center
• Cream Cheese Frosting – Binds the cake crumbs and adds a lovely creaminess; both homemade and store-bought work well.
For the Coating and Decoration
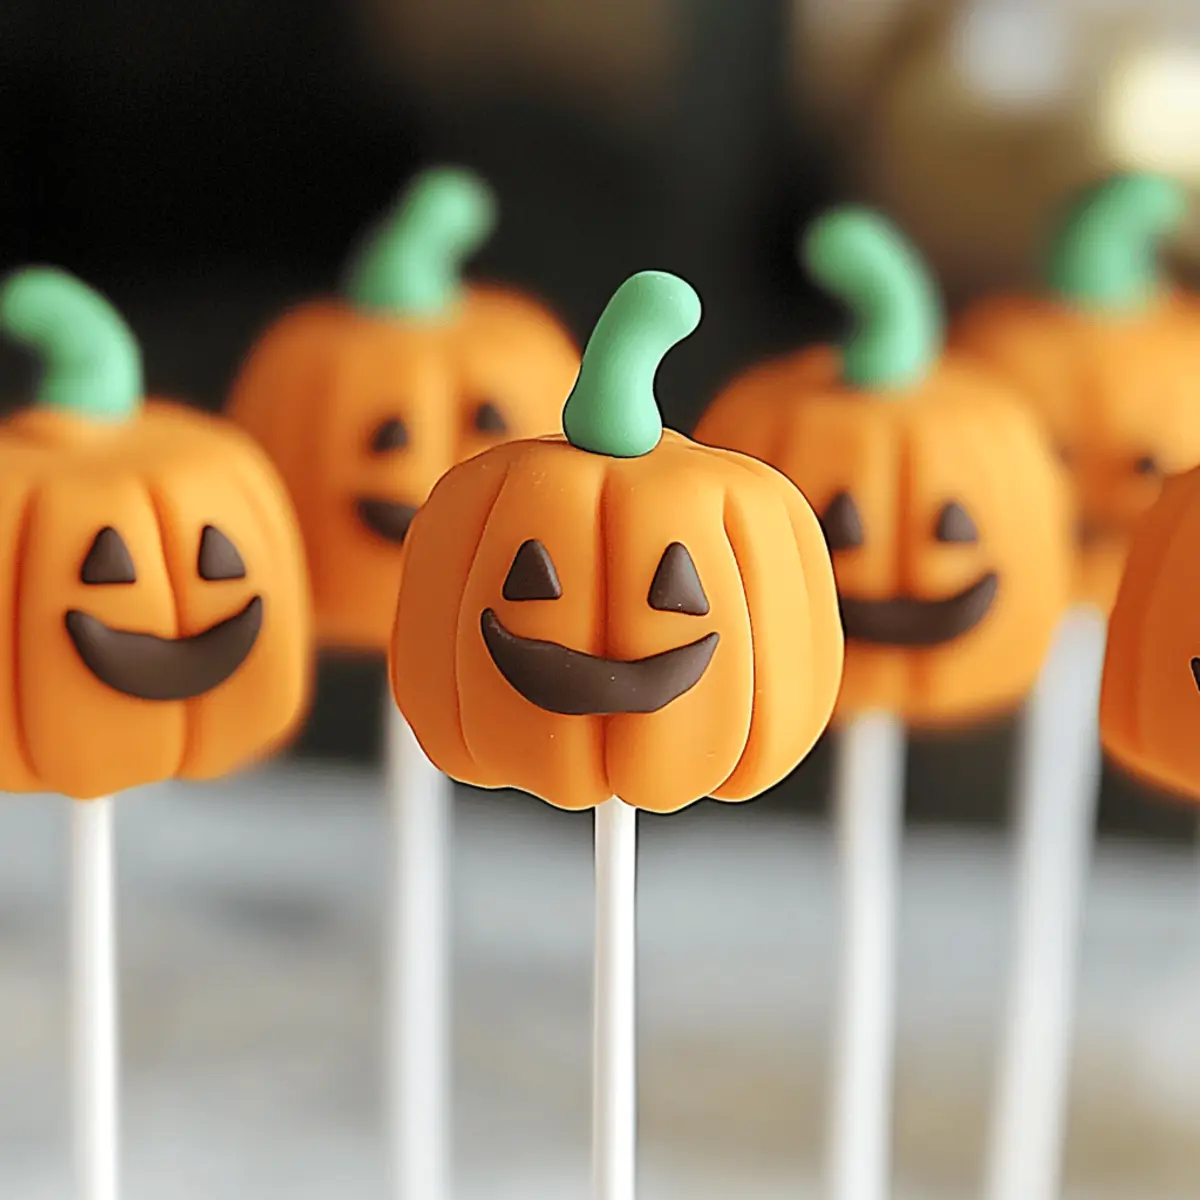
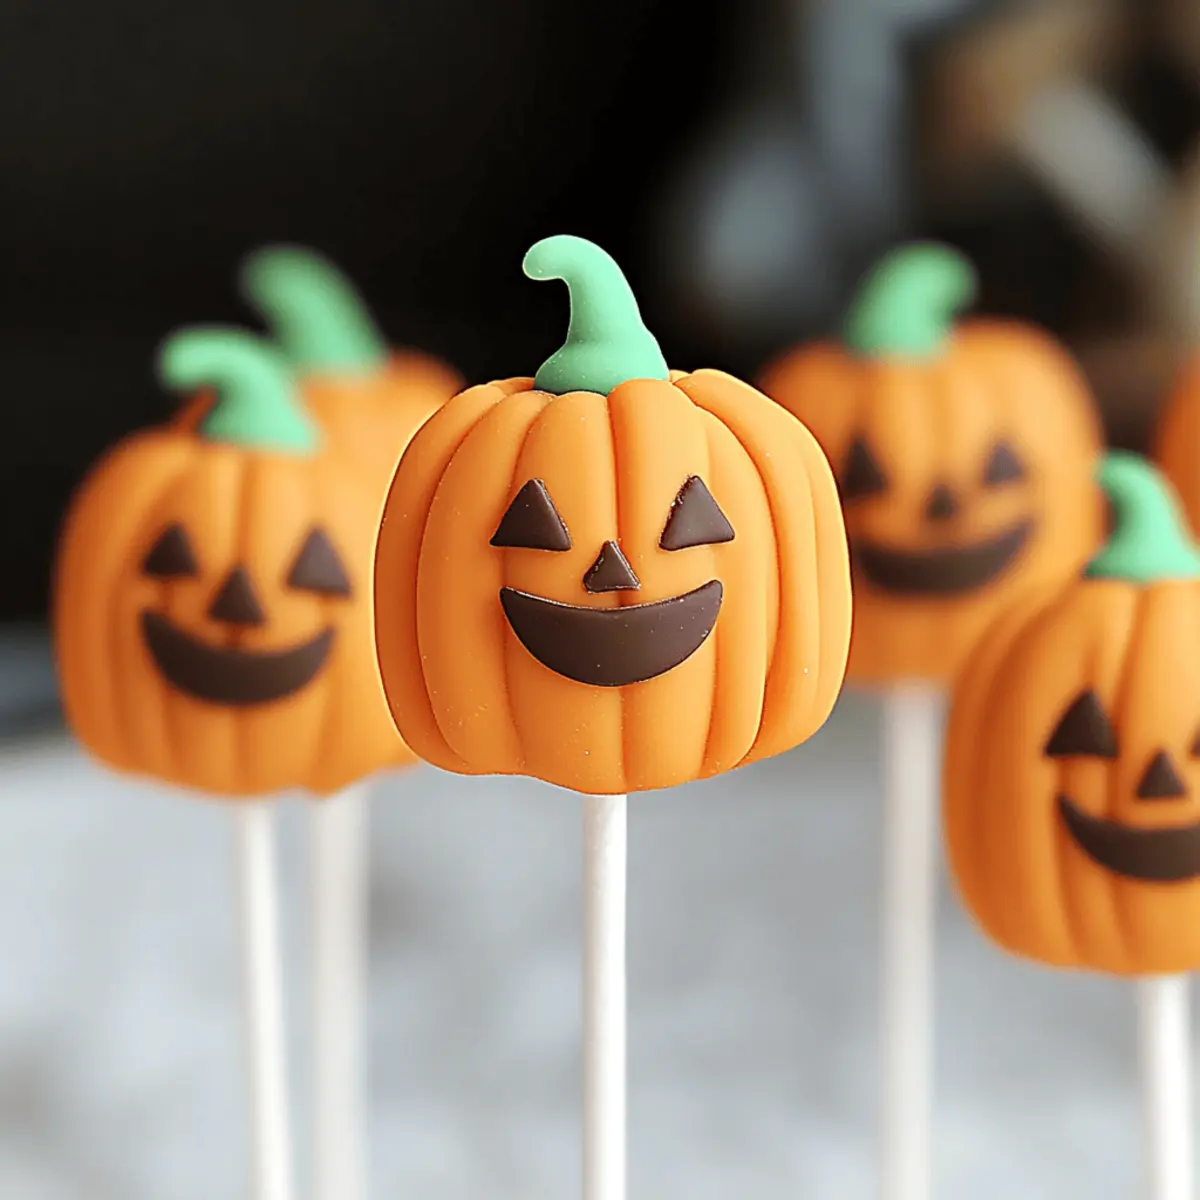
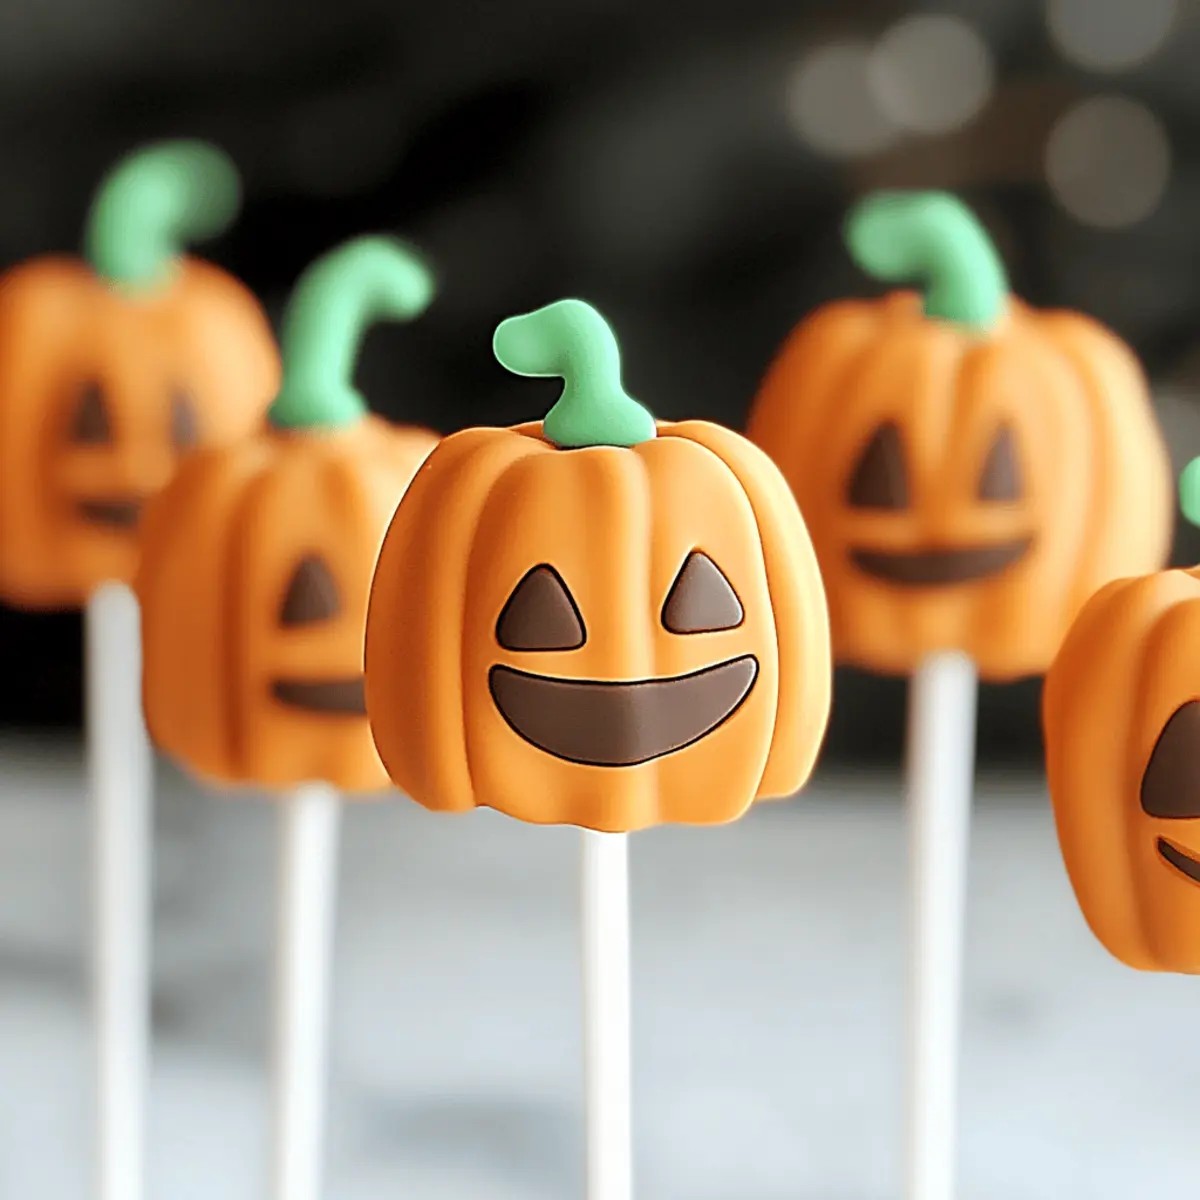
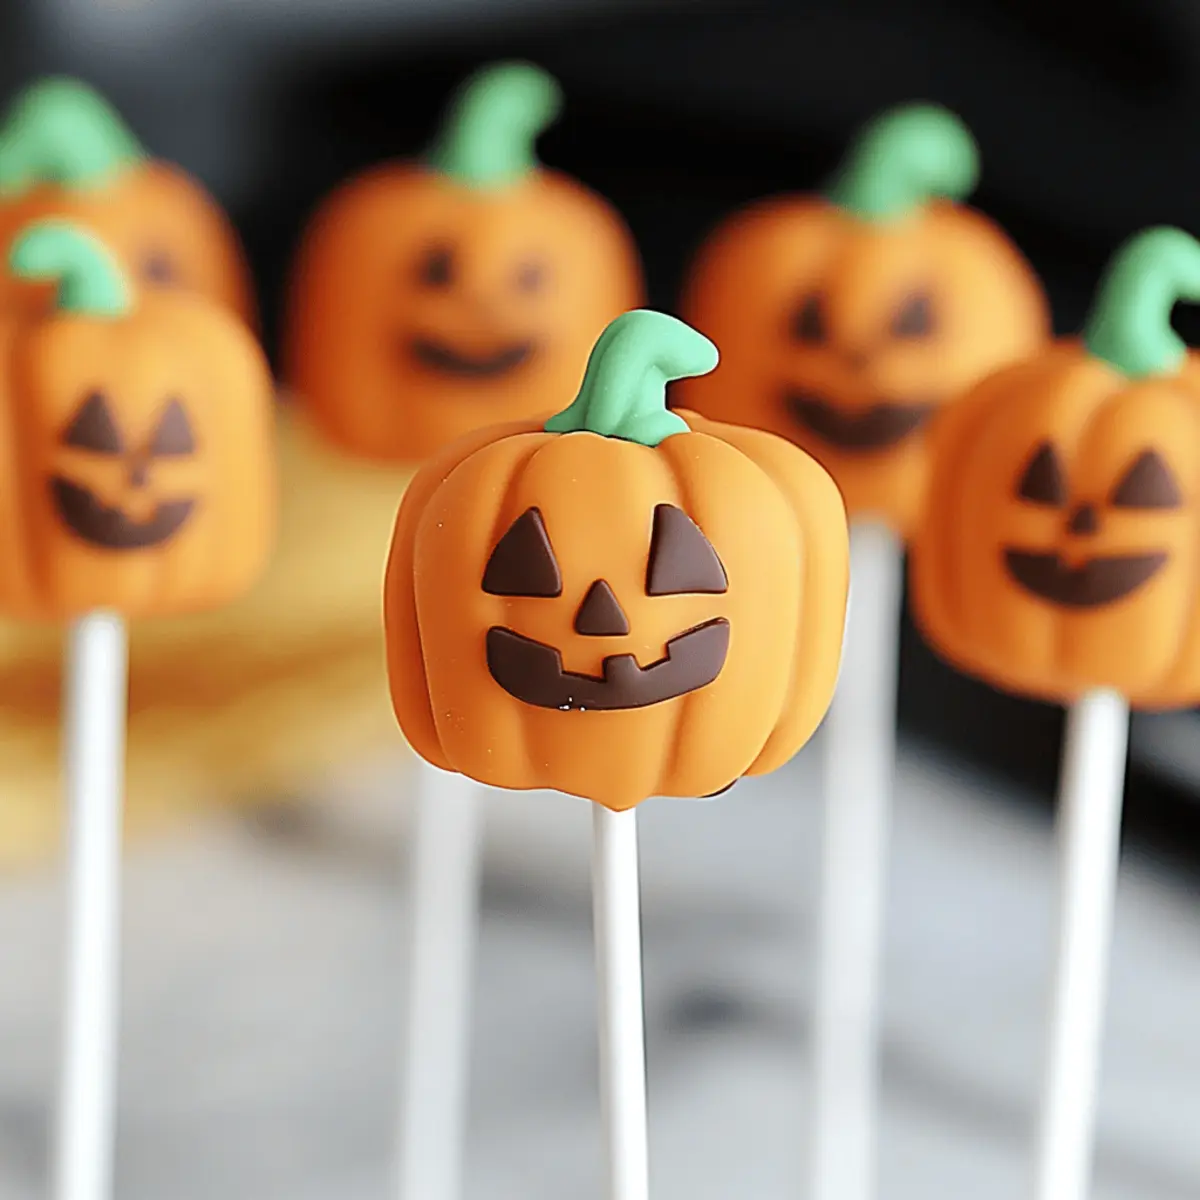
• Orange Candy Melts – These vibrant melts provide a festive coating; high-quality melts yield the best results.
• Green Fondant or Candy – Perfect for adding adorable pumpkin stems on top of your cake pops.
• Melted Chocolate – Ideal for decorating fun faces on your pops, creating a playful touch.
Feel free to explore variations like gluten-free or sugar-free options! These delightful Pumpkin Cake Pops will surely bring warmth and joy to your autumn gatherings.
Step‑by‑Step Instructions for Irresistibly Cute Pumpkin Spice Cake Pops
Step 1: Bake the Cake
Start by preheating your oven to 350°F (175°C). Prepare your pumpkin spice cake mix according to the package instructions, usually mixing with eggs, oil, and water until smooth. Pour the batter into a greased baking pan and bake for 25–30 minutes, or until a toothpick inserted in the center comes out clean. Allow the cake to cool completely on a wire rack.
Step 2: Crumble the Cake
Once your pumpkin spice cake has cooled, gently crumble it into fine crumbs using your hands in a large mixing bowl. Aim for a consistent texture, avoiding any large chunks, as this will ensure even mixing with the frosting. This step is crucial for texture and will help create the delightful pumpkin cake pops you’re aiming for.
Step 3: Mix with Frosting
Next, take your cream cheese frosting and add it directly to the crumbled cake. Use a spatula to mix thoroughly until the crumbs are fully combined and the mixture is moist but not sticky. If the mixture feels too dry, you can add a spoonful of frosting at a time till it reaches the perfect consistency for rolling into balls.
Step 4: Shape the Cake Balls
Now, take about a tablespoon of the mixture and roll it into 1-inch balls using your hands. This step is essential for forming the perfect pumpkin cake pops. Place the formed balls onto a parchment-lined baking sheet, ensuring they are spaced apart. Once you’ve shaped all the mixture, pop the baking sheet into the freezer and chill for at least 1 hour to firm them up for coating.
Step 5: Melt the Coating
While your cake balls are chilling, prepare the orange candy melts. In a microwave-safe bowl, heat the candy melts in 30-second intervals, stirring in between until the melts are fully smooth and free of lumps. This will create a vibrant and tasty coating for your pumpkin cake pops. Make sure to maintain the melted coating at a dip-ready consistency.
Step 6: Insert the Sticks
Once the cake balls are firm, dip the end of each cake pop stick into the melted candy. This helps the stick adhere better to the cake ball. Carefully insert the stick into the center of each ball, ensuring it goes in about halfway. This technique will help keep your cake pops stable during the coating process.
Step 7: Coat the Cake Pops
Now, it’s time to dip your cake pops! Hold each cake pop by the stick, and dip it into the melted orange candy coating, rotating to ensure an even coating. Allow any excess candy to drip off back into the bowl, then place each coated pop back onto the parchment-lined baking sheet. Make sure they’re spaced out to prevent sticking.
Step 8: Add Decorative Stems
After the candy coating has set slightly, take small pieces of green fondant or candy and shape them into little stems. Gently press each stem onto the top of the cake pops, giving them a cute, finished look. Your pumpkin cake pops will start to take on an adorable, festive appearance perfect for autumn celebrations.
Step 9: Decorate with Chocolate
Once everything is set, you can get creative! Using a piping bag filled with melted chocolate, pipe fun faces or designs on each pumpkin cake pop. Let the decorations set at room temperature for 15-30 minutes, allowing the chocolate to harden. This playful step adds extra charm to your irresistibly cute pumpkin spice cake pops!
Step 10: Serve and Enjoy
Finally, your delightful pumpkin spice cake pops are ready to be enjoyed! Arrange them on a festive platter or gift them to friends and family. These treats not only taste delicious but also add a festive flair to any gathering, ensuring everyone leaves with a smile.
What to Serve with Irresistibly Cute Pumpkin Spice Cake Pops
Whether hosting friends or enjoying a cozy family night, these delightful cake pops can shine even brighter with the right pairings.
- Hot Apple Cider: The warm, spiced notes of apple cider resonate beautifully with the pumpkin flavor, creating an inviting autumn experience.
- Ginger Snap Cookies: These crunchy treats add a delightful spice contrast that complements the soft, sweet cake pops perfectly. Imagine a bite of each—heavenly!
- Vanilla Ice Cream: A scoop of creamy vanilla ice cream provides a cool, delicious contrast and enriches the flavor experience of your pumpkin cake pops.
- Pumpkin Spice Latte: This iconic fall beverage enhances the pumpkin theme while offering a cozy warmth and caffeine kick that pairs wonderfully.
- Pecan Pie Bites: These small, sweet bites introduce a nutty crunch and added sweetness, making for a decadent autumnal dessert spread.
- Chocolate Milk: The rich flavor of chocolate milk adds a delightful creaminess that balances the spiced sweetness of each cake pop, perfect for kids and adults alike.
- Caramel Sauce: Drizzling warm caramel over both the cake pops and a scoop of ice cream creates an indulgent treat that’s hard to resist!
- Whipped Cream: Serve with a dollop on the side, inviting each guest to add a creamy element that harmonizes blissfully with your sweet treats.
- Cinnamon Hot Chocolate: As the weather cools, a comforting cinnamon hot chocolate offers a cozy pairing, enhancing the flavors of fall beautifully.
- Apple Slices with Nut Butter: For a fresh, healthy option, pair with crisp apple slices dipped in nut butter; the crunch and flavors balance sweetness exquisitely.
Expert Tips for Pumpkin Cake Pops
- Cool Before Crumbling: Ensure your cake is completely cool before crumbling; a warm cake can create a messy mixture that’s challenging to work with.
- Chill for Shape: Freeze the rolled cake balls for at least 1 hour to ensure they maintain their shape during the coating process.
- Quality Matters: Use high-quality candy melts for a smooth, glossy coating. This will enhance both the flavor and appearance of your pumpkin cake pops.
- Moisture Control: If your cake pops fall off the stick, the mixture may be too moist. Make sure to balance the frosting content and chill adequately.
- Let Them Set: Allow decorated cake pops to set at room temperature for 15-30 minutes until the coating hardens, ensuring they’re ready for all to enjoy!
Pumpkin Cake Pops Variations & Substitutions
Feel free to get creative with these delightful treats; there are so many ways to customize your Pumpkin Cake Pops for a unique twist!
- Gluten-Free: Swap the cake mix for a gluten-free version and make the same delicious pops without the gluten.
- Sugar-Free: Use sugar-free frosting and cake mix for a lighter treat that still satisfies your sweet tooth.
- Spiced-Up: Add a teaspoon of cinnamon or nutmeg to amplify the pumpkin spice flavor for a warming experience.
- Chocolate Lovers: Mix in mini chocolate chips into the cake mixture for extra sweetness and a fun texture.
- Nutty Delight: Fold in crushed walnuts or pecans to add a pleasant crunch that contrasts beautifully with the soft cake.
Experimenting can be so rewarding! You could even pair these pops with some warm apple cider as a cozy refreshment, or if you’re feeling adventurous, try making Chocolate Cherry Cake pops for a different flavor explosion!
Make Ahead Options
These Pumpkin Spice Cake Pops are perfect for meal prep enthusiasts looking to save time during busy fall weeks! You can prepare and roll the cake mixture into balls up to 24 hours in advance; simply place them on a parchment-lined baking sheet and freeze. When you’re ready to finish, take the frozen cake balls and dip them in the melted orange candy, following the decorating steps as usual. This method maintains their delightful taste and texture, ensuring they’re just as delicious as if made fresh on the day. Plus, finished cake pops can be kept at room temperature for up to 3 days or stored in the fridge for a week, giving you sweet options for gatherings without the last-minute rush!
How to Store and Freeze Pumpkin Cake Pops
Room Temperature: Store pumpkin cake pops in an airtight container at room temperature for up to 3 days to keep them fresh and tasty.
Fridge: If you want to enjoy them longer, keep the cake pops in the fridge for up to 1 week; just make sure they are in a sealed container to maintain their moisture.
Freezer: For extended storage, freeze the pumpkin cake pops in an airtight container for up to 3 months. Thaw in the fridge overnight before serving.
Reheating: There’s no need to reheat these treats, but if they become chilly after freezing, let them sit at room temperature for about 15 minutes to soften slightly before enjoying!
Pumpkin Spice Cake Pops Recipe FAQs
How do I choose the best pumpkin spice cake mix?
Opt for a pumpkin spice cake mix that features natural spices for the most authentic flavor. It’s best if it doesn’t contain artificial flavors or preservatives. If you’re feeling adventurous, you can even try making your own mix by blending flour, baking powder, sugar, pumpkin spice, and salt!
Can I store my pumpkin cake pops?
Absolutely! Store your pumpkin spice cake pops in an airtight container at room temperature for up to 3 days. For even longer storage, place them in the refrigerator for up to a week, ensuring they remain sealed to prevent drying out.
What’s the best way to freeze pumpkin spice cake pops?
To freeze your cake pops, first, ensure they are fully set and decorated. Then, place them individually on a baking sheet lined with parchment paper and freeze until solid (about 1 hour). Once frozen, transfer them into an airtight container or freezer-safe bag, separating layers with parchment paper. They can be stored this way for up to 3 months!
What should I do if my cake pops fall off the stick?
If your cake pops are falling off the stick, it may be due to an overly moist mixture. Ensure your cake crumbs and frosting are mixed thoroughly but not too wet. Additionally, freeze the shaped cake balls for at least 1 hour before dipping them into the candy coating to help maintain their shape.
Are pumpkin cake pops safe for people with allergies?
Always check the labels of your ingredients! The pumpkin spice cake mix and cream cheese frosting may contain common allergens like eggs, dairy, wheat, and nuts. For allergies, there are gluten-free cake mixes available. If you’re making these for others, be sure to ask about any dietary restrictions to ensure everyone can enjoy these delicious treats.
Deliciously Moist Pumpkin Cake Pops for Cozy Fall Treats
Ingredients
Equipment
Method
- Preheat your oven to 350°F (175°C). Prepare your pumpkin spice cake mix according to the package instructions, usually mixing with eggs, oil, and water until smooth. Pour the batter into a greased baking pan and bake for 25–30 minutes, or until a toothpick inserted in the center comes out clean. Allow the cake to cool completely on a wire rack.
- Once your pumpkin spice cake has cooled, gently crumble it into fine crumbs using your hands in a large mixing bowl.
- Take your cream cheese frosting and add it directly to the crumbled cake. Use a spatula to mix until fully combined and moist.
- Roll about a tablespoon of the mixture into 1-inch balls and place them on a parchment-lined baking sheet.
- Melt the orange candy melts in a microwave-safe bowl in 30-second intervals until smooth.
- Dip the end of each cake pop stick into the melted candy, then insert it into the center of each ball.
- Dip each cake pop into the melted orange candy coating, rotating to ensure an even coating.
- Shape small pieces of green fondant or candy into stems and press them onto the tops of the cake pops.
- Using a piping bag filled with melted chocolate, pipe fun faces or designs on each pumpkin cake pop.
- Arrange the cake pops on a platter and enjoy!
Leave a Reply