
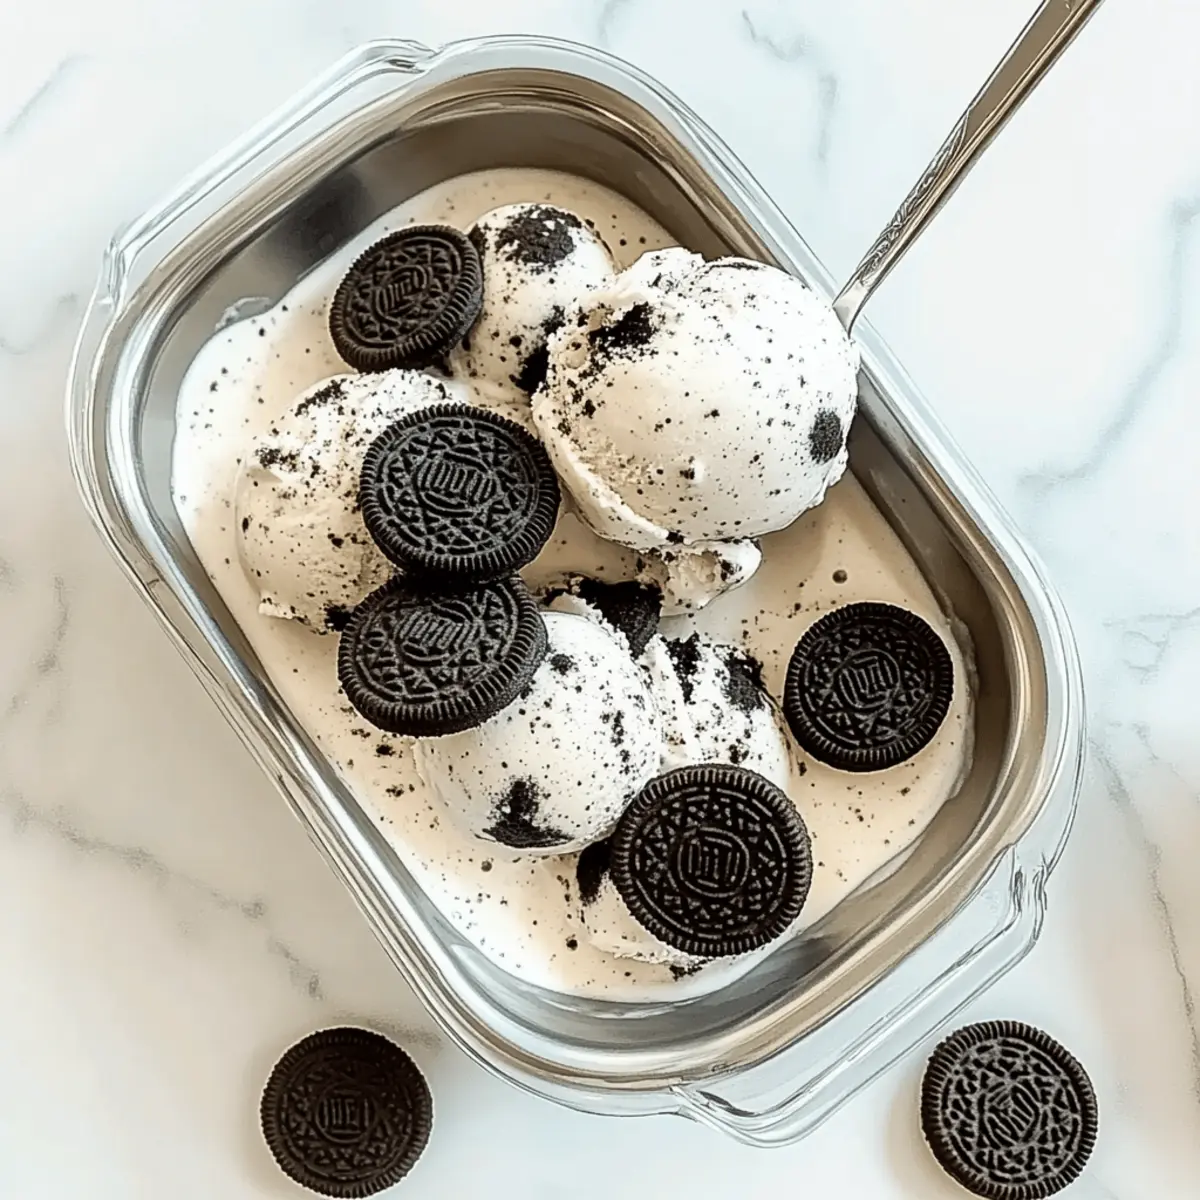
Who knew that a creamy, dreamy bowl of homemade Oreo ice cream could be whipped up in just 10 minutes? This recipe for No-Churn Oreo Ice Cream is not only egg-free but also completely customizable, making it the perfect guilt-free indulgence for any warm evening or cozy binge-watching session. As I stirred together the rich heavy cream and sweetened condensed milk, the promise of a velvety treat with a nostalgic crunch filled the air. Whether you’re entertaining friends, celebrating a special occasion, or simply craving a midnight snack, this dessert is sure to impress and delight. Plus, the best part? You can mix in your favorite treats for a personalized touch! Ready to make a scoop of magic? Let’s dive in!
Why Make Homemade Oreo Ice Cream?
Convenience: This no-churn recipe lets you whip up a delicious dessert in just 10 minutes, perfect for busy nights.
Customizable: Add your favorite mix-ins like fresh berries or a peanut butter swirl for a personal touch.
Guilt-Free Indulgence: With no eggs and simple ingredients, you can enjoy a creamy treat without the fuss.
Crowd-Pleaser: Friends and family will rave about the rich flavor and satisfying crunch, making it an ideal dessert for gatherings.
Whether you’re looking for a sweet finish to dinner or a late-night snack, this homemade Oreo ice cream is sure to hit the spot. Pair it with a drizzle of chocolate sauce or serve alongside a slice of Creamy Lemon Squares for an irresistible treat!
Homemade Oreo Ice Cream Ingredients
This delightful treat comes together with just a few simple ingredients!
For the Base
- Heavy Whipping Cream – The foundation of your ice cream, providing that rich and creamy texture.
- Sweetened Condensed Milk – Essential for sweetness and creating a velvety consistency.
- Vanilla Extract – Elevates the flavor; opt for pure vanilla for the best results.
For the Mix-Ins
- Oreo Cookies – The star of the show, adding a delicious crunch and familiar flavor. Feel free to chop different cookies for unique twists!
As you gather these ingredients for your homemade Oreo ice cream, remember that the magic lies in the mix-ins and how you personalize this creamy delight!
Step‑by‑Step Instructions for Homemade Oreo Ice Cream
Step 1: Chop Cookies
Begin by unwrapping your Oreo cookies and chopping them into small chunks, aiming for roughly ½-inch pieces. Reserve a handful of pieces for topping the ice cream later. This preparation will enhance your homemade Oreo ice cream with delightful bursts of crunch throughout the creamy base.
Step 2: Whip Cream
In a large mixing bowl, pour in your cold heavy whipping cream. Using an electric mixer, whip the cream on medium speed for about 3-5 minutes, or until medium-firm peaks form. The cream should be thick, fluffy, and hold its shape well, indicating it’s ready to be combined with the other ingredients for that luscious homemade Oreo ice cream.
Step 3: Combine Ingredients
Gently fold in the sweetened condensed milk and vanilla extract into the whipped cream. Use a spatula to lift and gently turn the mixture without deflating the whipped cream, creating a smooth and creamy texture. This step is essential for achieving the rich base of your homemade Oreo ice cream, blending sweetness and flavor seamlessly.
Step 4: Add Cookies
Now, it’s time to incorporate the chopped Oreo cookies into the mixture. Sprinkle about ¾ of your reserved Oreo chunks into the creamy base and fold them in gently. Make sure the cookies are evenly distributed, ensuring that every scoop of your homemade Oreo ice cream has that beloved cookie crunch integrated throughout.
Step 5: Freeze
Transfer the ice cream mixture into a metal pan. This material is ideal for helping the homemade Oreo ice cream freeze evenly. Evenly sprinkle the remaining Oreo pieces on top for a decorative touch. Cover the pan tightly with plastic wrap, and place it in the freezer for 4-6 hours, or until solid.
Step 6: Serve
Once your homemade Oreo ice cream is ready, remove it from the freezer and let it sit at room temperature for about 5-10 minutes for easy scooping. Use an ice cream scoop to serve generous portions into bowls. For a delightful finishing touch, consider drizzling chocolate sauce or adding fresh strawberries on top for an extravagant treat that everyone will love.
Homemade Oreo Ice Cream Variations
Ready to sprinkle some fun into your ice cream creation? Let’s explore a few sweet twists that’ll elevate your homemade Oreo ice cream experience!
-
Mint Chocolate: Substitute Oreos with mint chocolate cookies for a refreshing minty twist. This uplift can transport you to an enchanted chocolate garden with every creamy scoop.
-
Peanut Butter Swirl: Add dollops of creamy peanut butter directly into the mix for an indulgent nutty flavor. The rich peanut butter contrasts beautifully with the cookies, creating a delightful surprise in every scoop.
-
Fruit Fusion: Incorporate crushed strawberries or pureed raspberries to introduce a pop of tartness. It’s a wonderful way to balance the sweetness and adds vibrant color to your dessert.
-
Nut-Free Delight: Replace Oreo cookies with crushed chocolate candy bars while omitting any nuts. This creates a deliciously crunchy treat that’s perfect for those with nut allergies.
-
Vegan Option: Use coconut cream in place of heavy cream and opt for dairy-free sweetened condensed milk for a creamy, plant-based delight. The tropical flavor of coconut makes this version uniquely delicious.
-
Cookie Butter Bliss: Fold in swirls of cookie butter for a warming spice that resonates beautifully with the rich creaminess. This unexpected ingredient elevates your ice cream to a whole new level.
-
Chocolate Crunch: Mix in crushed chocolate wafer cookies alongside the Oreos for an extra layer of chocolatey goodness. The added texture makes every bite extra satisfying!
As you dive into these variations, don’t forget that your choice of toppings can also elevate this dessert. Consider serving it with a side of your favorite cookie pie or a generous drizzle of chocolate sauce for an unforgettable finish!
How to Store and Freeze Homemade Oreo Ice Cream
Fridge: Store in an airtight container in the fridge for up to 3 days; however, the creaminess may diminish.
Freezer: Keep your homemade Oreo ice cream in a tightly sealed container for up to 2 weeks. Press plastic wrap against the surface to prevent freezer burn.
Reheating: For easier scooping, let the ice cream sit at room temperature for 5-10 minutes before serving.
Serving Freshness: Always enjoy your ice cream soon after preparing, as it tastes best when freshly made!
Make Ahead Options
These delightful Homemade Oreo Ice Cream treats are perfect for meal prep enthusiasts! You can prepare the ice cream base up to 24 hours in advance by following the mixing steps and placing the mixture in the freezer immediately. To maintain quality, make sure the ice cream is stored in an airtight container to prevent freezer burn. If you wish to add toppings, it’s best to do so right before serving, ensuring they’ll stay crispy against the creamy goodness. When ready to indulge, simply scoop out portions after letting it sit at room temperature for 5-10 minutes for easy serving, and enjoy your homemade treat with minimal effort!
What to Serve with Creamy No-Churn Oreo Ice Cream
Indulge in a delightful dessert experience by pairing your homemade Oreo ice cream with these tempting accompaniments!
-
Chocolate Sauce: Drizzle rich chocolate sauce on top for an extra touch of sweetness and indulgence. It creates a decadent contrast with the creamy base.
-
Fresh Berries: Serve with a medley of mixed berries like strawberries and raspberries for a refreshing burst of flavor that balances the richness of the ice cream.
-
Waffle Cones: Scoop your homemade Oreo ice cream into crispy homemade waffle cones for a fun and crunchy treat that’s perfect for summer evenings.
-
Caramel Swirl: Add a luscious homemade caramel swirl through the ice cream for a delightful sweet-and-salty flavor combination that enhances each bite.
-
Chopped Nuts: Sprinkle a handful of crushed almonds or walnuts on top for a delightful crunchiness, adding an exciting texture to this creamy treat.
-
Coconut Flakes: Toasted coconut flakes bring a tropical flair, adding chewiness and enriching the flavor profile of your homemade Oreo ice cream.
-
Mint Sprigs: Fresh mint leaves as a garnish can bring a refreshing twist, enhancing the dessert’s presentation while also elevating its flavor.
-
Dairy-Free Options: If you’re catering to vegan friends, serve alongside coconut milk whipped cream for a dairy-free alternative that complements the ice cream beautifully.
Expert Tips for Homemade Oreo Ice Cream
- Choose Cold Cream: Start with cold heavy whipping cream to achieve the best texture and volume when whipping. This is crucial for your homemade Oreo ice cream.
- Gentle Folding: Use a spatula to gently fold in the sweetened condensed milk and chopped cookies without deflating the whipped cream to maintain a light and airy texture.
- Metal Pan Advantage: Freezing the ice cream in a metal pan helps it freeze more evenly, promoting a creamier consistency.
- Serving Snap: Let the ice cream sit at room temperature for 5-10 minutes before scooping to make serving easier and ensure each scoop is perfect.
- Mix-in Magic: Experiment with different cookies or mix-ins—like crushed mint chocolate or fruit—to customize your homemade Oreo ice cream and elevate flavors.
Homemade Oreo Ice Cream Recipe FAQs
How do I choose the right cookies for this recipe?
Absolutely! When selecting your Oreo cookies, look for ones that are fresh and free of dark spots or any signs of aging. This ensures maximum flavor and crunch in your homemade Oreo ice cream. If you’re feeling adventurous, consider using flavored Oreos or even other cookie varieties for a delightful twist.
What’s the best way to store homemade Oreo ice cream?
To keep your homemade Oreo ice cream at its best, store it in an airtight container in the freezer for up to 2 weeks. Be sure to press plastic wrap directly onto the surface before sealing the container; this prevents freezer burn and keeps the ice cream creamy and delicious!
Can I freeze the homemade Oreo ice cream for longer?
While I recommend enjoying your ice cream within 2 weeks for optimal freshness, you can freeze it for up to 3 months. Just make sure it’s stored in a well-sealed container, and allow it to sit at room temperature for about 10 minutes for easier scooping when you’re ready to enjoy.
What if my whipped cream doesn’t reach the right consistency?
No worries! If your whipped cream is too soft and doesn’t hold peaks, it may need more whipping. Take your electric mixer and beat the cream on high speed until it thickens up—just be sure not to overwhip, or you might end up with butter! Aim for those beautiful medium-firm peaks that make your homemade Oreo ice cream fluffy and light.
Can I make this recipe nut-free or vegan?
Very much so! To make your homemade Oreo ice cream nut-free, simply swap out the Oreos for crushed chocolate candy bars and omit any nut mix-ins. For a vegan option, you can use coconut cream instead of heavy whipping cream and ensure that your sweetened condensed milk is dairy-free. Remember, customization is part of the fun!
How can I make sure my ice cream stays creamy?
To ensure your homemade Oreo ice cream stays creamy and doesn’t become icy, be sure to whip the cream properly and avoid any substitutions like light cream or milk. Using a metal pan for freezing not only aids in an even freeze but also helps maintain that velvety texture you crave. Letting it sit at room temperature before serving also enhances the scooping experience. Enjoy!
Creamy Homemade Oreo Ice Cream That's Sure to Delight
Ingredients
Equipment
Method
- Chop the Oreo cookies into small chunks, reserving a handful for topping later.
- Whip the cold heavy whipping cream on medium speed until medium-firm peaks form, about 3-5 minutes.
- Gently fold in the sweetened condensed milk and vanilla extract into the whipped cream.
- Incorporate the chopped Oreo cookies, reserving some for later, and fold gently.
- Transfer the mixture into a metal pan, sprinkle the reserved cookie pieces on top, and freeze for 4-6 hours or until solid.
- Remove from freezer and let sit for 5-10 minutes before scooping.
Leave a Reply