
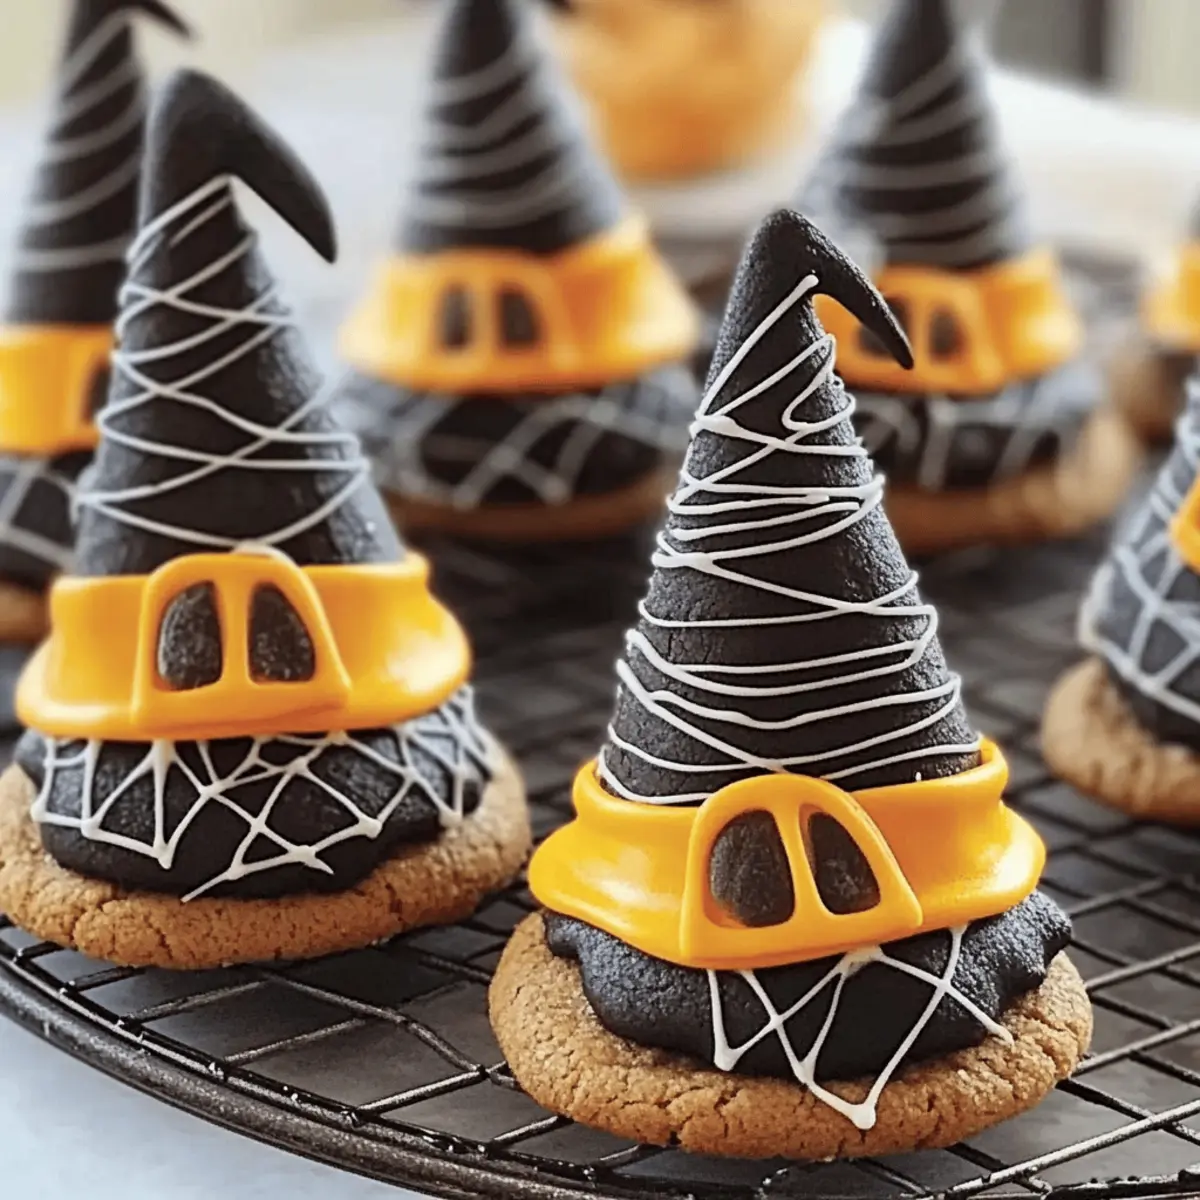
As I strolled through the aisles of my local grocery store, the vibrant Halloween decorations caught my eye, sparking a whirlwind of festive inspiration. That’s when I decided it was time to bake up some Fun Halloween Witch Hat Cookies! These enchanting treats not only balance delicious chocolatey flavors with whimsical designs but are also a breeze to whip up. Perfect for little hands to join in, you can customize them to match any Halloween theme, ensuring they’re a hit at any gathering. From playful icing hues to creative toppings, your imagination is the only limit. Are you ready to cast a spell in your kitchen this Halloween? Let’s dive into the delicious magic of these delightful cookies!
Why Are These Witch Hat Cookies Special?
Kid-friendly Fun: These Fun Halloween Witch Hat Cookies invite creativity for both kids and adults. A perfect opportunity for young chefs to get messy with colors!
Quick Preparation: Simplifying the baking process, you’ll use cake mix which minimizes prep time, letting you enjoy more festive fun with your family.
Festive Customization: With a rainbow of icing colors and decorations, you can easily adapt them for any Halloween theme, just like my Strawberry Cheesecake Cookies or whimsical Cinnamon Roll Cookies.
Crowd Pleaser: Whether at parties or goodie bags, these cookies are guaranteed to enchant every guest, turning any gathering into a sweet celebration!
Delicious Texture: Expect chewy, chocolatey goodness that pairs beautifully with the whimsical hat design, making each bite a delightful treat.
Fun Halloween Witch Hat Cookie Ingredients
• Get ready to whip up these playful treats!
For the Cookie Base
- Favorite Cake Mix – This simple base ensures sweetness and saves time; try substituting with a homemade chocolate cake for extra love.
- Store Bought Chocolate Cookies – An easy shortcut to a delicious cookie base; feel free to opt for your homemade version to enhance the treat’s charm.
For the Witch Hats
- Sugar Cones – They provide the iconic witch hat shape, and there’s no substitute that can match their structure.
- Black Color Mist Food Coloring Spray – Achieves a spooky finish on the cones; if unavailable, black icing serves as a festive alternative.
For Icing and Decoration
- Creamy White Decorator Icing – This is your main icing for decoration; consider royal icing if you prefer a firmer finish for stability.
- Lemon Yellow Icing Color – Adds a cheerful brightness to your decorations; natural dyes can be substituted for a healthier touch.
- Rose, Violet, Golden Yellow, & Orange Icing Colors – These vibrant colors enhance the festive spirit; feel free to swap with any food colors that match your Halloween theme.
Unleash your creativity with these Fun Halloween Witch Hat Cookies, and let the festive spirit guide your decorating!
Step‑by‑Step Instructions for Fun Halloween Witch Hat Cookies
Step 1: Prepare the Cones
Preheat your oven to 350°F (175°C). Begin by mixing your favorite cake mix according to the package instructions. Spoon about 2 tablespoons of the batter into each sugar cone, filling them about halfway. Place the filled cones on a baking sheet and bake for 15–18 minutes, or until a toothpick inserted comes out clean. Allow them to cool completely before handling.
Step 2: Color the Cones
Once the sugar cones have cooled, carefully trim any excess cake from the top for a clean finish. Use black color mist food coloring spray to coat the cones evenly, achieving that spooky look that makes these Fun Halloween Witch Hat Cookies shine. Let the colored cones dry completely to prevent any smudging when you assemble them.
Step 3: Tint the Icing
While waiting for the cones to dry, divide your creamy white decorator icing into separate bowls. Add drops of lemon yellow and your desired colors like rose, violet, golden yellow, and orange for a festive touch. Mix thoroughly until vibrant hues emerge. Prepare piping bags for each color to make decorating easy as you assemble your cookies.
Step 4: Assemble the Hats
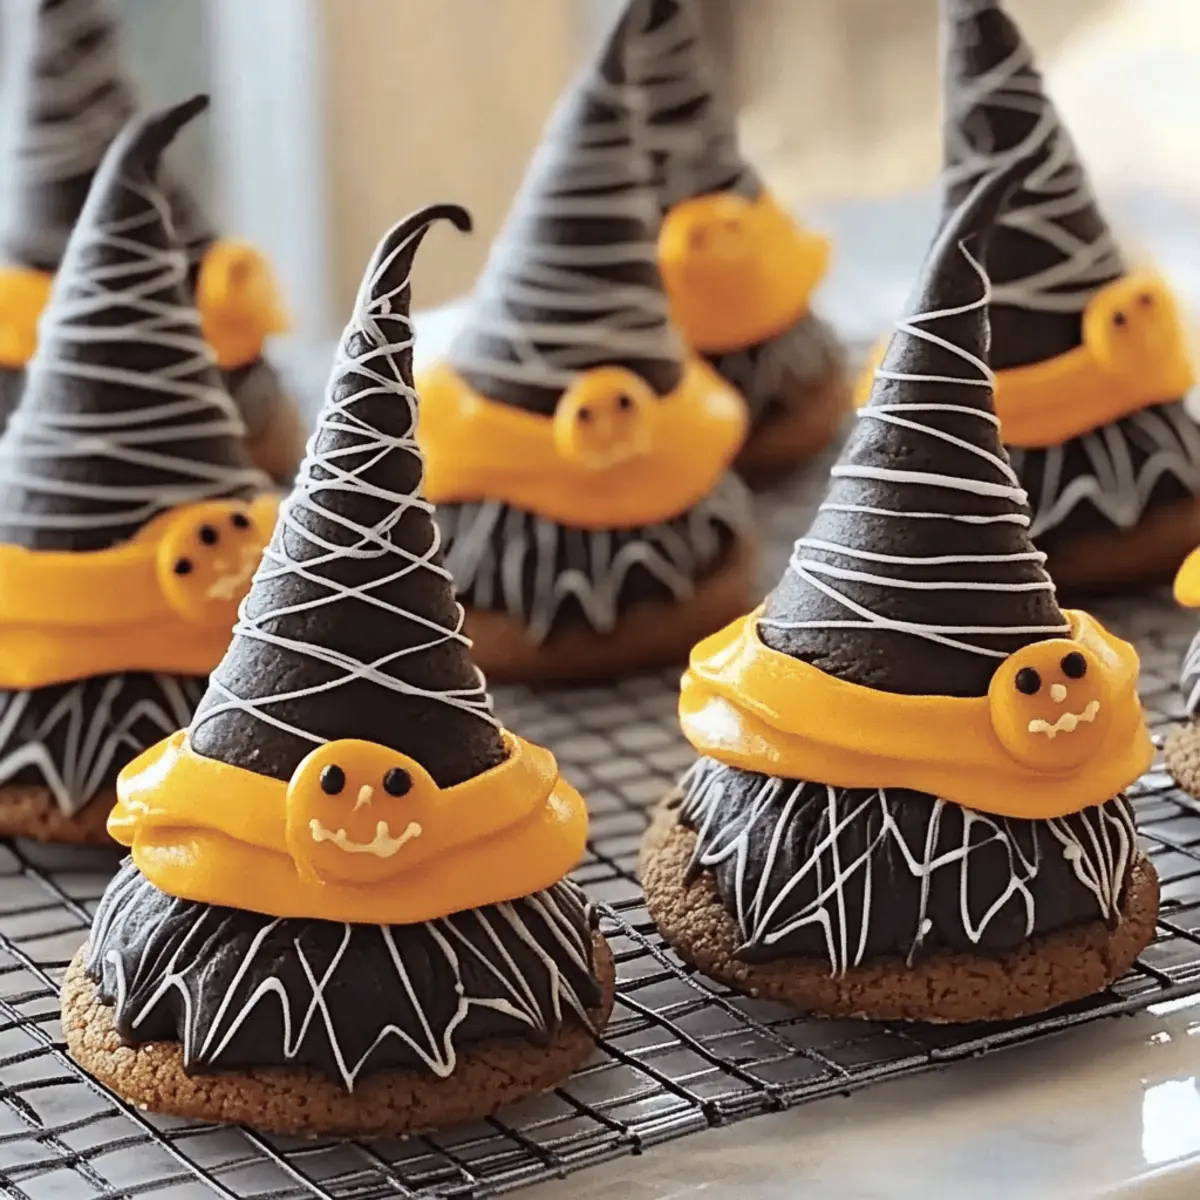
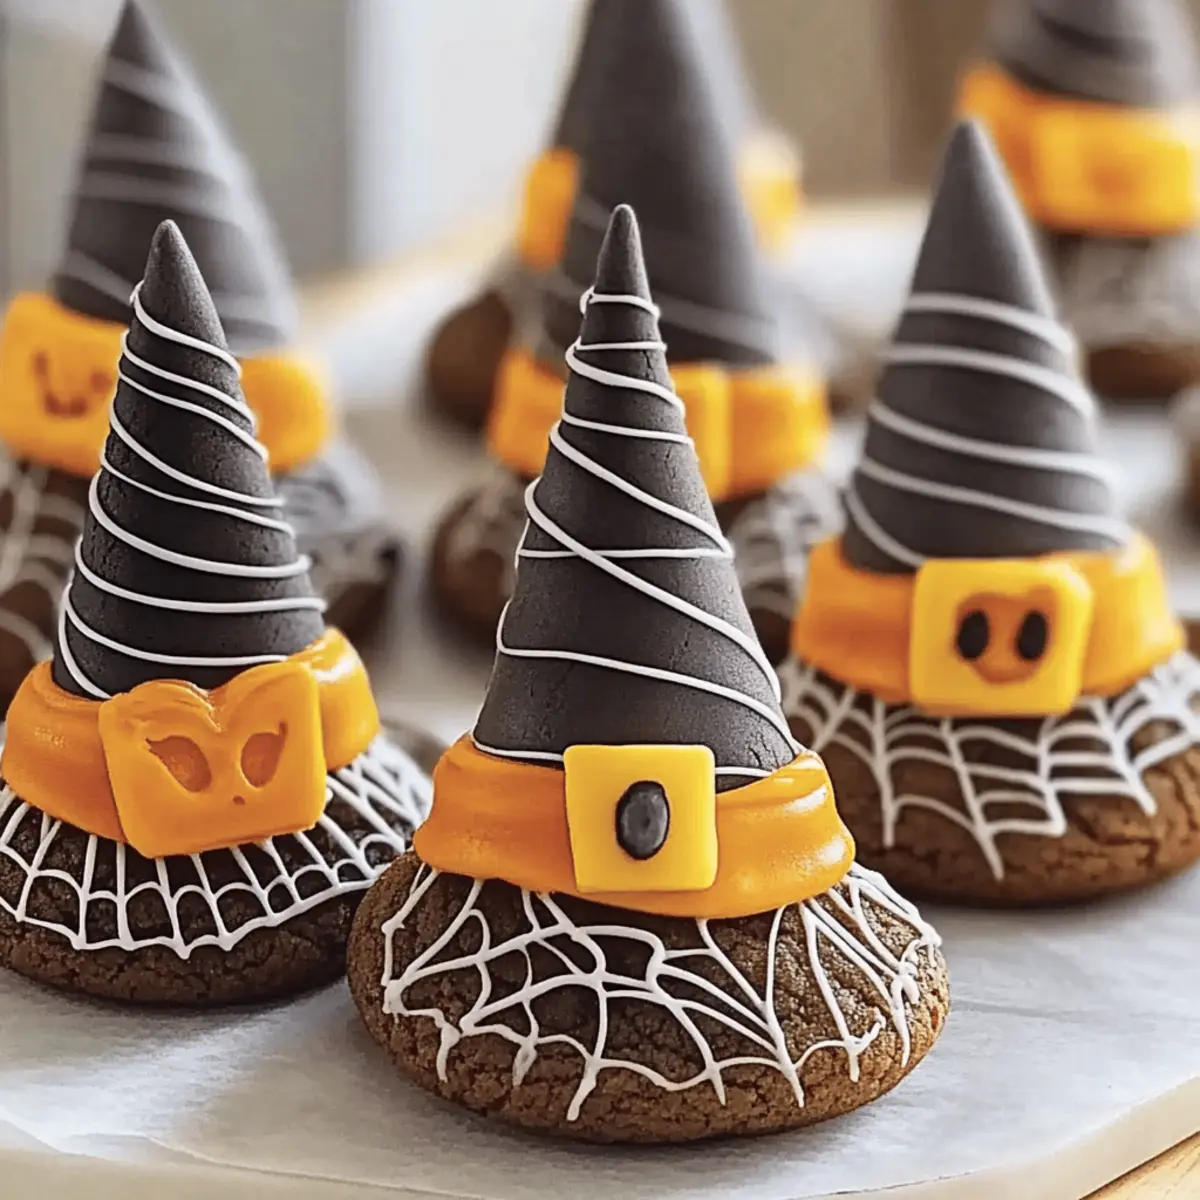
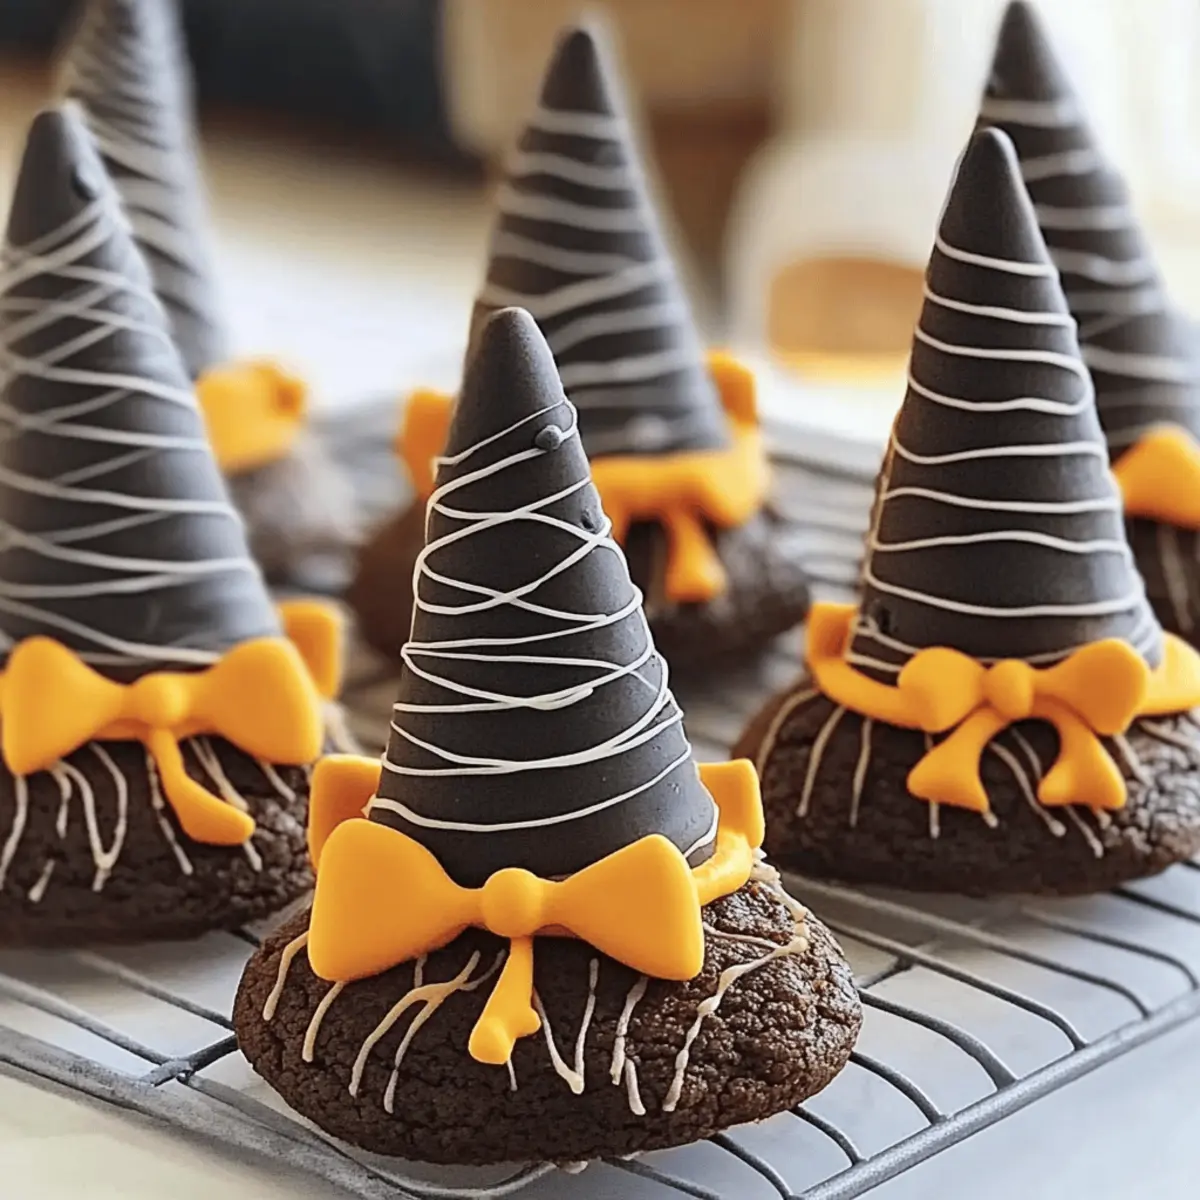
Take your cooled chocolate cookies and pipe a ring of orange icing on top. Gently place a black-coated sugar cone in the center of each cookie, pressing lightly to secure it in place. Use additional orange icing around the base of the cone to ensure it adheres well, creating the whimsical hats that define these Fun Halloween Witch Hat Cookies.
Step 5: Finish with Details
To add some magical touches, pipe small yellow buckles around the sugar cones using your lemon yellow icing. You can create a square shape to mimic a belt buckle, or get creative with other designs. Allow the decorations to dry completely before serving or packaging these delightful cookies, ensuring they are both beautiful and delicious.
Storage Tips for Fun Halloween Witch Hat Cookies
- Room Temperature: Store cookies in an airtight container for up to 5 days to keep them fresh and chewy, perfect for enjoying after your Halloween festivities.
- Fridge: If you live in a warm climate, you can extend freshness by placing the cookies in the fridge; just remember to seal them well to prevent drying.
- Freezer: For longer storage, freeze the assembled cookies individually for up to 3 months. Thaw at room temperature before serving for best texture.
- Reheating: If you prefer slightly warm cookies, reheat in a microwave for about 10 seconds, ensuring not to overheat and maintain the delightful texture of these Fun Halloween Witch Hat Cookies.
Expert Tips for Fun Halloween Witch Hat Cookies
• Drying Time Matters: Allow the black spray on your sugar cones to dry completely before assembly, preventing any unwanted smudging.
• Icing Timing: Ice your cookies promptly after spraying the cones to ensure better adherence of the icing, ensuring your Fun Halloween Witch Hat Cookies stay together.
• Trimming Skills: Use a sharp knife for trimming the cooled cones; this will create clean edges and enhance the appearance of your whimsical hats.
• Experiment with Colors: Don’t hesitate to try unique icing colors like green or pink for a non-traditional twist on your Fun Halloween Witch Hat Cookies.
• Mini Versions: Consider making mini witch hats for a delightful addition to goodie bags—these smaller treats are easy for little hands to enjoy!
Fun Halloween Witch Hat Cookies Variations
Feel free to let your creativity run wild with these fun and festive twists to make the Halloween Witch Hat Cookies uniquely yours!
-
Colorful Icing: Switch up the icing colors to vibrant greens or purples for a more playful look, perfect for enchanting Halloween parties.
Imagine the joy of kids choosing their favorite colors—it’s all about fun and imagination! -
Flavor Variations: Use pumpkin spice cake mix instead of chocolate for a seasonal twist that brings the flavors of fall to your cookies.
This little change can cast a deliciously aromatic spell across your kitchen, offering a true taste of autumn. -
Textural Crunch: Add crushed pretzels or toffee bits to the cookie batter for a delightful crunch, giving every bite a surprise.
The texture contrast can make the cookies even more enjoyable to eat, doubling the fun at your Halloween celebrations! -
Candy Decor: Decorate your cookie hats with gummy candies or mini marshmallows for an extra pop of sweetness and llama fun!
Incorporating different treats can turn the cookies into a whimsical candy wonderland, sparking joy in little hearts. -
Mini Treats: Bake mini versions of the cookies using smaller cones; these are perfect for serving at parties or including in goodie bags.
They create a delightful assortment of treats, ensuring every guest can share in the magical fun.
These variations are the perfect way to keep the spirit lively and exciting, just like my Blueberry Heaven Cookies or Pistachio Cream Cookies. Enjoy baking!
Make Ahead Options
These Fun Halloween Witch Hat Cookies are perfect for busy home cooks looking to save time! You can prepare the sugar cones filled with cake batter up to 24 hours in advance; simply bake them, allow them to cool, and store them in an airtight container. The black-coated cones can also be made ahead, just remember to let them dry completely to prevent smudging. Additionally, the decorator icing can be tinted and stored in piping bags in the refrigerator for up to 3 days. When you’re ready to serve, simply assemble the cookies by piping the orange icing on top, placing the prepared cones, and finishing with decorative details; your festive treats will be just as delightful and fresh!
What to Serve with Fun Halloween Witch Hat Cookies
There’s nothing like a festive treat to make your Halloween gathering extra special, so why not create a spread that complements these enchanting cookies?
-
Spooky Punch: A fruity, vibrant punch adds a refreshing touch, providing a perfect contrast to the rich chocolate cookies. Think pomegranate juice mixed with sparkling water for a festive fizz.
-
Candy Corn Medley: Serve a fun mix of candy corn and nuts for a delightful crunch. The sweet candy contrasts nicely with the chewy texture of the cookies, making for a playful combination.
-
Mini Pumpkin Quiches: These savory bites add a satisfying contrast to the cookies’ sweetness. Packed with flavors, they introduce a warm, homey element to your festive table.
-
Ghostly Marshmallow Pops: Create whimsical marshmallow pops dipped in white chocolate and decorated like little ghosts. They’re a sugary delight and visually captivating for the kids!
-
Creepy Veggie Platter: A colorful array of fresh vegetables arranged like a Halloween monster, served with a creamy dip. The crunchiness provides a nice texture balance to the cookies.
-
Apple Cider: Warm or chilled apple cider with hints of cinnamon will evoke cozy autumn vibes. This drink pairs beautifully with the chocolatey flavors of the cookies.
These delightful pairings will create a magical and festive atmosphere that ensures your Halloween celebration is memorable!
Fun Halloween Witch Hat Cookies Recipe FAQs
What type of cake mix works best for these cookies?
I recommend using chocolate cake mix for a rich flavor, but you can also try pumpkin spice or vanilla for a different spin—just consider your festive theme!
How should I store my Fun Halloween Witch Hat Cookies?
Keep your cookies in an airtight container at room temperature for up to 5 days. If you live in a warm area, you can also store them in the fridge, just be sure they’re sealed properly to avoid drying out.
Can I freeze these cookies?
Absolutely! You can freeze your assembled Fun Halloween Witch Hat Cookies individually for up to 3 months. To do this, place each cookie in a freezer-safe bag or container. When you’re ready to enjoy them, simply thaw at room temperature for the best texture.
What if my cones smudge when I spray them?
To avoid smudging, allow the black spray to dry completely on the sugar cones before assembly. If smudges occur, don’t worry! You can touch up the design with some black icing after assembling.
Can I make these cookies gluten-free?
Yes, you can! Look for a gluten-free cake mix or use a homemade gluten-free chocolate cookie recipe instead of the traditional cookie base—just ensure all ingredients comply with gluten-free standards for peace of mind.
Are there any alternatives for the food coloring?
Certainly! If you prefer a natural option, you can use beet juice for red or purple, turmeric for yellow, and spirulina for green. Just be aware that the colors might not be as vibrant as food coloring, but they’ll keep your treats festive and fun!
Creative Fun Halloween Witch Hat Cookies That Kids Adore
Ingredients
Equipment
Method
- Preheat the oven to 350°F (175°C) and mix the cake mix according to the package instructions. Spoon about 2 tablespoons of batter into each sugar cone, filling halfway. Bake for 15-18 minutes or until a toothpick inserted comes out clean. Let cool completely.
- Trim any excess cake from the top for a clean finish. Spray with black color mist food coloring evenly and let dry completely.
- Divide the creamy white icing into separate bowls. Add drops of yellow and desired colors (rose, violet, golden yellow, and orange). Mix until vibrant hues emerge and prepare piping bags.
- Pipe a ring of orange icing on top of cooled chocolate cookies. Place a black-coated sugar cone in the center and press lightly to secure it. Use additional icing around the base of the cone.
- Pipe small yellow buckles around the sugar cones using lemon yellow icing. Let the decorations dry completely before serving or packaging.
Leave a Reply