
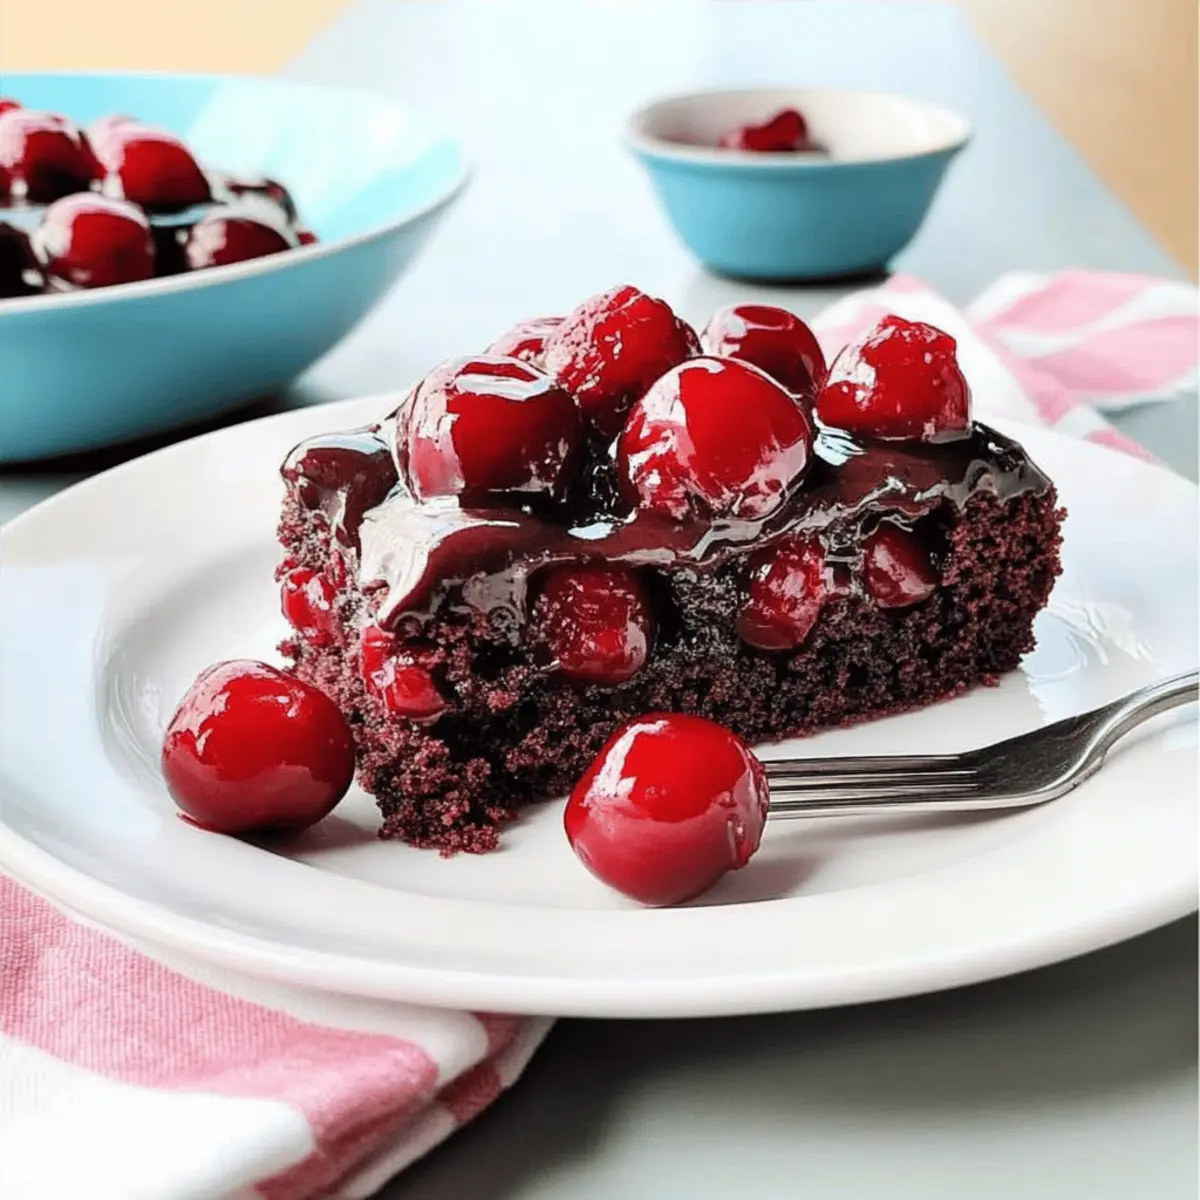
As the sweet aroma of chocolate dances through the kitchen, it’s hard not to reminisce about those cozy family gatherings where dessert was always the highlight. My mom’s Chocolate Cherry Upside-Down Cake has a unique charm that draws people in, making it a beloved vintage recipe in our household. It combines the rich, comforting taste of chocolate with the delightful tartness of cherries, creating an experience that’s both nostalgic and satisfying. The best part? This cake is incredibly easy to whip up, requiring no frosting and minimal fuss, making it the perfect treat for both casual weeknight dinners and special occasions. Are you ready to uncover the magic of this delightful cake? Let’s dive into the steps to create your own slice of chocolate cherry heaven!
Why is this cake a family favorite?
Nostalgic Comfort: Each bite of this Chocolate Cherry Upside-Down Cake transports you back to cherished family gatherings, making it a timeless classic.
Effortless Preparation: With only a few ingredients and no frosting required, you can whip up this delicious treat in no time.
Irresistible Flavor: The combination of rich chocolate and tart cherries creates a perfect harmony that will have everyone asking for seconds.
Versatile Delight: Whether served at a birthday party or a cozy weeknight dinner, this cake is a crowd-pleaser that suits any occasion.
Unique Variations: Feel free to customize it with different fruit fillings or mix-ins, allowing your creativity to shine. Once you’ve tasted this delightful dessert, consider trying the equally delicious Chocolate Oat Cookies or the refreshing Strawberry Crunch Cheesecake for more family-favorite treats!
Chocolate Cherry Upside-Down Cake Ingredients
For the Cake Base
• Chocolate Cake Mix – The foundation of our moist cake; feel free to use a homemade mix for an even richer taste.
• Butter – Imparts a delicious richness; can be swapped for margarine or vegan butter for dairy-free needs.
• Eggs – Provides structure; replace with applesauce for a delightful egg-free version.
• Water – Moistens the mix; consider using milk or coffee to deepen flavor.
For the Cherry Layer
• Cherry Pie Filling – Adds sweetness and creates the iconic upside-down presentation; fresh cherries can enhance the flavor experience.
Enjoy the delightful process of making this Chocolate Cherry Upside-Down Cake, and relish the moments it brings to your family gatherings!
Step‑by‑Step Instructions for Chocolate Cherry Upside Down Cake
Step 1: Prepare Oven and Pan
Preheat your oven to 350°F (175°C). While the oven heats, grab a 9×13-inch baking pan and generously grease it with butter or non-stick spray to ensure the cake releases easily after baking. This is a crucial step for the success of your Chocolate Cherry Upside Down Cake.
Step 2: Layer Cherry Filling
Open your cherry pie filling and spread it evenly across the bottom of the greased pan. Make sure to cover the entire surface, as this layer forms the beautiful topping of your upside-down cake. Set the pan aside and admire the bright red cherries, which will soon create a lovely contrast with the chocolate cake.
Step 3: Mix the Batter
In a mixing bowl, combine the chocolate cake mix, melted butter, eggs, and water. Using an electric mixer, beat the ingredients on medium speed for about 2 minutes until the batter is smooth and well-combined. You want a lovely chocolatey mixture with no lumps, full of promise for your upcoming Chocolate Cherry Upside Down Cake.
Step 4: Pour the Batter
Carefully pour the chocolate cake batter over the cherry filling in the baking pan. Make sure to distribute the batter evenly to ensure uniform baking. The rich batter will encase the cherries, providing a delicious surprise as you serve this vintage dessert.
Step 5: Bake
Place the pan in your preheated oven and bake for 30-35 minutes. Keep an eye on the cake during the last few minutes; it’s done when a toothpick inserted in the center comes out clean. You should see a beautifully risen cake with a soft, set top, indicating your Chocolate Cherry Upside Down Cake is almost ready.
Step 6: Cool and Serve
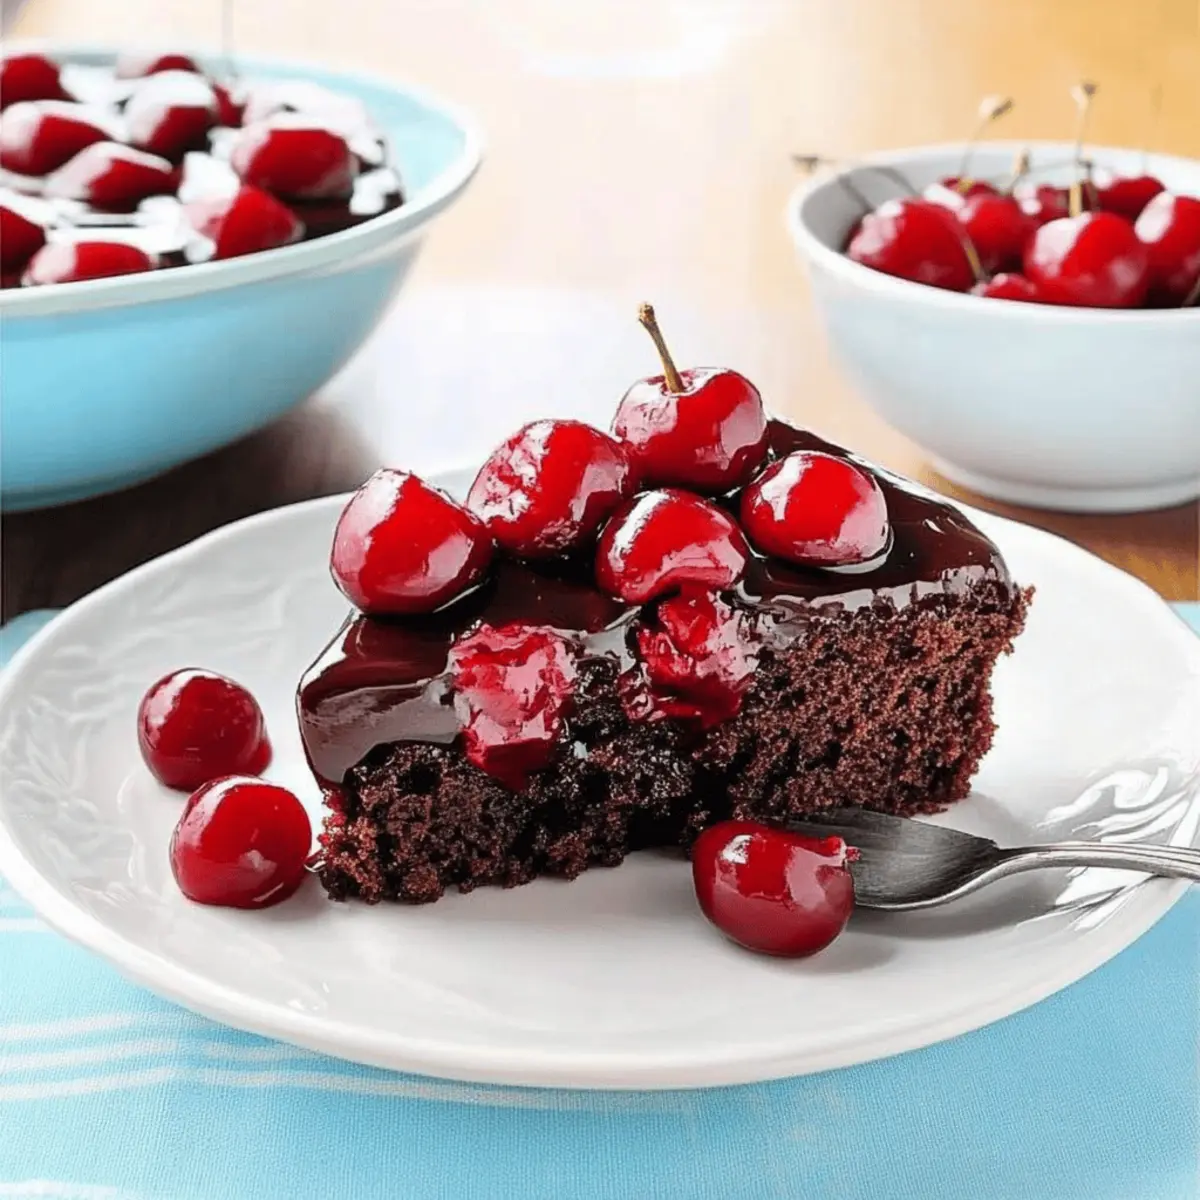
Once baked, remove the pan from the oven and let the cake cool for about 10 minutes. Then, carefully invert it onto a serving platter. Allow the cake to rest for a few moments to let the cherries settle on top. Serve warm or at room temperature, and enjoy the delightful flavors of chocolate and cherries melding together!
Make Ahead Options
These Chocolate Cherry Upside-Down Cakes are perfect for meal prep enthusiasts! You can prepare the cherry filling and batter up to 24 hours in advance. Simply layer the cherry pie filling in the baking pan and cover it tightly with plastic wrap to prevent it from drying out. Next, mix up your chocolate cake batter and refrigerate it separately. When you’re ready to bake, pour the chilled batter over the cherry filling and proceed with the baking instructions as usual. This way, you save time on busy days while still enjoying a dessert that’s just as delicious and fresh as if it were made on the spot!
What to Serve with Mom’s Chocolate Cherry Upside-Down Cake
Indulging in this delightful cake is just the beginning—pair it with complementary sides for the ultimate treat experience.
-
Whipped Cream: The light and airy texture of whipped cream beautifully contrasts the dense cake, creating a delightful balance.
-
Vanilla Ice Cream: A scoop of melty vanilla ice cream adds a creamy touch that enhances the rich chocolate and tart cherries.
-
Chocolate Syrup: Drizzling chocolate syrup over the cake intensifies the chocolate flavor and makes each bite even more indulgent.
-
Fresh Berries: A side of fresh raspberries or strawberries introduces a bright, tangy note, perfectly complementing the cake’s richness.
-
Coffee: A warm cup of coffee pairs wonderfully with the Chocolate Cherry Upside-Down Cake, enhancing its flavors while providing a cozy touch.
-
Hazelnut Spread: A dollop of hazelnut spread adds a nutty sweetness that pairs well with the chocolate and cherry elements, for a luxurious twist.
-
Nuts & Whipped Topping: To add crunch, sprinkle toasted nuts atop a dollop of whipped topping. This contrast elevates the cake while providing an extra layer of texture.
By choosing any of these sides, you can create a memorable dessert experience with your Chocolate Cherry Upside-Down Cake that everyone will love!
Expert Tips for Chocolate Cherry Upside Down Cake
- Watch the Clock: Baking times can vary, so check for doneness a few minutes early. The perfect Chocolate Cherry Upside Down Cake should spring back when gently touched.
- Flip with Care: Inverting the cake when it’s slightly warm helps maintain its shape. Use a smooth, gentle motion to avoid breaking it apart.
- Don’t Overdo the Cherries: Adding too many cherries can weigh the cake down, resulting in a dense texture. Stick to the recommended amount for the best results.
Chocolate Cherry Upside-Down Cake Variations
Feel free to explore these delightful twists that enhance your Chocolate Cherry Upside-Down Cake experience!
-
Fruit Swap: Replace cherry pie filling with peach or pineapple for a tropical flair that offers a whole new taste sensation.
-
Nutty Crunch: Add walnuts or pecans to the batter for a delightful crunch. Not only do they add texture, but they also bring a lovely toastiness that pairs beautifully with chocolate.
-
Chocolate Boost: Stir in chocolate chips for an even richer chocolate experience. They’ll create little pockets of melted goodness throughout your cake.
-
Egg-Free Option: Swap eggs for applesauce or a flaxseed mixture to create a vegan version. The moisture from the applesauce keeps the cake tender and delicious.
-
Milk Alternative: Swap water for almond milk or coffee for a subtle flavor lift. The coffee brings out the chocolate’s richness, making every bite even more decadent.
-
Layered Delight: Slice the finished cake into layers, adding whipped cream or cream cheese frosting between them for an indulgent dessert that’s perfect for celebrations.
-
Spiced Flavor: Incorporate a bit of cinnamon or vanilla extract into the batter for an added depth of flavor. These warm spices enhance the overall taste, giving it a cozy feel.
-
Heat It Up: For the spice lovers, add a pinch of cayenne or jalapeño powder into the batter for a kick that surprises and delights!
Whatever variations you choose, this Chocolate Cherry Upside-Down Cake can be tailored to make every gathering special. If you’re looking for more ways to enjoy sweet treats, don’t miss out on these delicious Fried Strawberry Cheesecake Sandwiches and Strawberry Cheesecake Cookies!
How to Store and Freeze Chocolate Cherry Upside-Down Cake
Room Temperature: Store leftover cake in an airtight container for up to 3 days. This keeps it fresh and moist, perfect for enjoying throughout the week!
Fridge: If you want to extend the life of your cake, refrigerate it in an airtight container for up to a week. Just bring it to room temperature before serving or enjoy it chilled.
Freezer: For longer storage, wrap individual slices in plastic wrap, then place them in a freezer-safe bag. Your Chocolate Cherry Upside-Down Cake can be frozen for up to 3 months.
Reheating: To enjoy a slice, thaw it overnight in the fridge, then warm in the microwave for about 15-20 seconds for that freshly-baked taste!
Chocolate Cherry Upside-Down Cake Recipe FAQs
What should I look for when selecting cherries?
Absolutely! For the best flavor in your Chocolate Cherry Upside-Down Cake, choose ripe cherries that are firm and have a deep red color. Avoid any with dark spots or wrinkles, as those may be overripe. If you opt for cherry pie filling, check the ingredient list to ensure it’s made with real fruit for a more authentic taste.
How can I properly store leftover cake?
Very simple! Store leftover Chocolate Cherry Upside-Down Cake in an airtight container at room temperature for up to 3 days. If you want it to last longer, refrigerate it for up to a week, and just bring it back to room temperature before serving. This method will keep your cake fresh and delicious!
Can I freeze this cake?
Absolutely! To freeze, wrap individual slices of your Chocolate Cherry Upside-Down Cake tightly in plastic wrap, then place them in a freezer-safe bag. This will give you a convenient treat that can last up to 3 months. When you’re ready to enjoy, just thaw it overnight in the fridge, then warm in the microwave for 15-20 seconds for that freshly-baked taste.
What if my cake doesn’t rise properly?
It happens! If your cake doesn’t rise well, it could be due to expired baking ingredients. Always check the expiration dates on your cake mix and leaveners. Also, ensure you haven’t overloaded the cake with too many cherries, as this can weigh it down and affect rising. For best results, stick to the recommended amounts in the recipe.
Can this recipe be made dairy-free or egg-free?
Very much so! To create a dairy-free version, simply substitute the butter with margarine or a vegan butter alternative. For an egg-free option, replace the eggs with a 1/4 cup of applesauce for each egg needed. This keeps the cake moist without compromising on flavor.
How should I serve the Chocolate Cherry Upside-Down Cake?
I often serve this delightful cake warm with a dollop of whipped cream or a scoop of vanilla ice cream on the side! The creaminess balances the tartness of the cherries beautifully. For a more sophisticated touch, sprinkle some chopped nuts on top for added texture. Enjoy your family favorite!
Chocolate Cherry Upside Down Cake: A Family Favorite Treat
Ingredients
Equipment
Method
- Preheat your oven to 350°F (175°C) and grease a 9x13-inch baking pan.
- Spread the cherry pie filling evenly across the bottom of the greased pan.
- In a mixing bowl, combine the chocolate cake mix, melted butter, eggs, and water. Mix on medium speed for about 2 minutes until smooth.
- Pour the batter over the cherry filling in the baking pan.
- Bake for 30-35 minutes, checking for doneness with a toothpick.
- Let the cake cool for 10 minutes, then invert it onto a serving platter and serve warm or at room temperature.
Leave a Reply