
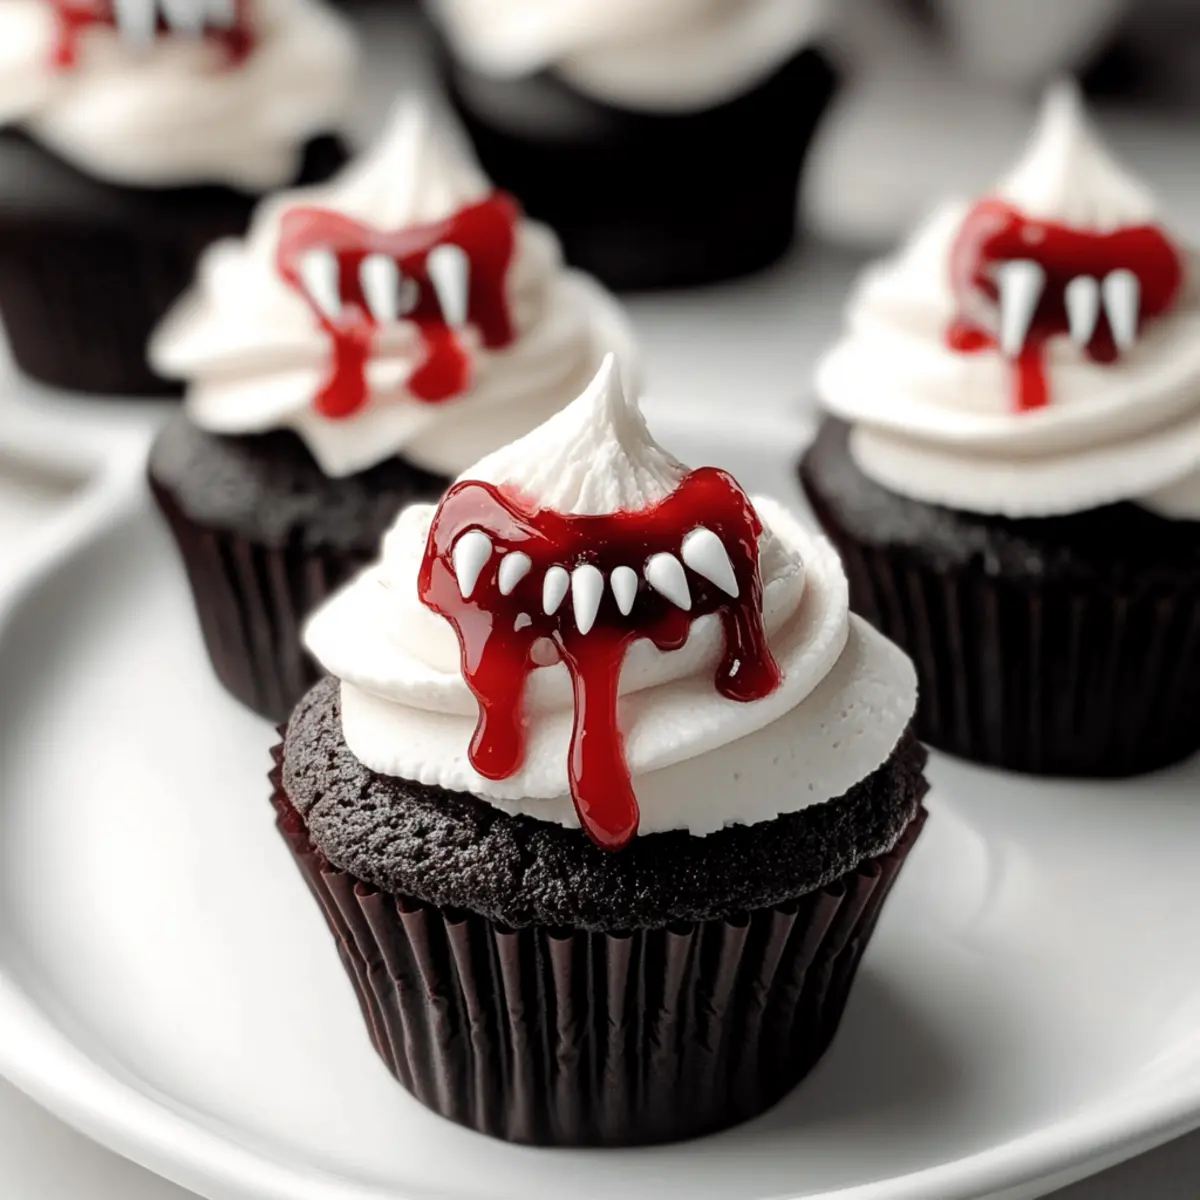
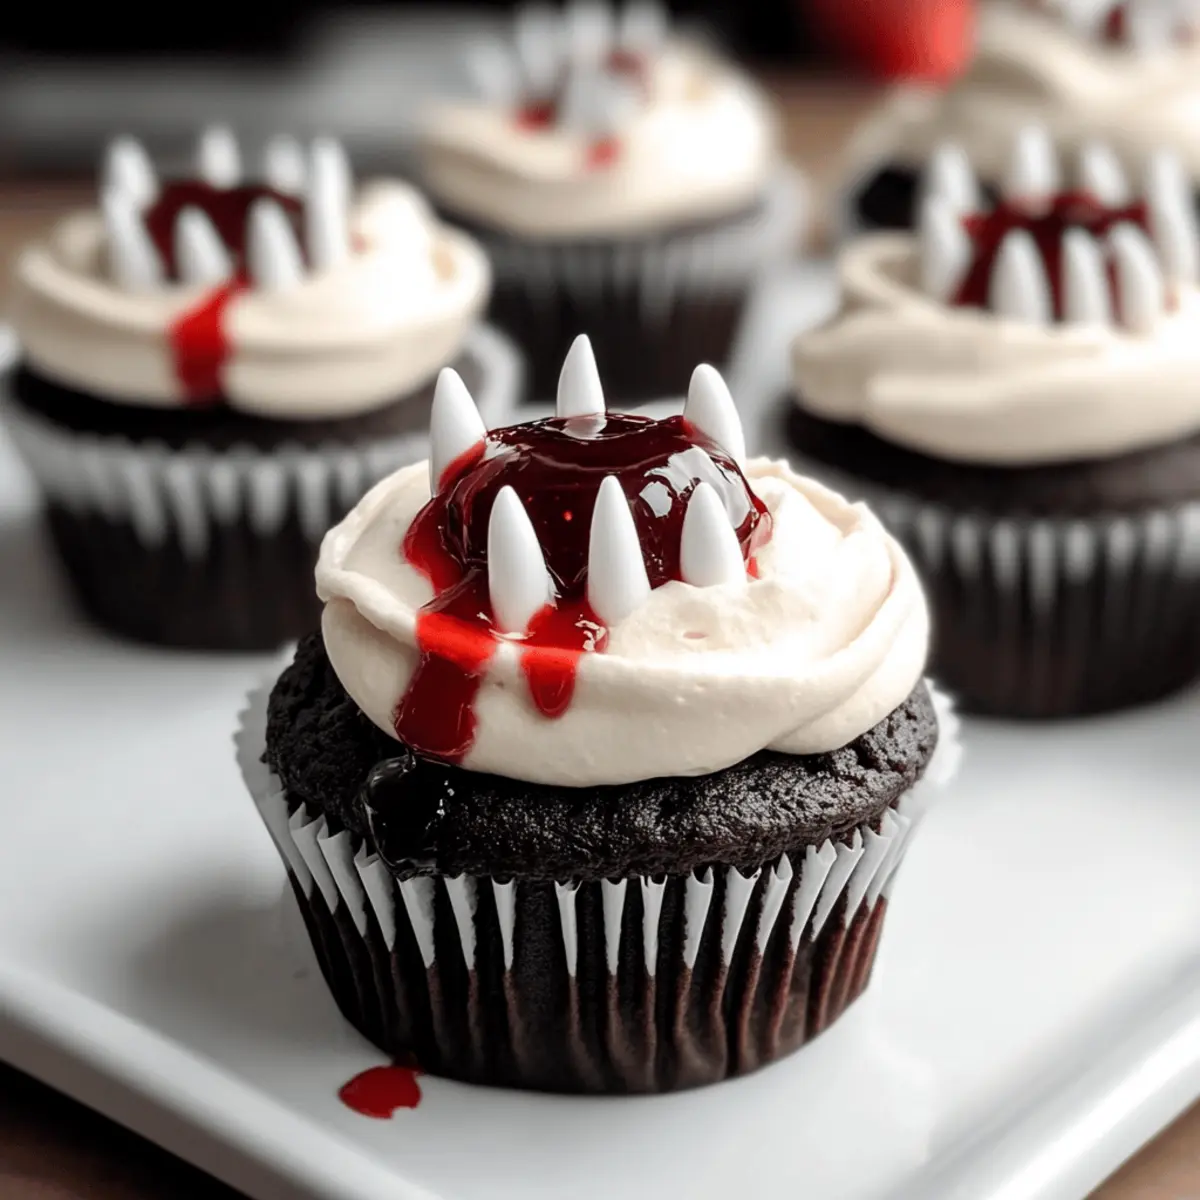
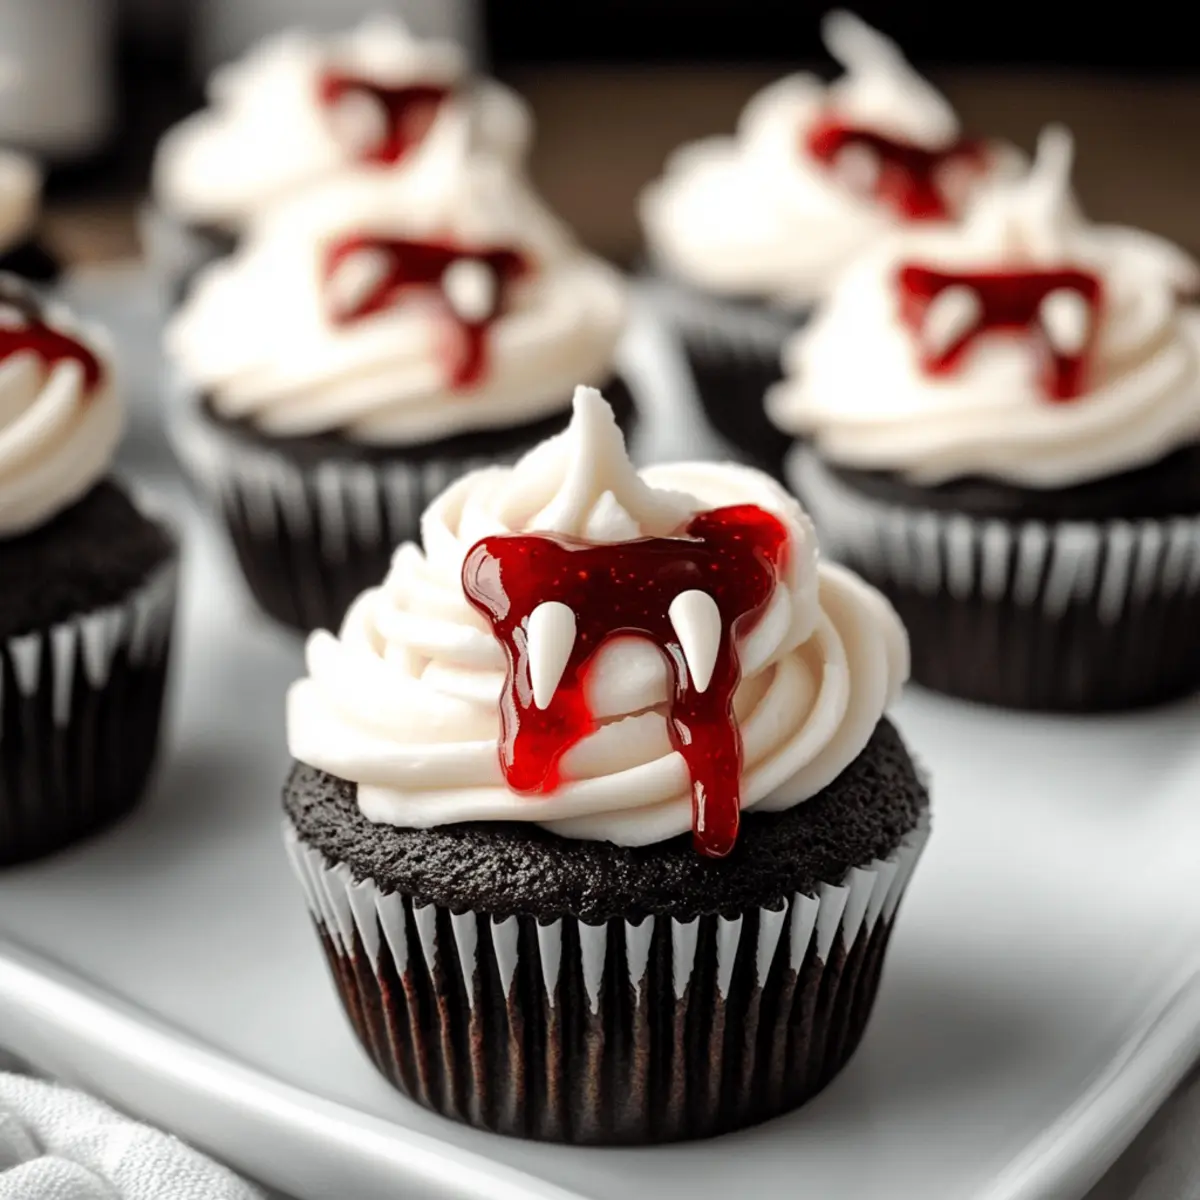
As I flicked through my favorite recipe book, a playful idea struck me: why not give traditional cupcakes a spooky makeover for Halloween? Cue these delightful Halloween Vampire Bite Cupcakes! Imagine sinking your teeth into a dark chocolate cupcake, only to encounter a luscious strawberry jam filling that oozes out like a perfect, sweet surprise. These gluten-free and easily dairy-free treats are not only fun to make but also a guaranteed crowd-pleaser at any fall gathering. With their whimsical fang markings and the thrill of a bit of fright, these cupcakes can elevate your Halloween festivities into something truly memorable. So, are you ready to whip up some spooky celebrations with these delicious bites?

Why are Vampire Bite Cupcakes a must-try?
Spooky Appeal: These cupcakes bring a unique twist to traditional desserts, making them perfect for Halloween celebrations.
Easily Customizable: With options to swap fillings or adjust flavors, you can make them your own!
Healthy Indulgence: Being both gluten-free and easily dairy-free, these treats cater to various dietary needs without compromising taste.
Showstopper Presentation: Their fang-marked buttercream and oozing jam centers create eye-catching treats that will amaze your guests.
Family Fun: Baking these cupcakes can become a festive activity for you and your loved ones, embracing the Halloween spirit together! For other fun ideas, check out Spooky Halloween Shrunken Head Pie or Gulab Jamun Cupcakes for a delightful twist on classic flavors.
Halloween Vampire Bite Cupcake Ingredients
• Here’s what you need to create these spooktacular treats!
For the Cupcakes
- Chocolate Chips – Provides sweetness and richness; opt for dairy-free chips if necessary.
- Unsalted Butter – Adds moisture and flavor; can be replaced with dairy-free butter for a vegan option.
- Milk – Contributes to the batter’s moisture; use almond or any plant-based milk for a dairy-free version.
- Instant Coffee – Enhances chocolate flavor; omit if you prefer a coffee-free cake.
- Vanilla Extract – Adds aroma and flavor; no substitutions needed unless allergenic.
- Egg – Provides structural support and helps the cupcakes rise; try a flax egg for a vegan option.
- Coconut Sugar/Brown Sugar – Sweetener that adds moisture and depth; can be mixed for complexity.
- Gluten-Free All-Purpose Flour – Base of the cupcake; ensure it has xanthan gum for proper texture.
- Cocoa Powder – Imparts rich chocolate flavor; blending dutch-processed with black cocoa enhances taste.
- Baking Soda & Baking Powder – Essential leavening agents for a perfectly risen cupcake.
- Salt – Elevates and balances all flavors.
For the Jam Filling
- Strawberries – Fresh is best for the jam filling; frozen strawberries work in a pinch.
- Cornstarch – Thickens the jam to the desired consistency.
- Red Gel Food Coloring – For a spooky, “bloody” appearance; completely optional.
For the Buttercream
- Icing Sugar – Sweetens and thickens the buttercream; adjust quantity for desired sweetness.
- Salt (in buttercream) – Balances the sweetness beautifully.
- Extra Milk (in buttercream) – Helps achieve the ideal smooth consistency for spreading.
These Halloween Vampire Bite Cupcake ingredients will bring both allure and delight to your spooky festivities!
Step‑by‑Step Instructions for Halloween Vampire Bite Cupcakes
Step 1: Preheat the Oven
Begin by preheating your oven to 350°F (175°C). While the oven warms up, line a cupcake pan with colorful paper liners to add a fun touch to your Halloween Vampire Bite Cupcakes. Set the prepared pan aside as you move on to the next step, ensuring everything is ready for a smooth baking process.
Step 2: Melt the Chocolate Mixture
In a microwave-safe bowl, combine chocolate chips, unsalted butter, and your choice of milk. Heat the mixture in the microwave in 30-second intervals, stirring in between, until thoroughly melted and smooth. This should take about 1 to 2 minutes in total. Once melted, let it cool for a moment before moving to the next step.
Step 3: Mix the Wet Ingredients
To the cooled chocolate mixture, whisk in the instant coffee, vanilla extract, egg, and both coconut and brown sugars. Stir until well combined and smooth. This mixture will form the flavorful base for your Halloween Vampire Bite Cupcakes, showcasing rich chocolate undertones accented by sweet notes.
Step 4: Combine the Dry Ingredients
In a separate bowl, gently sift together the gluten-free all-purpose flour, cocoa powder, baking soda, baking powder, and salt. Once combined, gradually mix the dry ingredients into the wet mixture, stirring until everything is just incorporated. The batter should be smooth and slightly thick, perfect for creating delightful cupcake textures.
Step 5: Bake the Cupcakes
Fill each cupcake liner about halfway with the batter, leaving room for the cupcakes to rise. Carefully place the cupcake pan in the preheated oven, and bake for 15 to 19 minutes. Use a toothpick to test doneness; it should come out clean or with a few moist crumbs attached. Remember, the cupcakes will be soft but will firm up as they cool.
Step 6: Cool the Cupcakes
Once baked, allow the cupcakes to cool in the pan for about 5 minutes. Then, gently transfer them to a wire rack and let them cool completely, which should take around 1 to 2 hours. Properly cooling the cupcakes is essential to ensure the buttercream doesn’t melt during decoration.
Step 7: Prepare the Strawberry Jam
While the cupcakes cool, prepare the strawberry jam filling. In a saucepan, combine strawberries and a little water, cooking over medium heat until the strawberries have melted down, about 5–7 minutes. Stir in cornstarch and simmer until it thickens, about 2–3 more minutes. Optionally, add red gel food coloring for a spooky touch. Chill the jam until ready to use.
Step 8: Make the Buttercream
Using a stand mixer, beat unsalted butter until light and fluffy, about 2–3 minutes. Gradually add icing sugar and a splash of extra milk, mixing on low speed, then increase to medium until the buttercream reaches a smooth, creamy consistency. This will create the perfect topping for your Halloween Vampire Bite Cupcakes, adding both sweetness and visual appeal.
Step 9: Core and Fill the Cupcakes
Once the cupcakes are completely cooled, use a small knife or a cupcake corer to remove the center of each cupcake. Be careful to hollow out enough space to hold the luscious strawberry jam filling. Spoon or pipe the prepared jam into the center of each cupcake, bringing the Halloween Vampire Bite experience to life with an oozy surprise.
Step 10: Decorate With Buttercream
Finally, top each cupcake generously with the whipped buttercream. For a spooky effect, use a straw or the back of a piping tip to make fang marks in the buttercream. Fill these holes with a bit more strawberry jam for the biting effect, completing your Halloween Vampire Bite Cupcakes with both visual flair and delicious flavor.
Make Ahead Options
These Halloween Vampire Bite Cupcakes are perfect for meal prep, allowing you to enjoy their spooky charm without the stress on the big day! You can bake the cupcakes up to 24 hours in advance. Once cooled, simply store them in an airtight container at room temperature to keep them moist. The strawberry jam filling can be made up to 3 days ahead; just refrigerate it in a sealed container to maintain freshness. On the day of serving, prepare the buttercream and frost the cupcakes. To achieve that delightful ooze, core and fill the cupcakes with the jam right before decorating, ensuring they remain just as delicious and exciting!
How to Store and Freeze Halloween Vampire Bite Cupcakes
Room Temperature: Keep cupcakes at room temperature in an airtight container for up to 2 days to maintain their soft texture without drying out.
Fridge: If you have leftover cupcakes, store them in the refrigerator for up to 3 days, but be mindful that the frosting may lose some of its fluffiness.
Freezer: For longer storage, freeze the assembled cupcakes in a single layer on a baking sheet, then transfer to an airtight container for up to 2 months. Thaw overnight in the fridge or at room temperature before enjoying.
Reheating: If desired, warm refrigerated cupcakes in the microwave for about 10 seconds to enjoy a freshly-baked experience, but enjoy the Halloween Vampire Bite Cupcakes with the delicious jam filling soon after baking for the best flavor!
Expert Tips for Halloween Vampire Bite Cupcakes
-
Avoid Overbaking: Check the cupcakes with a toothpick in the last few minutes of baking; you want moist crumbs, not a dry cupcake.
-
Cool Before Decorating: Make sure both cupcakes and jam are completely cooled before frosting to keep the buttercream from melting.
-
Use a Piping Bag: For a clean look and less mess, use a piping bag for both jam filling and buttercream decoration, ensuring consistent results.
-
Choose the Right Flour: Always confirm your gluten-free all-purpose flour has xanthan gum for proper structure; this is crucial for your Halloween Vampire Bite Cupcakes.
-
Add Flavor Variations: Don’t hesitate to explore different jam fillings or flavored extracts to impart your twist on the classic recipe!
What to Serve With Halloween Vampire Bite Cupcakes
Creating the perfect Halloween experience doesn’t end with these spooky delights; pair them with unique treats that enhance their festive charm!
- Creamy Pumpkin Soup: This velvety soup adds warmth and savory flavors, providing a delightful contrast to the sweetness of the cupcakes.
- Spiced Apple Cider: A warm drink to complement the rich chocolate and fruity jam, making every sip feel like a cozy autumn hug.
- Ghostly Cheese Platter: Include soft cheeses and crackers shaped like ghosts for a fun, themed snack that provides a savory balance.
- Candy Corn Trail Mix: A crunchy, sweet-n-salty option that adds delightful texture, bringing out fall flavors while keeping things playful!
- Chocolate-Dipped Pretzels: These add a delightful crunch and a bit of saltiness to counter the sweetness of the cupcakes, creating a varied snacking experience.
- Mini Pumpkin Pies: Bite-sized desserts echo the flavors of fall and create not only an aesthetic but also a delicious backdrop to your cupcake centerpiece.
Make your Halloween gathering unforgettable by incorporating these tasty pairings alongside your Halloween Vampire Bite Cupcakes!
Halloween Vampire Bite Cupcake Variations
Feel free to mix and match these ideas to create your own spooky twist on these delectable cupcakes!
-
Fruit Filling: Substitute strawberries with raspberry, cherry, or even pumpkin puree for different flavor profiles.
-
Flavored Extracts: Experiment with almond or peppermint extracts in the batter for a unique surprise that will delight your taste buds.
-
Chocolate Chips: Swap in white chocolate or butterscotch chips for a sweeter surprise that contrasts beautifully with the dark chocolate.
-
Spice It Up: Add a pinch of cinnamon or pumpkin spice to the cupcake batter for a warm, cozy flavor that evokes fall festivities.
-
Dairy-Free Buttercream: Try using a vegan butter alternative to make the buttercream entirely dairy-free while keeping it creamy and delicious.
-
Vegan Option: Use a flax egg or aquafaba in place of the regular egg, along with plant-based milk and butter for a fully vegan treat.
-
A Little Heat: For those who enjoy a kick, add a dash of cayenne pepper to your jam mixture for a surprising spicy twist.
-
Nutty Texture: Incorporate crushed nuts like walnuts or pecans into the batter for an added crunch that pairs nicely with the soft cupcake.
Feeling inspired? Try these variations, and make sure to also explore other delightful treats like Fried Cheese Bites for your Halloween celebrations!
Halloween Vampire Bite Cupcakes Recipe FAQs
How do I choose the right strawberries for the jam filling?
Absolutely! When selecting strawberries, look for vibrant red berries that are firm to the touch and free from dark spots. Fresh strawberries yield the best flavor, but if they’re out of season, you can certainly use frozen varieties. Just be sure to thaw them completely before cooking.
What’s the best way to store my Halloween Vampire Bite Cupcakes?
For optimal freshness, store your cupcakes in an airtight container at room temperature for up to 2 days. If they need to last longer, refrigerate them for up to 3 days. Remember, refrigeration may slightly affect the buttercream’s fluffiness, so try to enjoy them as soon as possible!
Can I freeze these cupcakes?
Absolutely! If you’d like to extend their shelf life, freeze your assembled Halloween Vampire Bite Cupcakes in a single layer on a baking sheet first. Once frozen, transfer them to an airtight container or freezer bag for up to 2 months. When you’re ready to indulge, simply thaw them overnight in the fridge or let them sit at room temperature for a few hours!
What if my cupcakes are too dry after baking?
Very common! Ensure you’re not overbaking your cupcakes. Start checking for doneness around the 15-minute mark by inserting a toothpick; it should come out with a few moist crumbs, not completely clean. If they do come out dry, a simple syrup could be brushed on the cooled cupcakes to add moisture back in — equal parts sugar and water heated until dissolved, then cooled!
How can I make these cupcakes vegan?
The more the merrier! To make these Halloween Vampire Bite Cupcakes vegan, simply substitute the egg with a flax egg (1 tablespoon of ground flaxseed mixed with 2.5 tablespoons of water, let sit until gel-like), and use a dairy-free butter and plant-based milk. Ensure your chocolate chips and buttercream are vegan-friendly to keep everything compliant.
Halloween Vampire Bite Cupcakes That Ooze Spooky Deliciousness
Ingredients
Equipment
Method
- Preheat your oven to 350°F (175°C) and line a cupcake pan with colorful paper liners.
- Melt chocolate chips, unsalted butter, and milk in the microwave in 30-second intervals until smooth. Allow to cool.
- Whisk in instant coffee, vanilla extract, egg, and sugars into the cooled chocolate mixture until combined.
- Sift together gluten-free flour, cocoa powder, baking soda, baking powder, and salt. Gradually mix into wet mixture.
- Fill each cupcake liner halfway with the batter and bake for 15 to 19 minutes. Test doneness with a toothpick.
- Cool cupcakes in the pan for 5 minutes, then transfer to a wire rack to cool completely (about 1 to 2 hours).
- Prepare the strawberry jam by cooking strawberries with water for 5–7 minutes, then add cornstarch to thicken.
- Beat unsalted butter until fluffy, then gradually mix in icing sugar and milk until smooth.
- Core each cooled cupcake and fill with the prepared strawberry jam.
- Decorate each cupcake with buttercream, creating fang marks and filling with more jam for effect.
Leave a Reply