
As the leaves begin to change and that familiar crispness fills the air, I can’t help but feel a surge of excitement for Halloween festivities. This year, I’ve crafted the ultimate treat for my family: Mini Halloween Pizzas! These delightful bites are not only quick to whip up, but they also offer endless customization options to delight even the pickiest little eaters. Perfect for a fun family activity, everyone gets to channel their creativity while personalizing their spooky masterpieces. Imagine crispy crusts, gooey cheese, and vibrant toppings transforming into a fantastical Halloween feast! Ready to dive into a world of whimsical flavors and crafty decorations? Let’s get baking!
Why Are Mini Halloween Pizzas So Special?
Endless Customization: With endless topping options, each family member can create a pizza that reflects their tastes and imaginations.
Quick & Easy: These mini pizzas come together in no time, making them an ideal choice for busy weeknights or spontaneous Halloween parties.
Fun Family Activity: Get everyone involved in the kitchen! It’s a great way to bond while unleashing your creativity as you decorate your own spooky creations.
Eye-Catching Presentation: With a mix of colors and fun shapes, these pizzas are sure to impress your guests and encourage kids to try new veggies!
Crowd-Pleaser: Perfect for parties, these mini pizzas will have everyone coming back for more, making your Halloween gatherings a real hit! Don’t forget to check out our Spooky Halloween Shrunken for more festive fun.
Mini Halloween Pizzas Ingredients
For the Crusts
• Mini Pizza Crusts – Essential for crafting the base of these fun creations; you can use store-bought or homemade for extra freshness.
• Olive Oil Spray – A quick way to grease the baking sheet and prevent any sticky situations!
For the Sauce
• Pizza Sauce (3/4 cup) – Adds moisture and flavor; marinara can also be a delicious substitute for a twist!
For the Cheese
• Mozzarella Cheese (1 cup, shredded) – This gooey cheese is essential for that irresistible melted texture in your mini Halloween pizzas.
• Part-Skim String Cheese (4 sticks) – Perfect for pulling apart and creating spooky mummy designs that will delight your little chefs!
For the Toppings
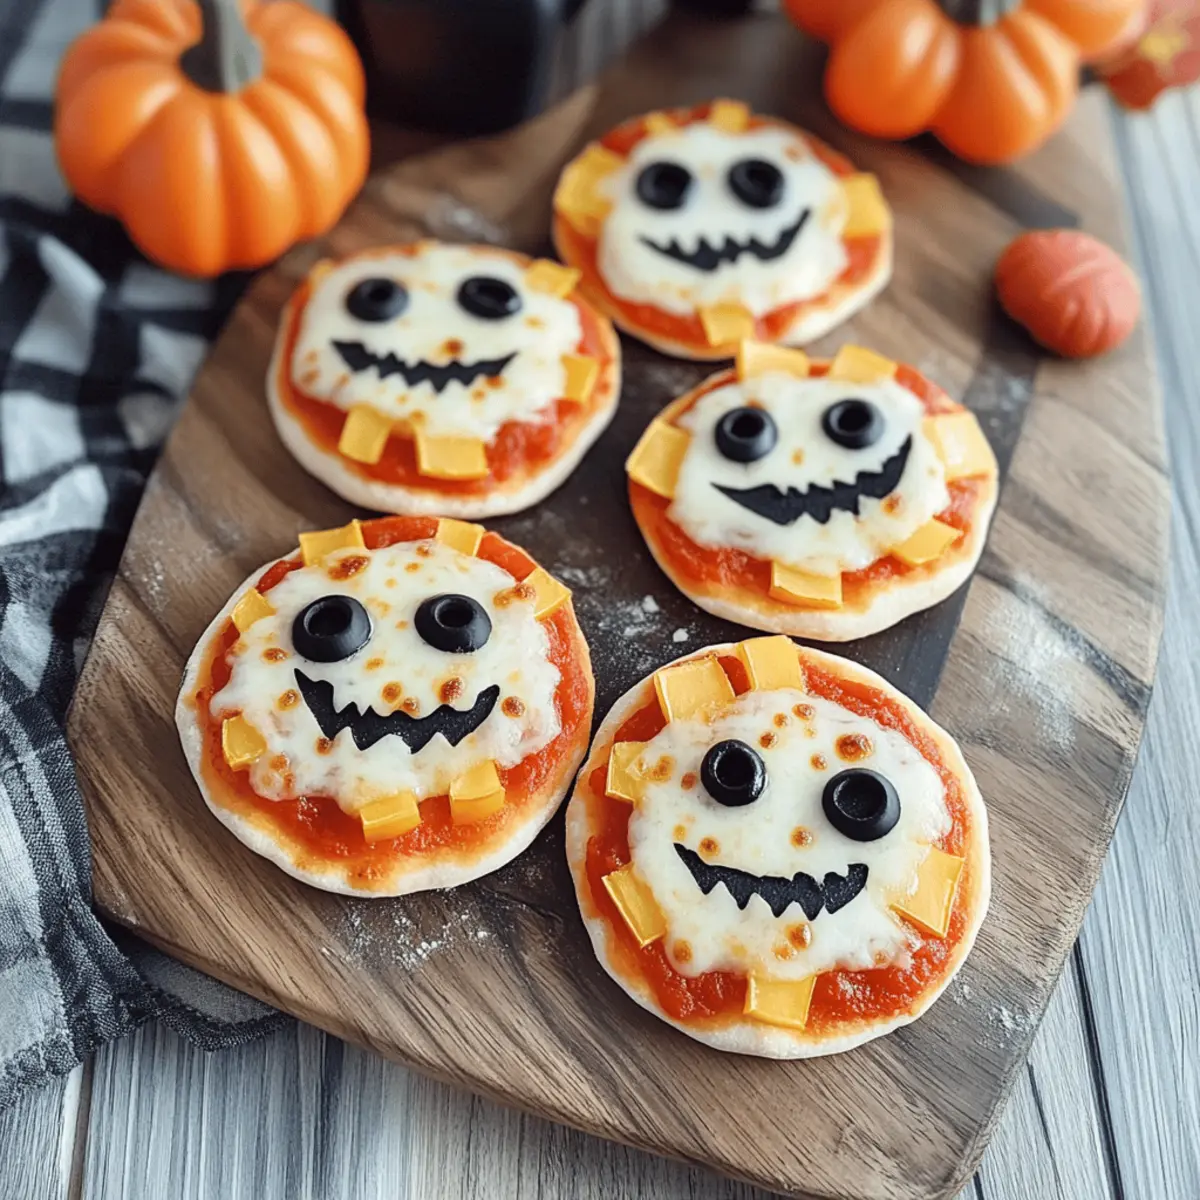
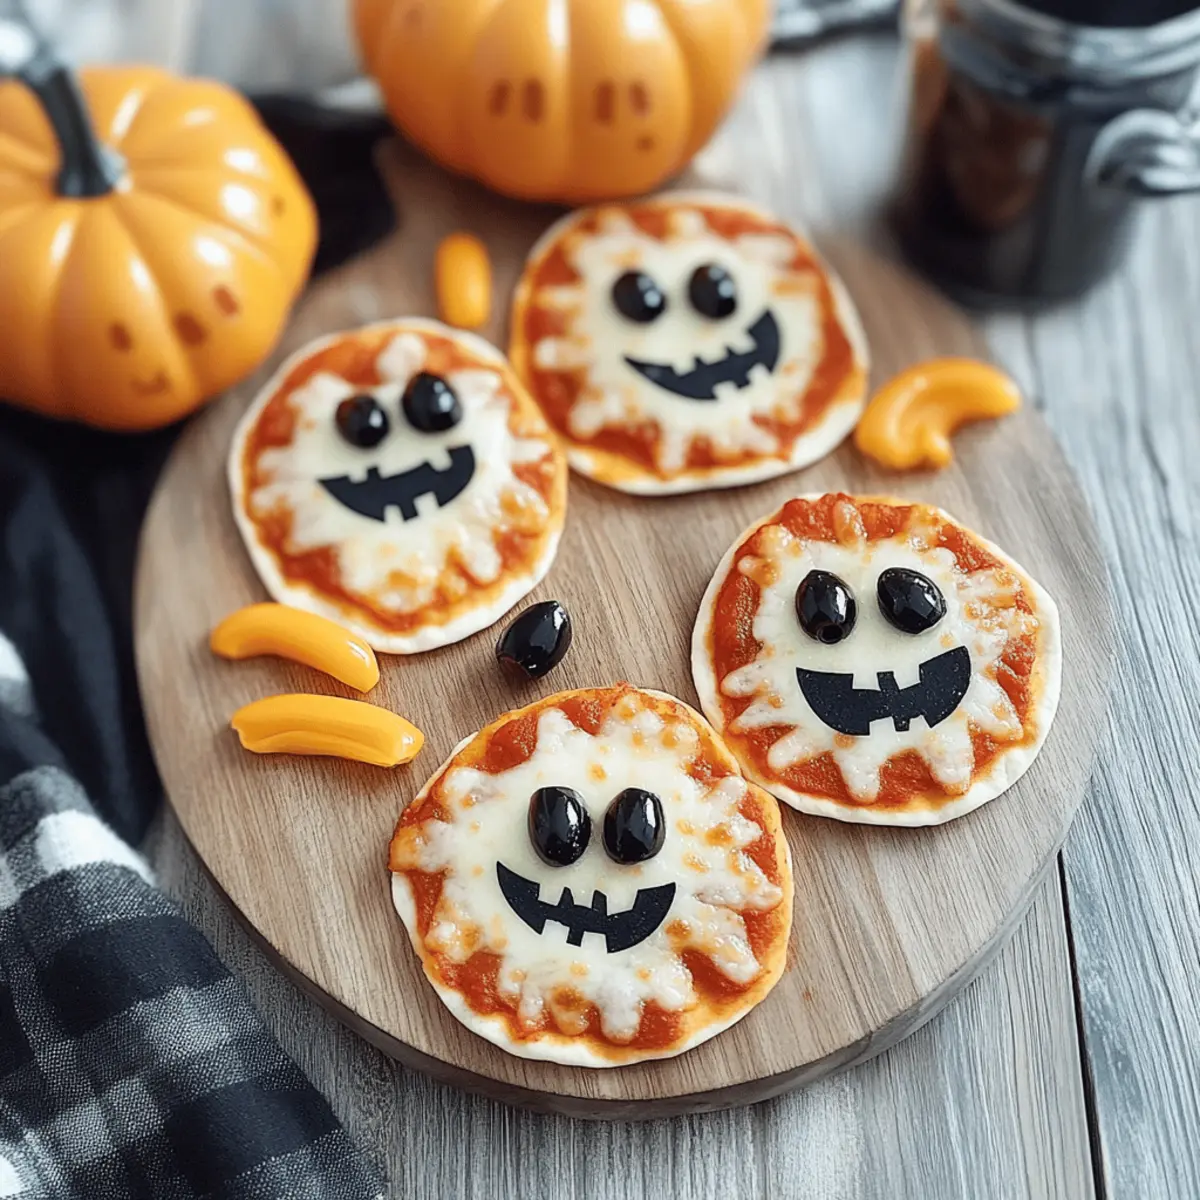
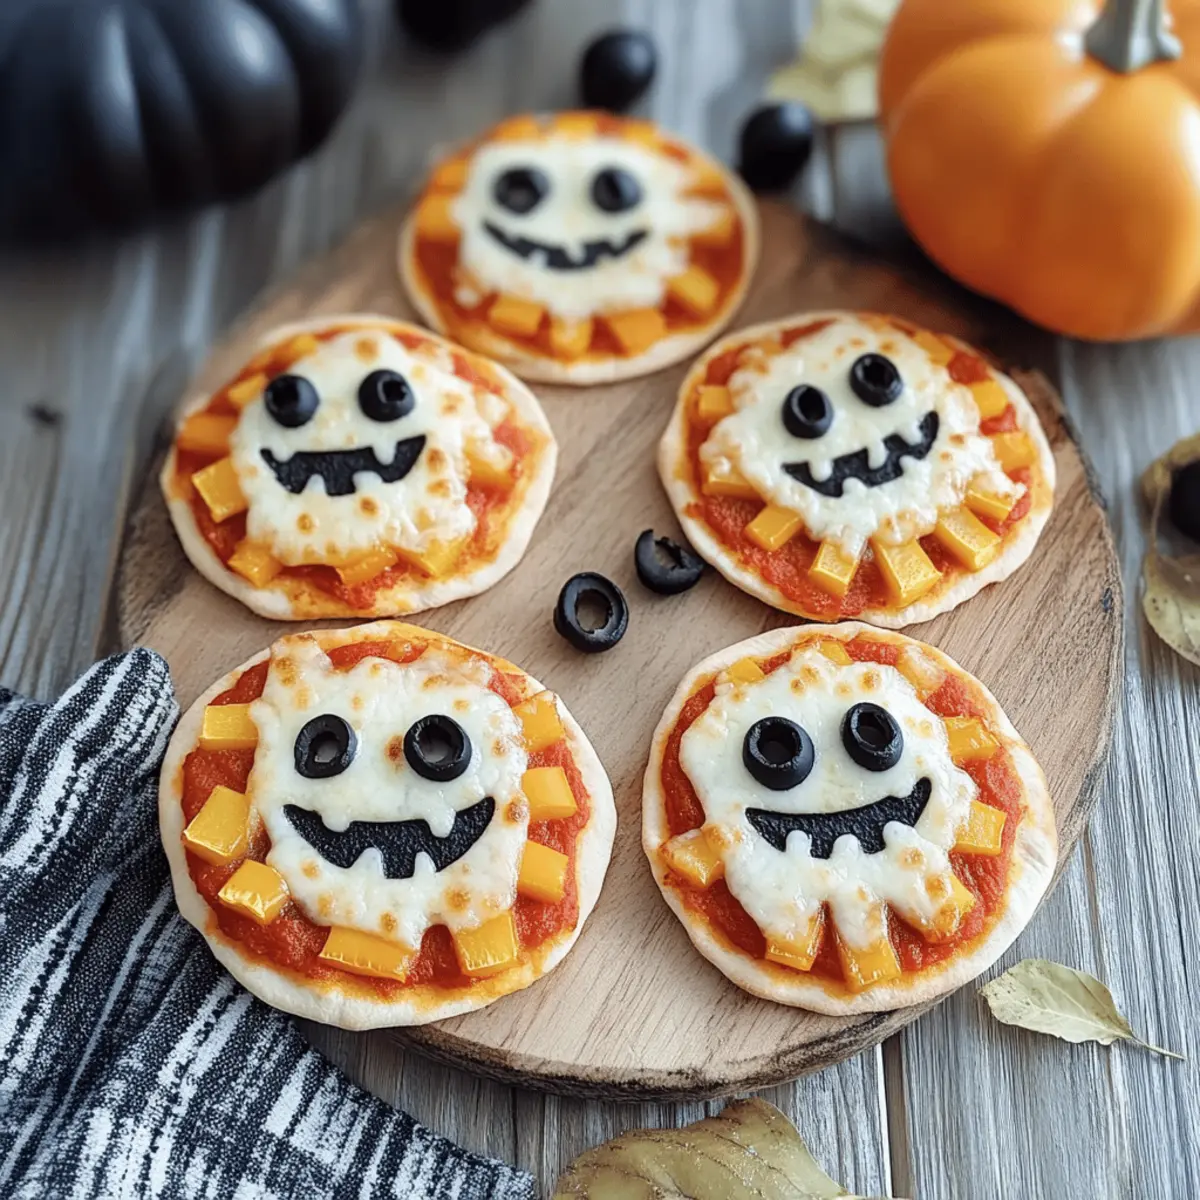
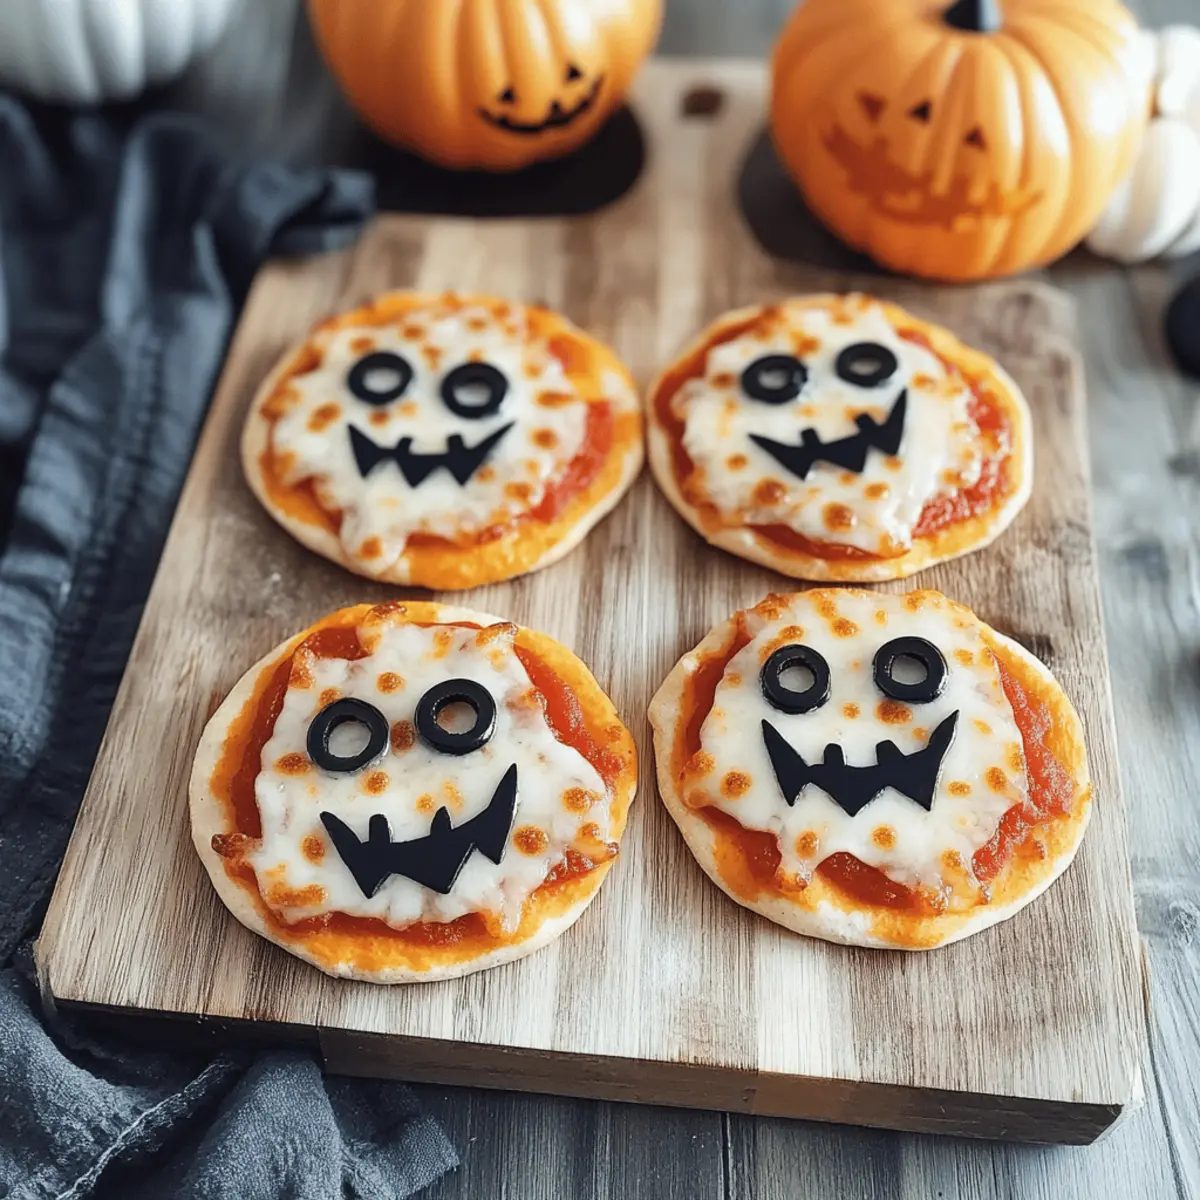
• Black Olives (1/4 cup, sliced) – Use these for a fun or creepy decoration, like spider bodies on your mini pizzas.
• Mini Pepperoni (1/4 cup, optional) – Adds a punch of flavor and fun decoration; feel free to skip for a veggie-only version!
• Orange & Green Bell Peppers (1 cup, thin strips) – Their vibrant colors add crunch and excitement to your spooky creations!
• Fresh Basil (2 tbsp, chiffonade) – Sprinkle on top for an added burst of freshness and beautiful aroma once baked.
These mini Halloween pizzas are not just delicious; they’re a thrilling canvas for creativity during your family feast nights!
Step‑by‑Step Instructions for Mini Halloween Pizzas
Step 1: Preheat the Oven
Begin by preheating your oven to 425°F (220°C). While the oven heats, prepare your baking sheet by lightly misting it with olive oil spray to ensure that your mini Halloween pizzas don’t stick. This quick step sets the stage for baking those delightful, crispy crusts!
Step 2: Prepare the Crusts
Take your mini pizza crusts and place them on the greased baking sheet. Using a spoon, spread 1-2 tablespoons of pizza sauce on each crust, carefully leaving a small border around the edges. This saucy layer adds flavor and moisture, ensuring that each bite of your mini Halloween pizzas is packed with deliciousness.
Step 3: Add the Cheese
Sprinkle shredded mozzarella cheese generously on top of half of the mini pizzas, ensuring an even layer for that gooey melt. For the other half, break apart the string cheese to create spooky mummy designs. This adds a fun twist to your Halloween feast, inviting creativity in the kitchen!
Step 4: Decorate the Pizzas
Now it’s time to get creative! Use black olives to form spider bodies, and layer on thin strips of orange and green bell peppers for an extra pop of color. If desired, add mini pepperoni for additional flavor or decoration. Watch as your mini Halloween pizzas transform into spooky and playful treats!
Step 5: Bake the Pizzas
Carefully slide your baking sheet into the preheated oven and bake for 10-12 minutes. Keep an eye on them, looking for a golden-brown crust and bubbling cheese to indicate doneness. Remember to rotate the pan halfway through baking to ensure even cooking and to achieve that perfect crispy texture.
Step 6: Cool & Serve
Once done, remove the mini Halloween pizzas from the oven and let them cool for about 2 minutes. To add a final touch, sprinkle fresh basil on top for both flavor and visual appeal. Serve immediately, and enjoy these fun, spooky creations with your family during your Halloween celebration!
Tips for the Best Mini Halloween Pizzas
-
Prep Ahead: Prepare toppings and sauce in advance to streamline your cooking process and create a fun assembly line with your family.
-
Avoid Soggy Crusts: Don’t overload your mini Halloween pizzas with too much sauce; a thin layer will keep the crust crispy.
-
Creative Layouts: Encourage kids to arrange toppings creatively! This makes decorating more fun and can lead to surprisingly spooky results.
-
Watch the Bake Time: Keep a close eye on your pizzas as they bake to prevent burning; ovens can vary, so check them a couple of minutes early.
-
Storage Savvy: Leftovers can be stored in an airtight container for up to 3 days, making for a quick meal or snack later on. Enjoy more of those tasty mini Halloween pizzas!
Mini Halloween Pizzas: Endless Twists Await!
Feel free to let your imagination run wild with these mini Halloween pizzas, creating a spook-tacular feast unique to your family’s taste!
- Healthier Toppings: Replace pepperoni with sliced avocado or spinach for a wholesome twist without sacrificing flavor. Kids may surprise you by loving the new additions!
- Cheese Choices: Try using goat cheese or a dairy-free alternative for those with dietary restrictions. Each cheese lends a unique flavor profile that can take your mini pizzas up a notch!
- Crust Alternatives: For a gluten-free option, use pre-made zucchini or cauliflower crusts, which provide a delightful change in texture while keeping things healthy.
- Spicy Kick: Add a sprinkle of red pepper flakes or sliced jalapeños to bring the heat to your Halloween delight. Just a little goes a long way for those who enjoy a spicy thrill.
- Sweet Twist: Try topping with a drizzle of honey or a sprinkle of cinnamon on a few of your pizzas for a sweet and savory combination. These oddballs can delight adventurous taste buds!
- Decorative Fun: Encourage kids to create fun shapes using cookie cutters on the vegetables before adding them to the pizzas. This simple step makes decorating even more exciting!
- Sauce Variations: Use pesto or barbecue sauce instead of traditional pizza sauce for a flavor explosion that’s completely unique. It’s a fun way to surprise your family and try something new!
- Mini Halloween Platter: Pair these mini pizzas with spider-shaped veggies or a ghoulish dip, like a spooky guacamole. Make your spread a feast that complements your delicious pizzas.
Don’t forget to check out our Spooky Halloween Shrunken for even more festive ideas! The Halloween fun doesn’t stop here—get creative and enjoy every bite of your family feast!
How to Store and Freeze Mini Halloween Pizzas
Fridge: Leftover mini Halloween pizzas can be stored in an airtight container for up to 3 days. Make sure they are completely cooled before sealing to preserve freshness.
Freezer: For longer storage, freeze fully assembled mini Halloween pizzas in a single layer, placing parchment paper between layers. They can last up to 2 months in the freezer.
Reheating: To reheat, bake from frozen at 425°F (220°C) for about 12-15 minutes or until heated through. If thawed, heat in the oven for 8-10 minutes until hot and crispy.
Make-Ahead Tip: Prepare the crusts and toppings up to 24 hours in advance. This allows for a quick assembly and bake when you’re ready to enjoy your spooky creations!
Make Ahead Options
These Mini Halloween Pizzas are ideal for busy cooks looking to streamline meal prep! You can prepare the mini pizza crusts and toppings up to 24 hours in advance. Simply pre-slice your bell peppers and olives, and store them in airtight containers in the refrigerator to maintain freshness. You can also spread sauce on the crusts and cheese can be shredded and kept separate. When you’re ready to serve, simply assemble the pizzas with your prepped ingredients, decorate them, and bake at 425°F (220°C) for 10-12 minutes. This way, you’ll enjoy the same cheesy, delicious flavors while saving precious time on festive nights!
What to Serve with Halloween Mini Pizzas?
Create the ultimate Halloween feast with delightful pairings that excite the palate and inspire spooky fun!
- Crispy Veggie Platter: Crunchy vegetables like carrots, cucumbers, and bell peppers add a refreshing touch, perfect for balancing the cheesy pizzas.
- Warm Apple Cider: Sipping on sweet, spiced apple cider warms the soul and complements the festive theme of your meal.
- Pumpkin Spice Cookies: Sweet treats infused with pumpkin spice provide a cozy dessert option that echoes the season’s flavors beautifully.
- Spooky Fruit Skewers: Assemble skewers using colorful fruits like grapes, strawberries, and melons for a fun, healthy addition that little ones will love.
- Green Salad with Dressing: Crisp greens topped with a zesty dressing bring a fresh element to the meal, brightening up the table.
- Chocolate Dipped Marshmallows: Treat the family to gooey marshmallows dipped in chocolate and Halloween sprinkles—a festive dessert that’s utterly irresistible!
- Hot Chocolate Bar: Set up a hot chocolate station with toppings like whipped cream, marshmallows, and candy corn to indulge the festive spirit.
- Cheesy Garlic Breadsticks: Soft, garlicky breadsticks are a fantastic side, offering a contrasting texture that’s perfect for dipping into the pizza sauce.
- Caramel Corn: Add a hint of sweetness with caramel corn, creating a delightful munching snack to enjoy alongside the savory pizzas.
- Halloween Punch: A fruity punch with floating eyeball-inspired gummy candies makes for an eye-catching drink that’s sure to thrill everyone at your table!
Mini Halloween Pizzas Recipe FAQs
What type of mini pizza crusts can I use?
You can use either store-bought or homemade mini pizza crusts for these mini Halloween pizzas. If you prefer a fresher taste, I highly recommend making your own crusts ahead of time. It’s a fun way to personalize your pizzas!
How should I store leftover mini Halloween pizzas?
Leftover mini Halloween pizzas should be stored in an airtight container in the fridge for up to 3 days. Be sure they’ve completely cooled down before sealing, as this will help preserve their freshness and prevent sogginess.
Can I freeze mini Halloween pizzas?
Absolutely! To freeze, fully assemble the mini Halloween pizzas and place them in a single layer on a baking sheet with parchment paper in between each layer to avoid sticking. They can last up to 2 months in the freezer. When you’re ready to bake, just pop them into the oven from frozen at 425°F (220°C) for about 12-15 minutes or until heated through.
How can I ensure my mini Halloween pizzas don’t turn out soggy?
To keep your mini Halloween pizzas crispy, apply only a thin layer of pizza sauce. Too much sauce can make the crust soggy. Also, avoid overloading with toppings, as the moisture can accumulate during baking.
What are some fun toppings I can use for customization?
The fun of mini Halloween pizzas comes from their endless customization! Besides the classic options like pepperoni or green and orange bell peppers, consider using spinach, mushrooms, or even pineapples for a twist. Kids can get creative with their designs, adding anything from different cheeses to edible googly eyes for an extra spooky touch!
Mini Halloween Pizzas: Spooky Fun for Family Feast Nights
Ingredients
Equipment
Method
- Preheat your oven to 425°F (220°C) and prepare a baking sheet with olive oil spray.
- Place mini pizza crusts on the baking sheet and spread 1-2 tablespoons of pizza sauce on each, leaving a small border.
- Sprinkle shredded mozzarella cheese on half of the pizzas and use string cheese to create mummy designs on the other half.
- Decorate with black olives, bell pepper strips, and mini pepperoni if desired.
- Bake in the oven for 10-12 minutes until the crust is golden brown and the cheese is bubbling.
- Let cool for 2 minutes and garnish with fresh basil before serving.
Leave a Reply